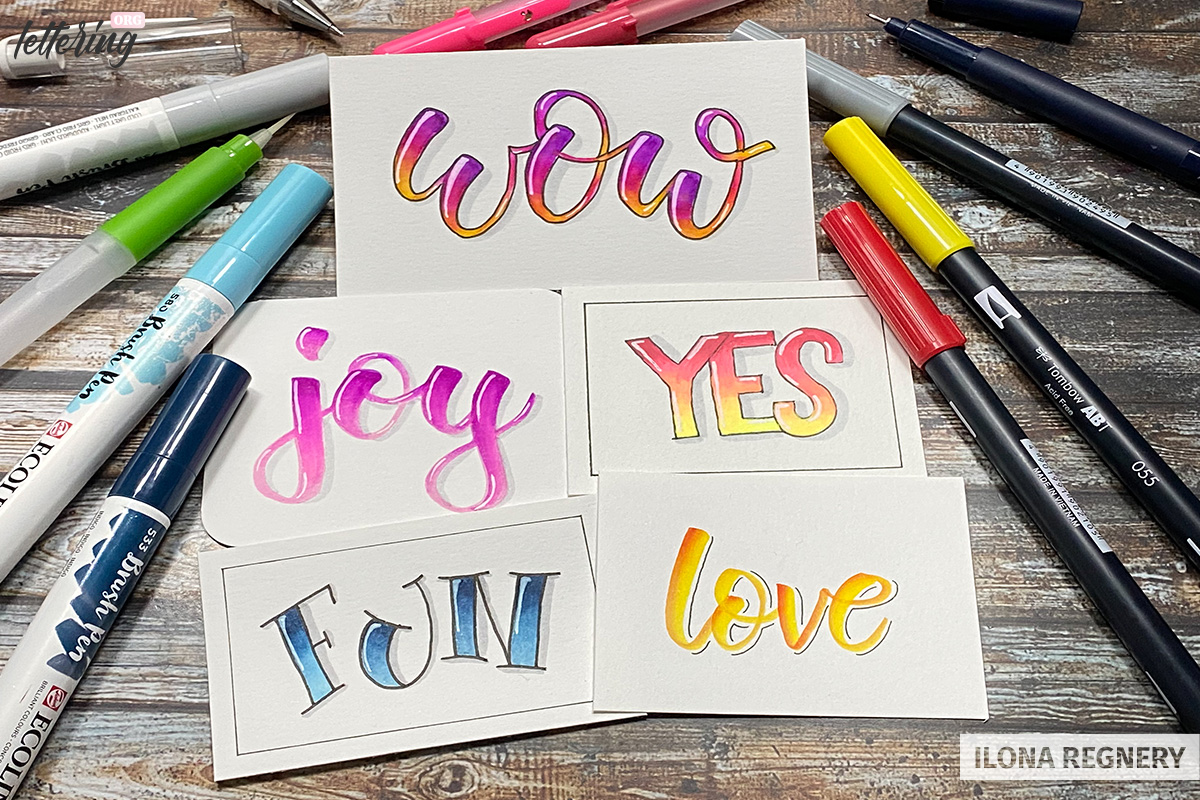
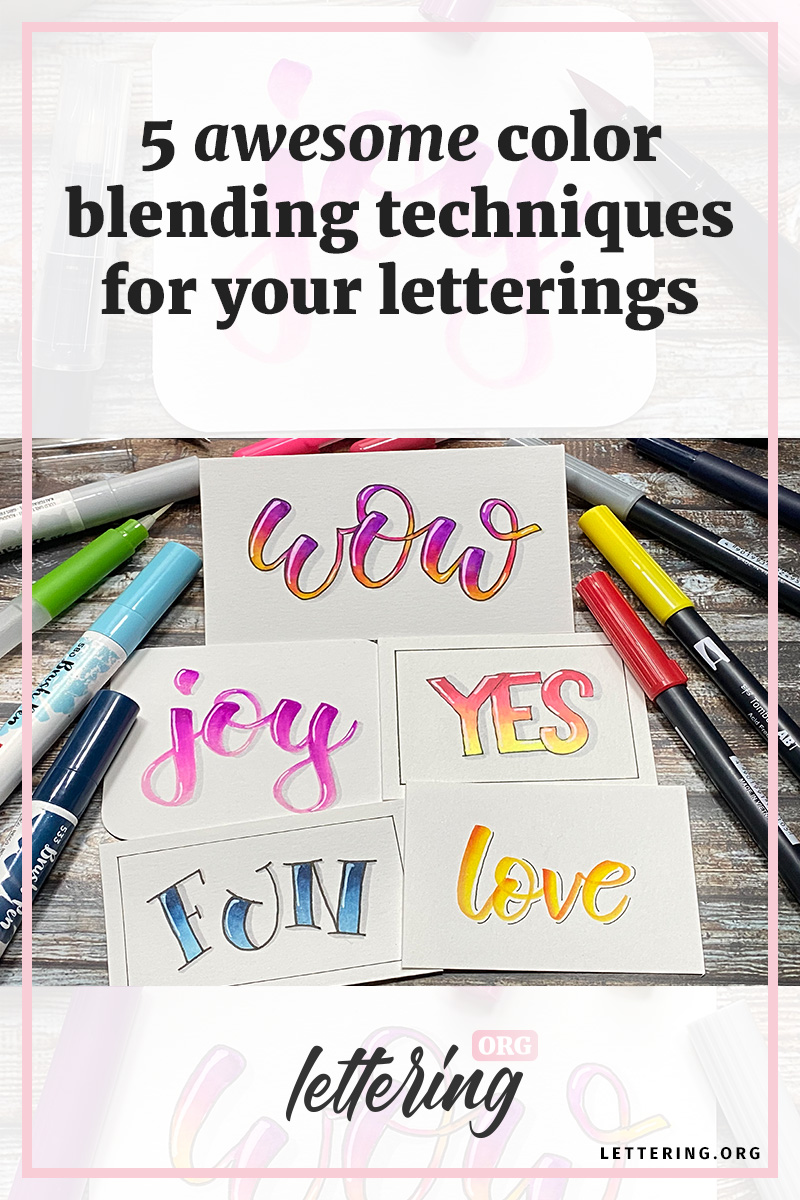
Colored lettering pieces are always fascinating! Especially those with nice gradients. It often looks more difficult than it really is, promised.
I’m happy to lead you through 5 different techniques. My pics and tips will help you doing blends like a pro in no time and with every blending you will get better.
Are you ready to find out your favourite blending technique?
Contents
What you basically need
- Mix-media paper or a smooth watercolor paper for the first three techniques
- Water color paper for the gel pen blending – the ink stays better on a rougher surface, especially by using glitter gel pen
- Smooth brush pen friendly paper for the infusing technique
- Brush pens: a light and dark pen of a color family e.g. light and dark blue, light pink and berry; color triple combos of your choice e.g. yellow, pink and red
- Gel pens in different colors and a white gel pen for highlights
- Watercolour brush or water tank brush fine
- Paper towel
- Fine liner black
- Pencil & eraser for sketching your lettering
Blending with the lightest colour
This technique works well with a lot of different brands. It’s important to use the very lightest and a dark pen of one colour family. In this example I’ve used a dark blue and a light blue pen for doing the gradient.
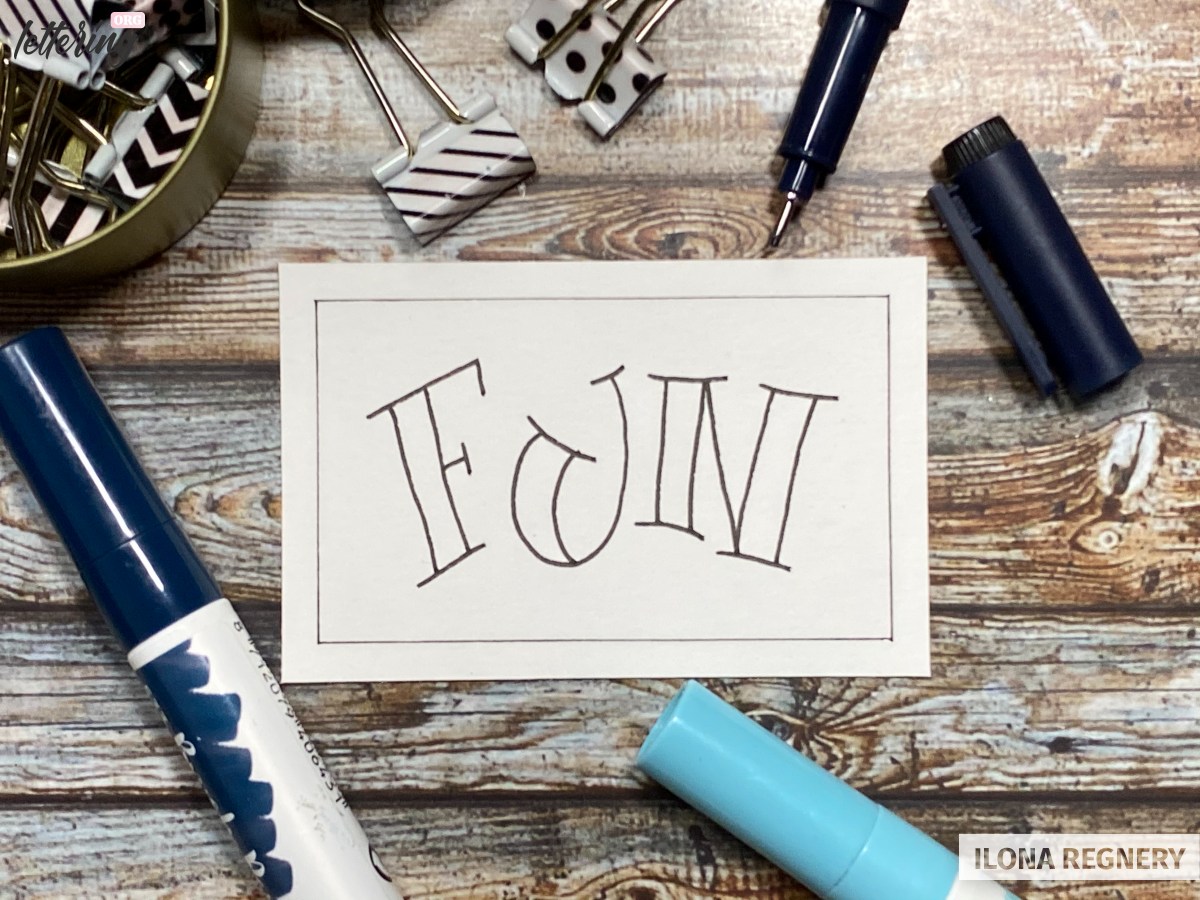
Prepare your lettering
This blending technique will get the best results by working with letters which have empty areas, as faux calligraphy or block letters. If needed sketch the word with a pencil first and follow the lines with a black fine liner. Wait until the ink is completely dried and erase all visible pencil lines.
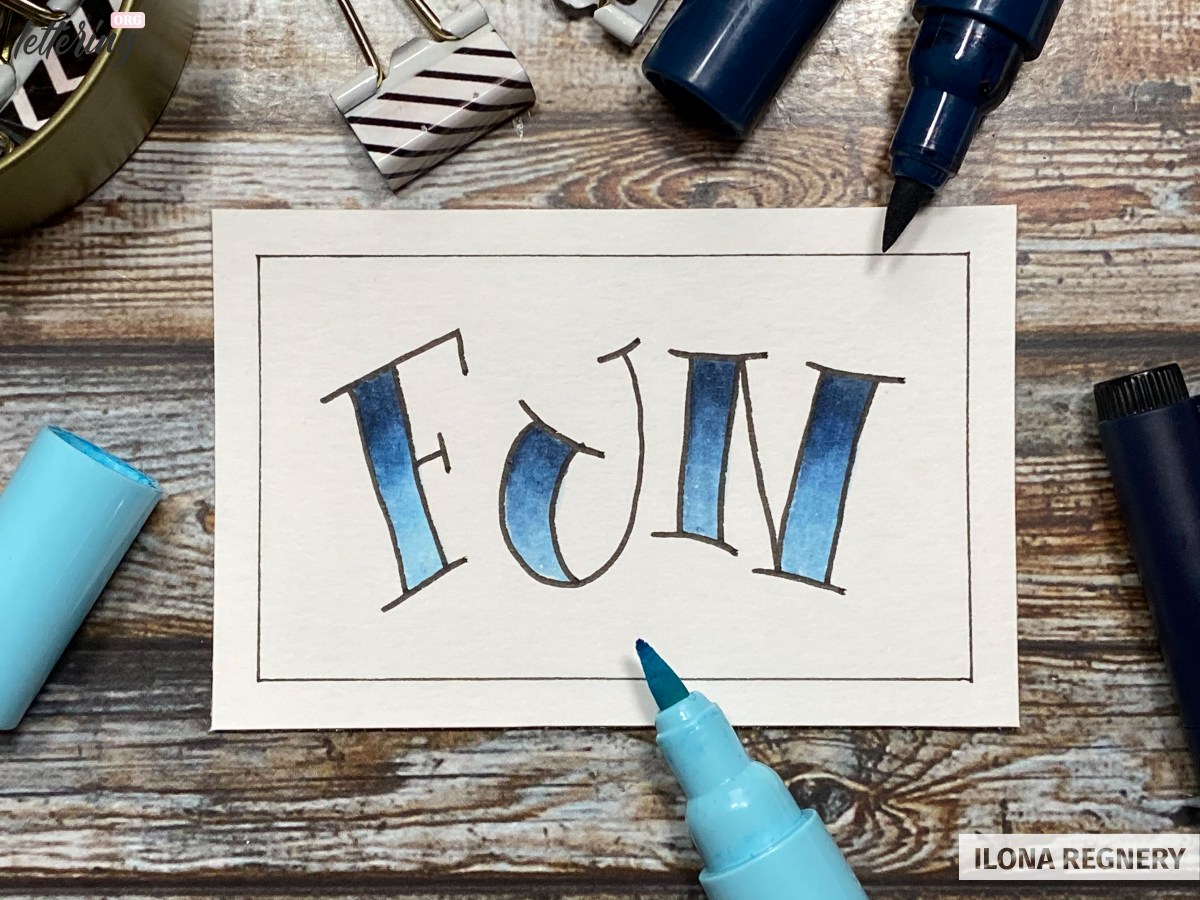
Partially add the first colour
Use the dark color brush pen, for example a dark blue, and fill out the first third of the first letter.
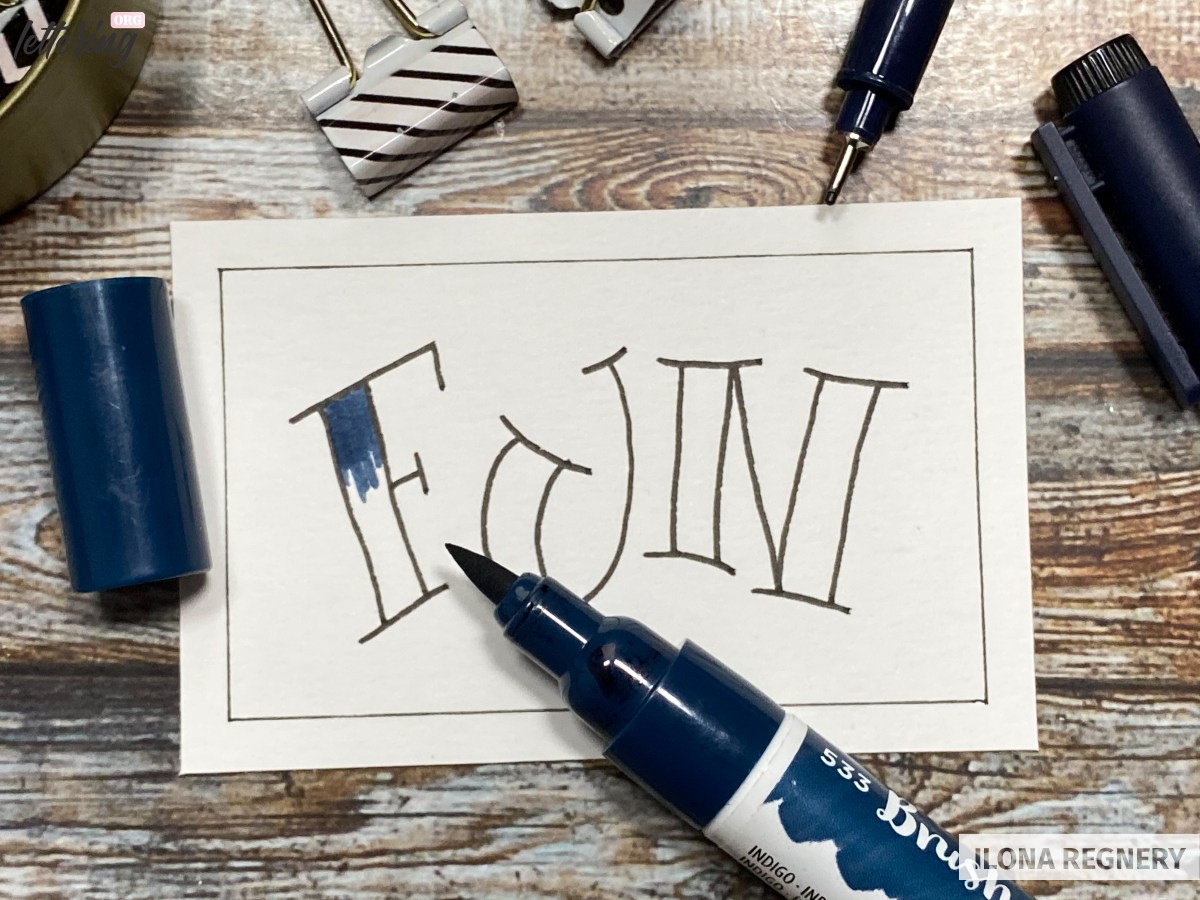
This technique works best if the dark color is still a bit wet. Try to resist the temptation to fill out all letters at once.
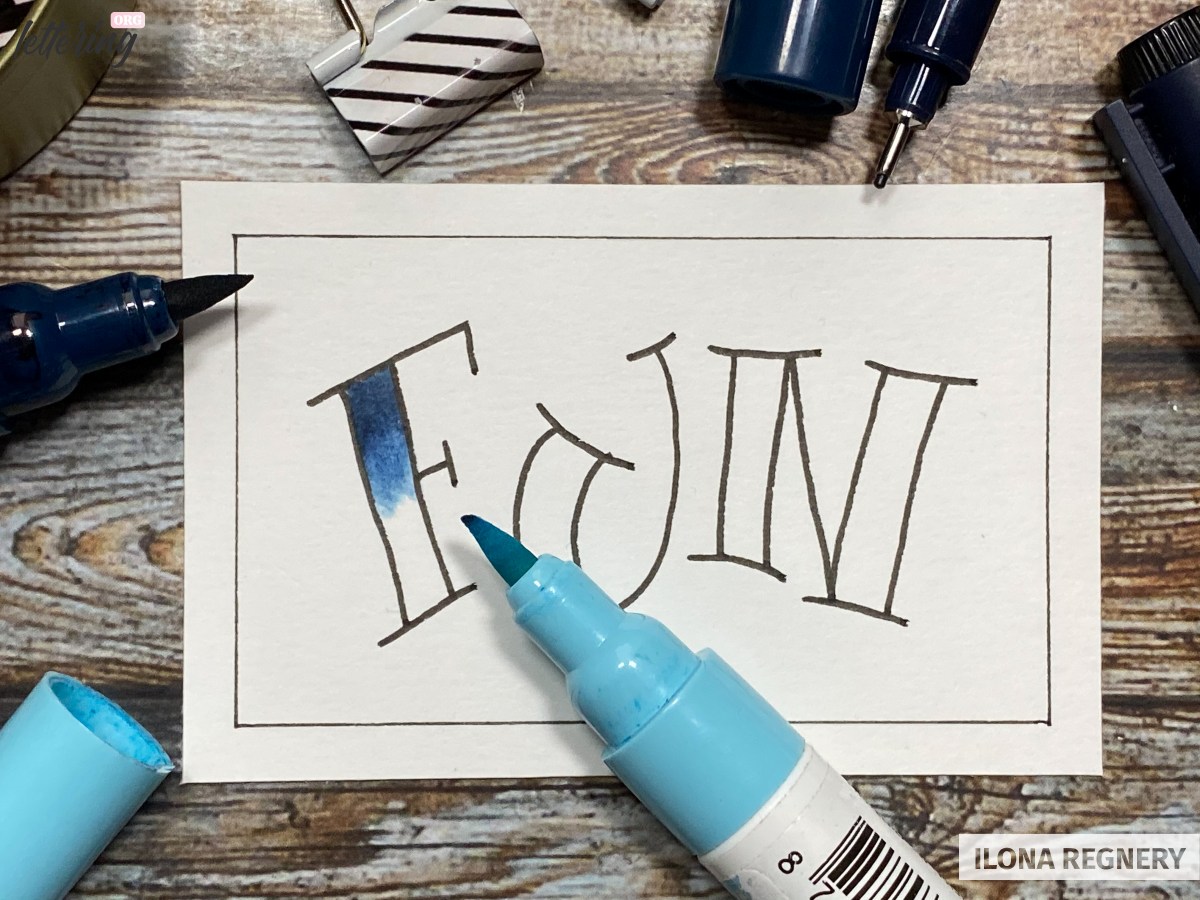
Blending with the light color pen
Take the light brush pen (light blue) and go slightly with short strokes over the second half of the dark area up to the middle of the letter. The darker color will infuse a bit into the nib of the pen. This way the colours start to mix together, and you will see the darker colour is fading out.
Clean the nib of the pen a bit on the paper towel. Then continue the blending process again with short strokes. Now the mixed colour infuses a bit into your pen, and you will fade out the mix until you will finally end up with the original colour of the light colour pen.
Clean the nib in between. Finally use the cleaned brush pen and go slightly over the whole colored part with long strokes, clean the nib after every single stroke.
Using the brush pen only in one direction give you full control over the blending process and help avoiding the paper get thinner or damaged!
Repeat these two steps until all letters are filled with blends.
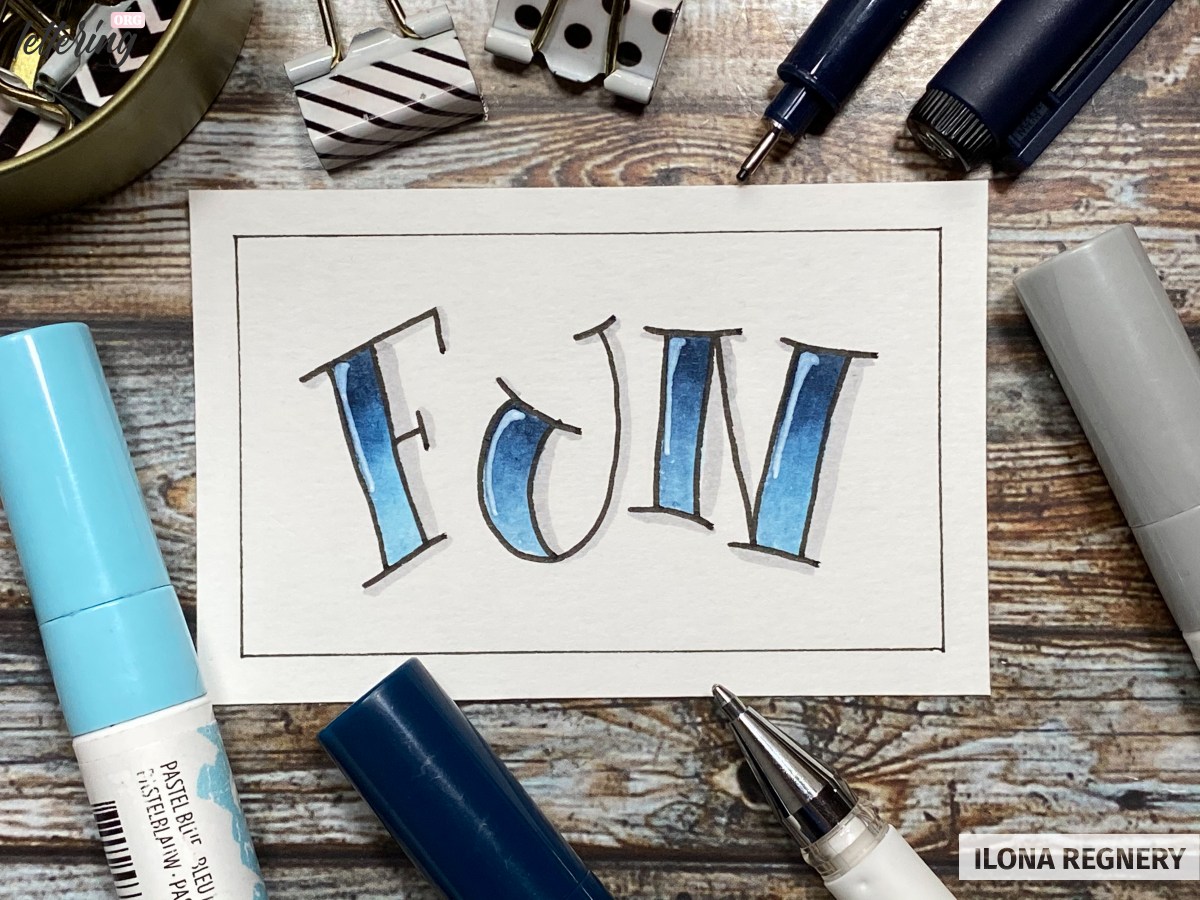
Finish & decorate
Add shadows with a grey brush pen to your lettering for more depth and some white gel pen highlights for a glossy look.
Using a blender pen
Blender pens are great for blending or lighten up colors. Many brands offer their own blender pens, some not.
Commonly they are filled with a mix of water, glycerine and alcohol. Often you can use one brand with brush pens of another brand, as long the ink is water based. Try first on a separate paper, to see if it’s working well.
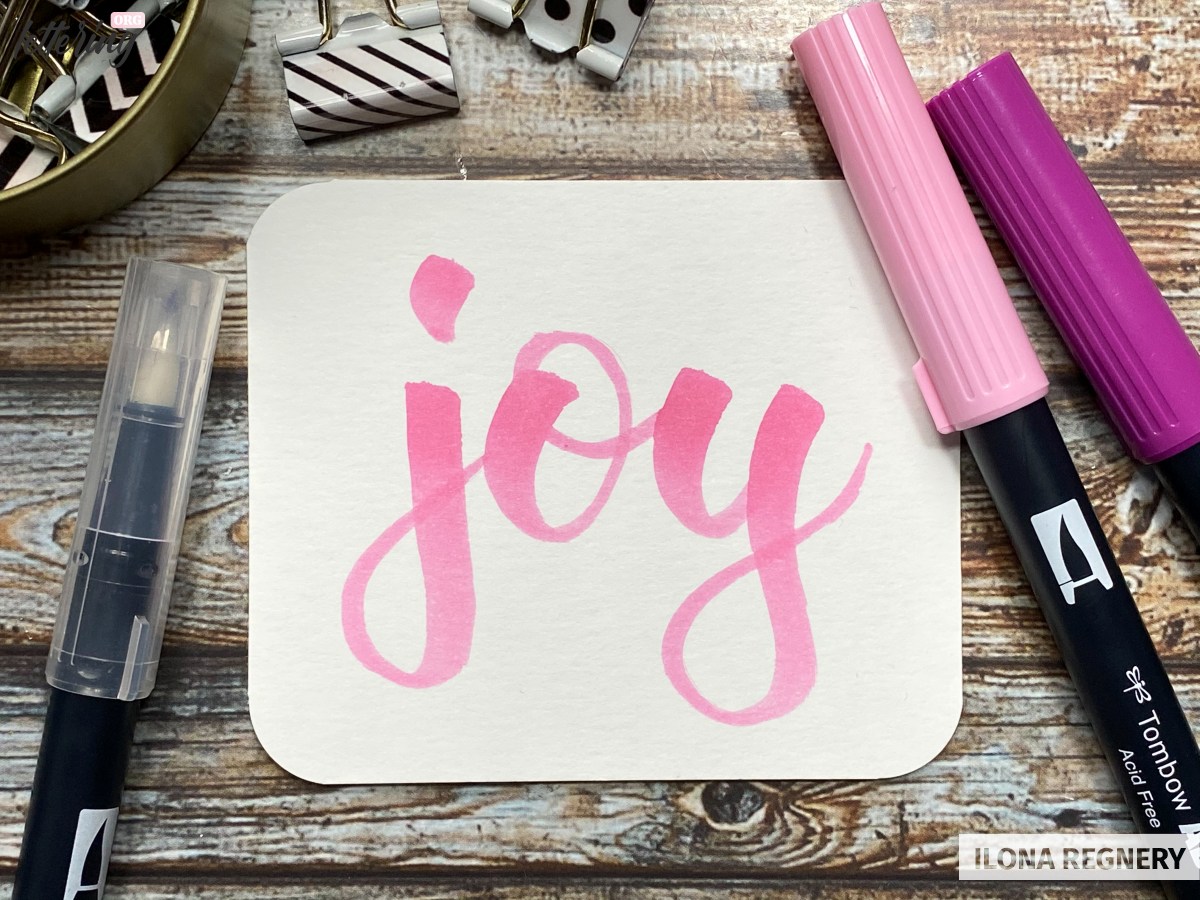
Write the first layer
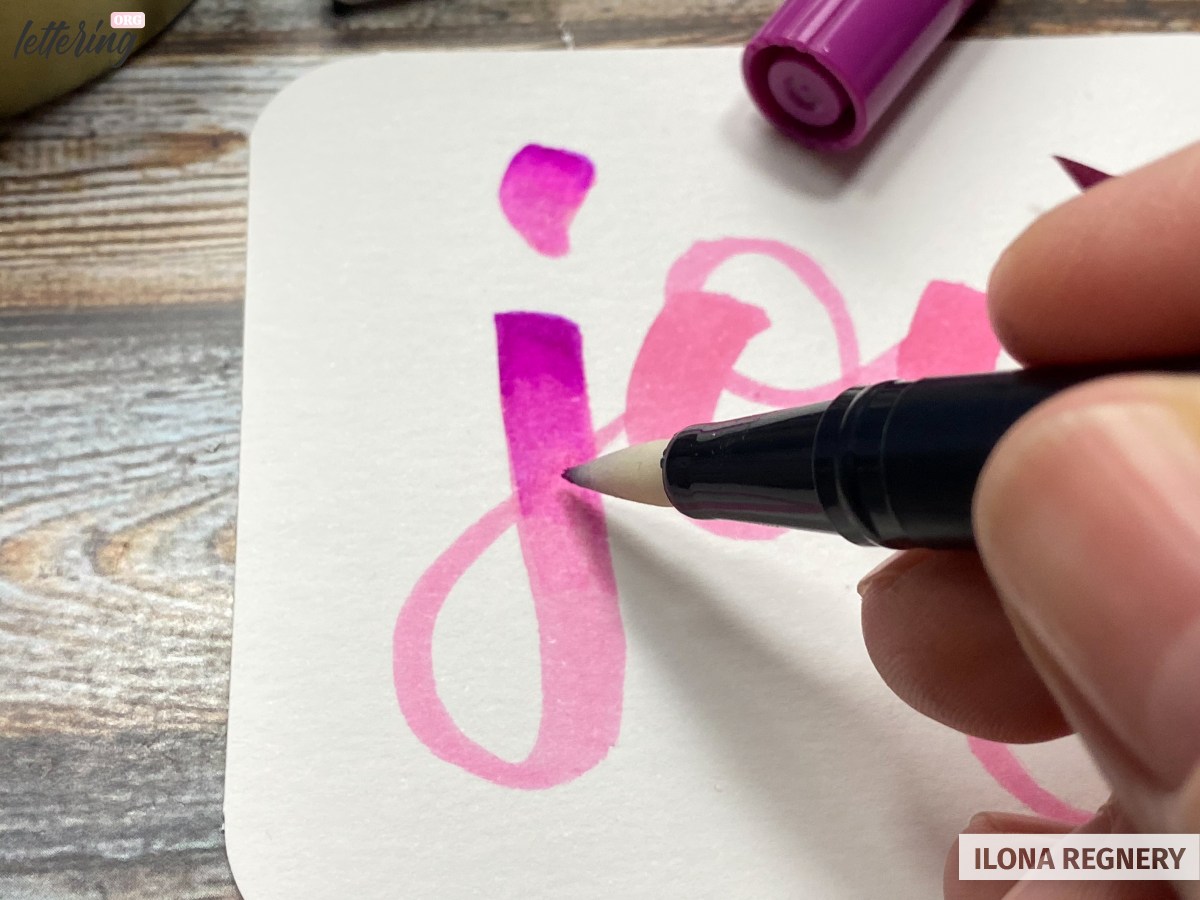
Take a light color brush pen, for example a light pink, and write a word of your choice.
Add the darker color
Add a bit of the darker color (dark pink) at the top of the first letter.
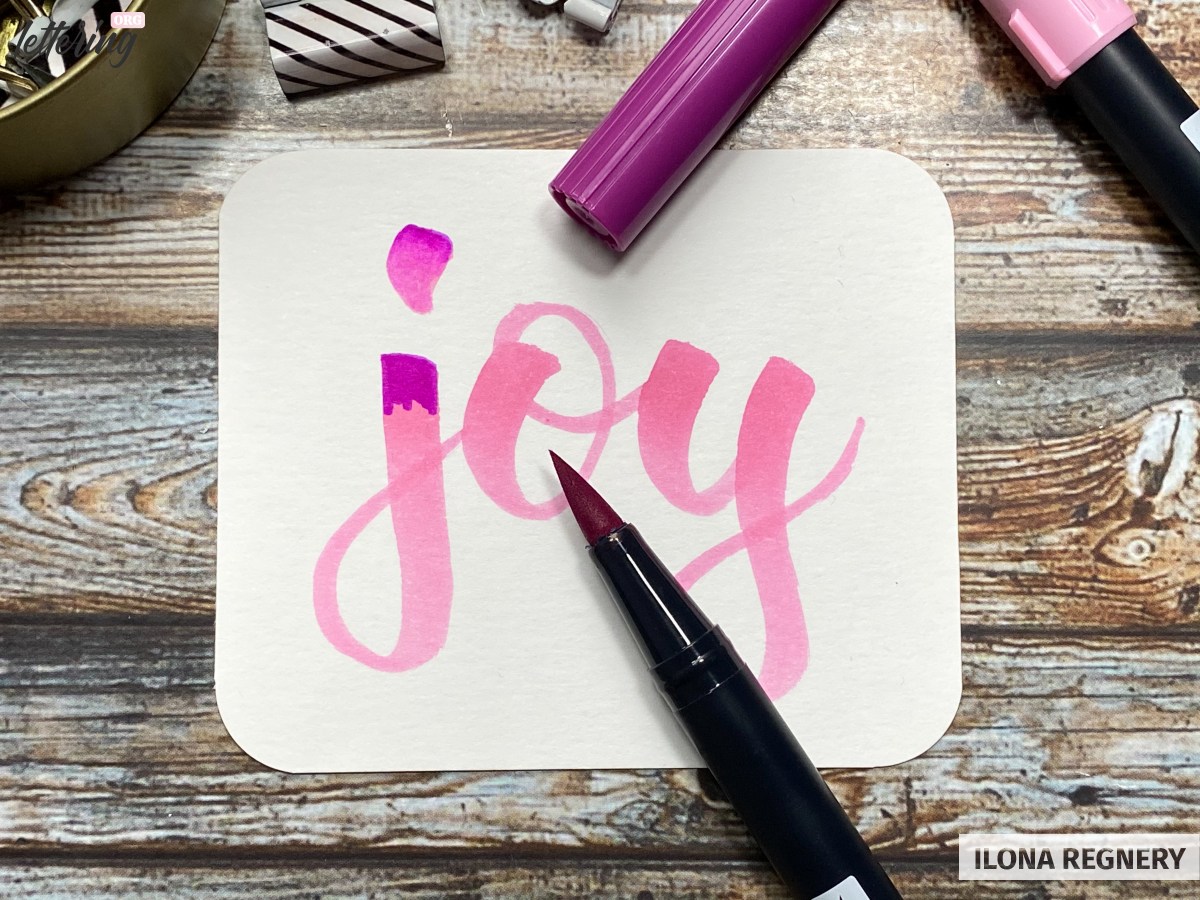
The smaller the letters are the smaller should be the dark part – this helps to avoid the letters get too dark in total and don’t show a nice gradient.
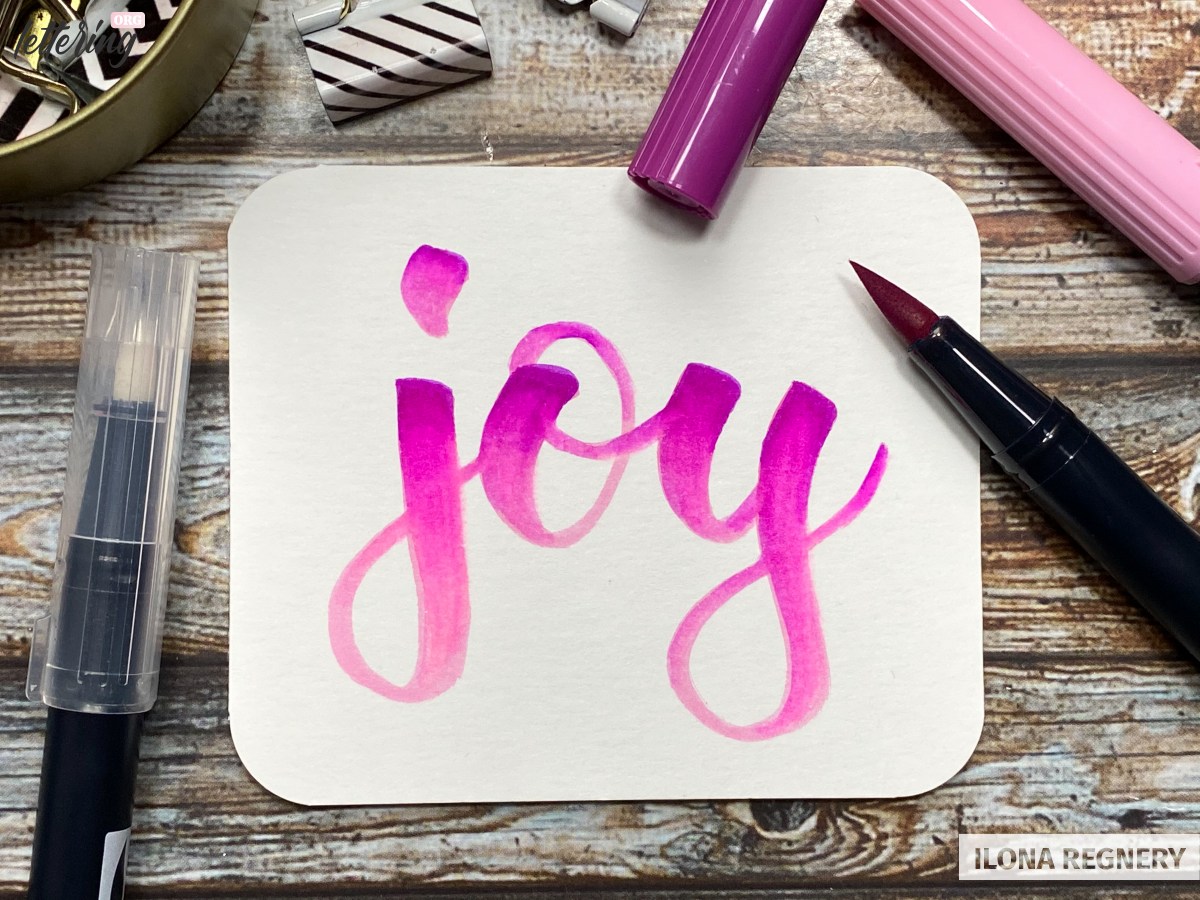
Blending with the blender pen
Now take the blender pen. Go slightly over the dark part with short strokes. The blender pen dilutes the dark colour and this way the dark colour absorbs a bit into the blender nib.
Spread now the diluted color down to the bottom of the letter. Try to do it with short strokes in one direction, to hold the full control over the intensity of your blending.
If needed clean the blender nib a bit on a paper towel and continue the blending process.
Work this way until every letter shows a nice gradient.
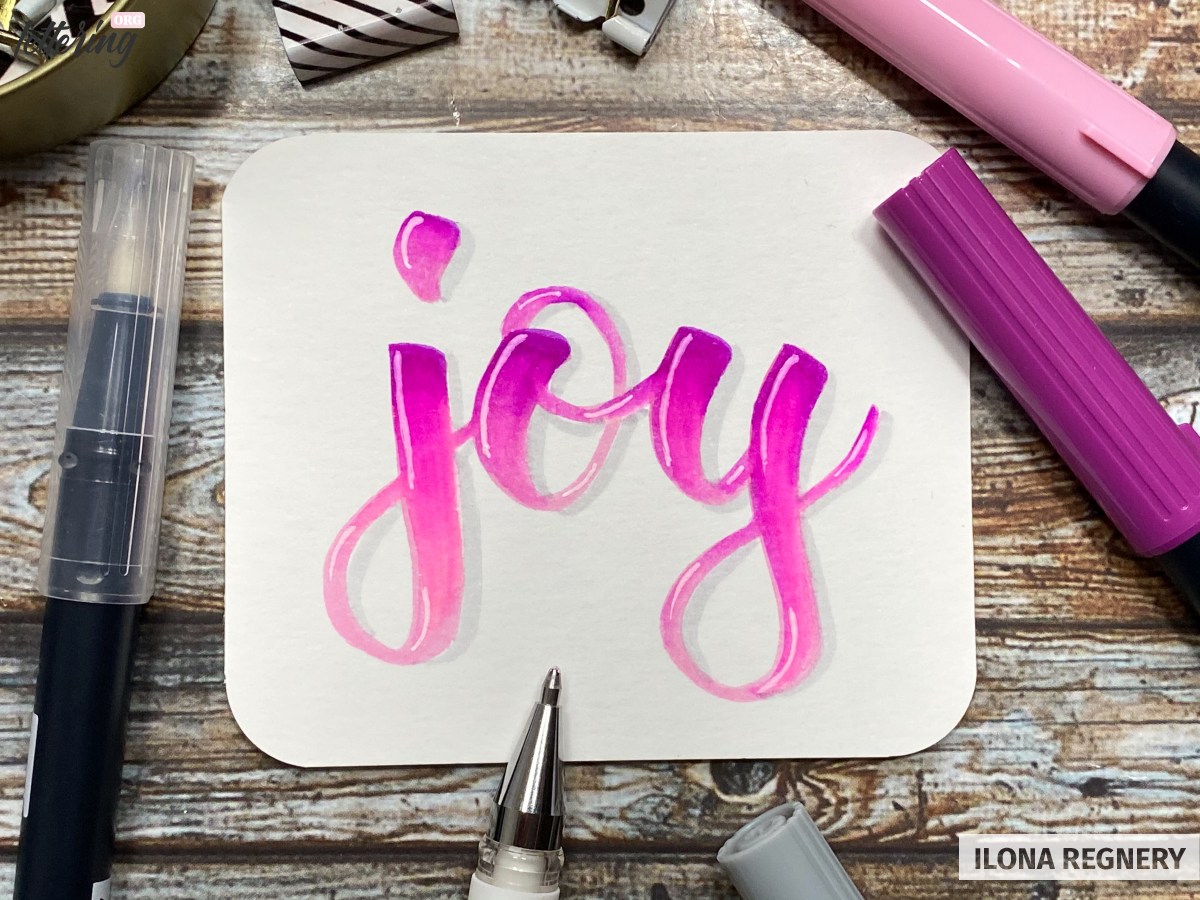
Finish & decorate
Add shadows with a grey brush pen to your lettering. White gel pen highlights underline the glossy look perfectly.
Blends with a brush or water tank brush
This technique is a favourite of a lot of artists. Depending to the amount of water, you can play with the effects.
From a very compact and opaque blend up to watercolour effects, which gives your blends a beautiful delicate look.
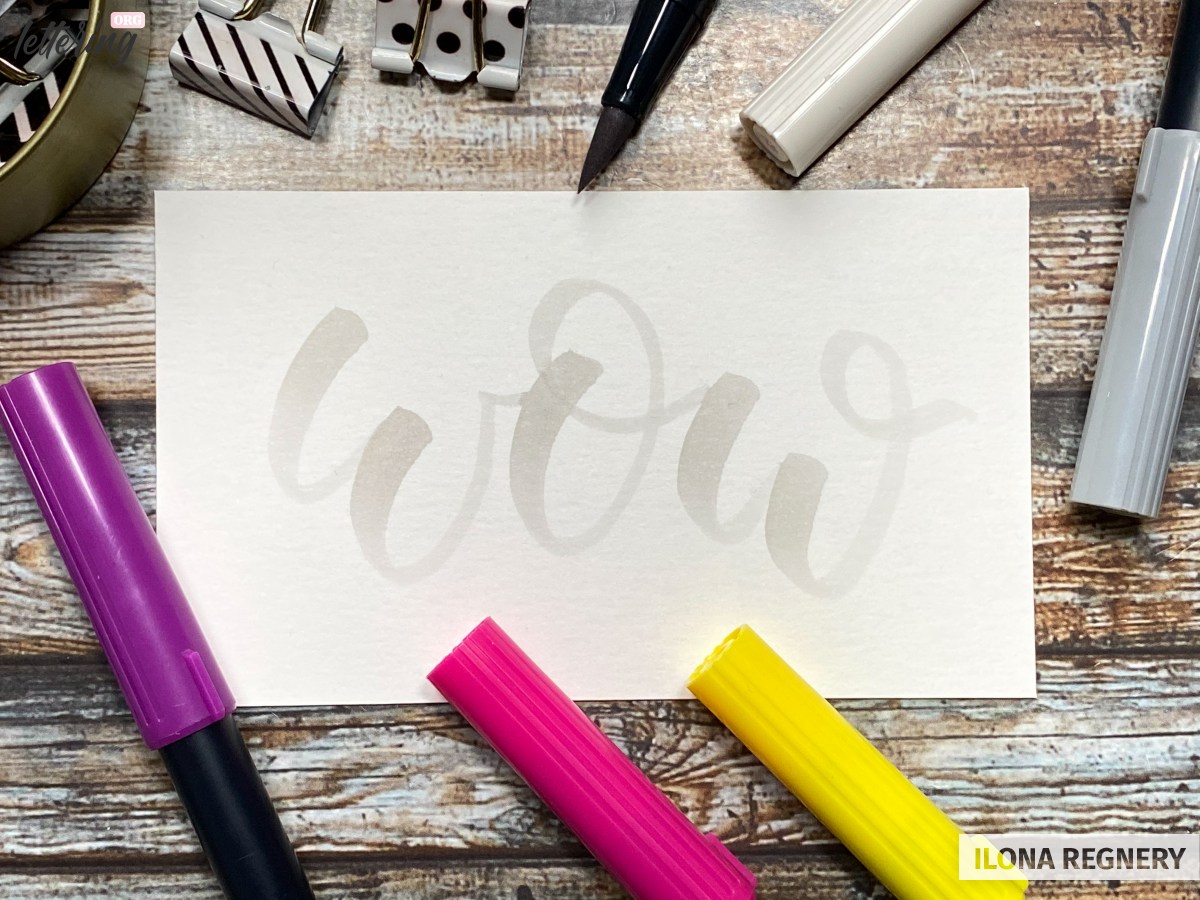
Sketching with a grey brush pen
Use a very bright grey brush pen and write a word of your choice first. Continue as soon the grey ink is completely dry.
The shade of the sketching brush pen will influence the result and brightness of your finished lettering. Try to use a very light fawn shade for bright blends and a light cool grey for darker blends.
Add the colours
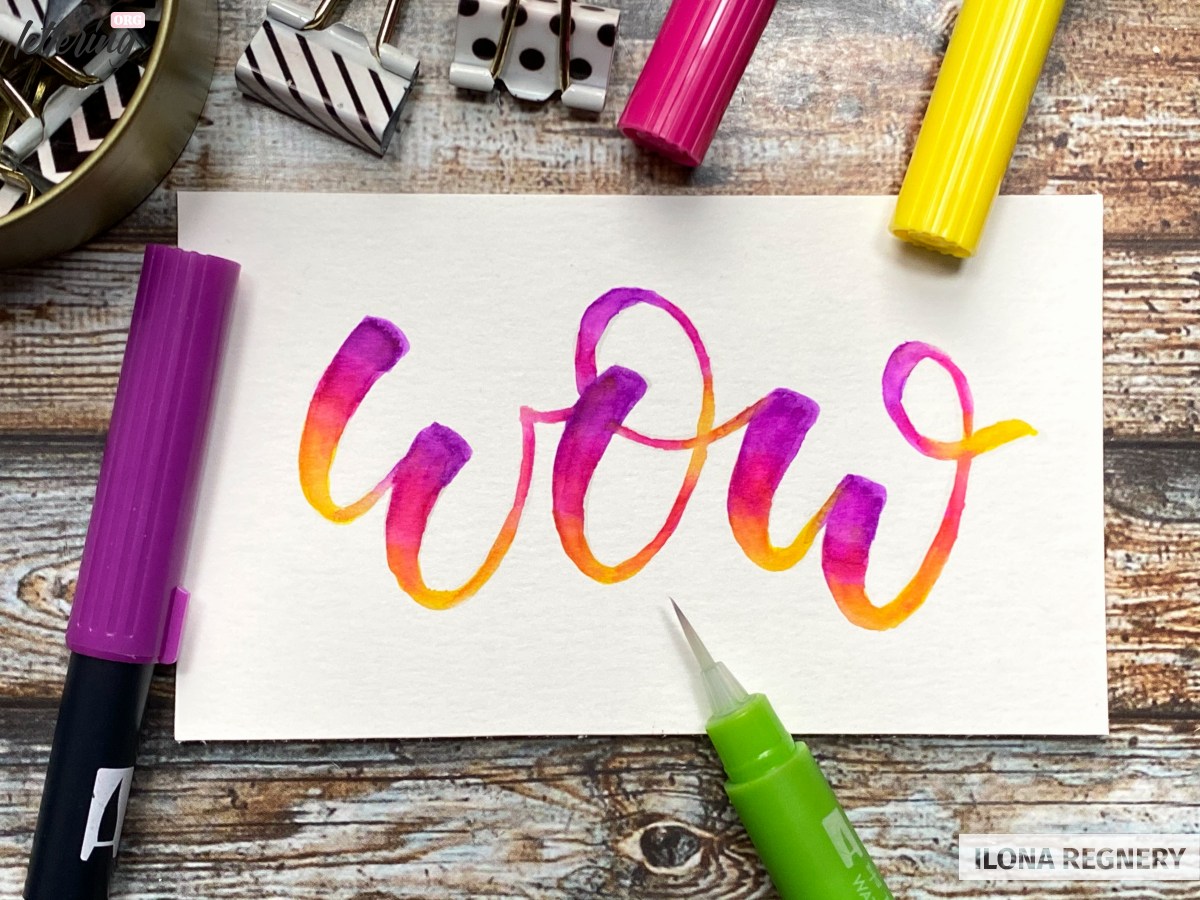
Here I’ve worked with a colour combo of purple, pink and yellow. You can also use different blue shades, blue green mixes or one of many other nice triple colour combos.
Add the colours to the first letter and let a little space between each colour areas.
Dark colours are often rich in pigments. As darker the colour as smaller should be the part of that colour to avoid your blending ends up with a dark mess.
Blending with the brush
Use a semi wet brush and mix the colours together where the little spaces are. For this start nearly at the end of the first colour (purple).
The wet brush will dilute the colour and absorb it, so you’re able to paint with the diluted colour down to the empty space and a bit to the next colour. Work with short strokes. Clean you brush and work now upwards from the second colour (pink) up to the first colour.
Repeat this, until you will have a nice mix, where the empty area between both colours was before. Clean your brush and continue the blending process by mixing together the second and last colour (yellow).

For more watery and delicate results use smaller colour swatches with more distance to each other and more water.
Continue and fill out all letters this way.
Finish & decorate
Add outlines with a black fine liner and shadows with a grey brush pen. White gel pen highlights will give your lettering a shiny look.

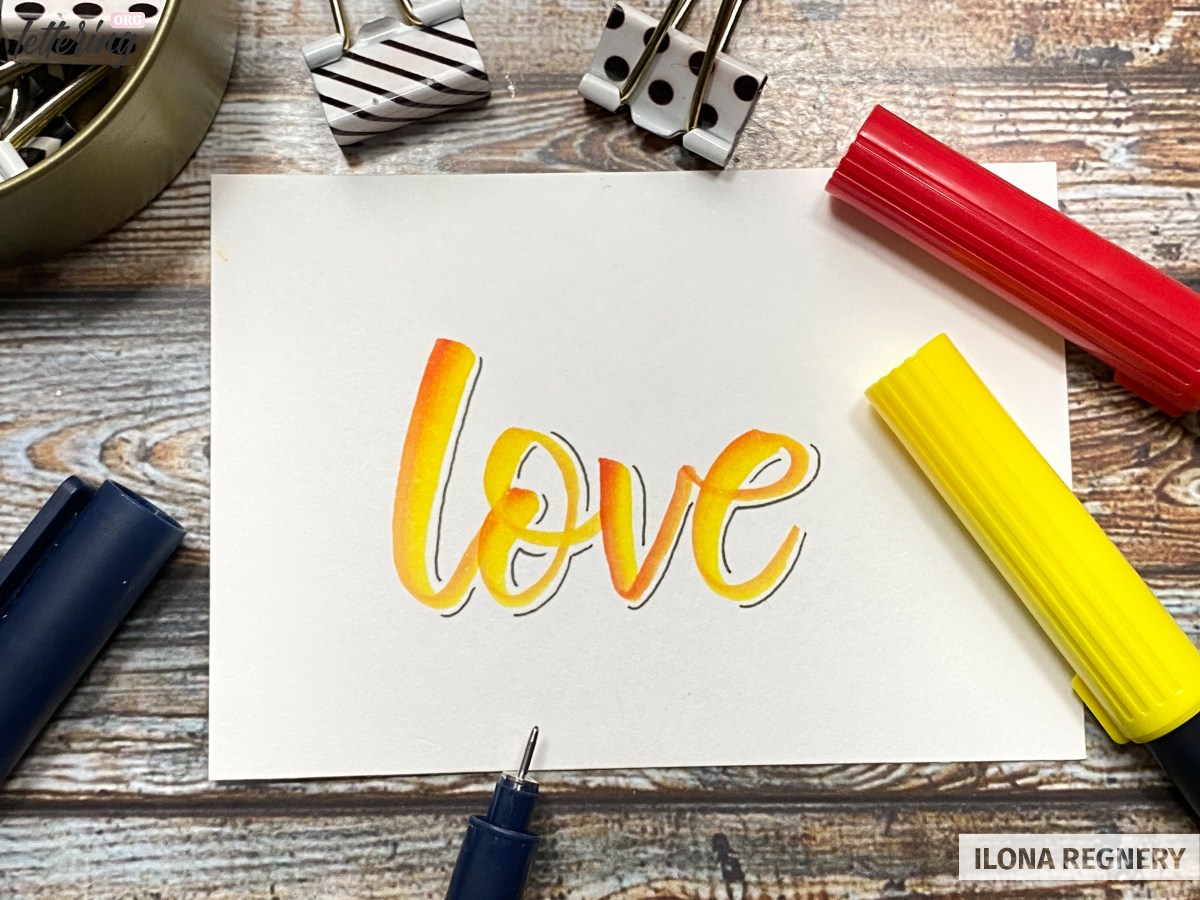
Gel pen blending
Blending with gel pens is a lot of fun. You can do it with the pens itself by painting over the last third of the previous colour and mix in the next colour.
A technique I prefer if I work with glitter gel pens. For blending the Gelly Roll moonlight pens, I prefer the water tank brush.
Preparing your lettering
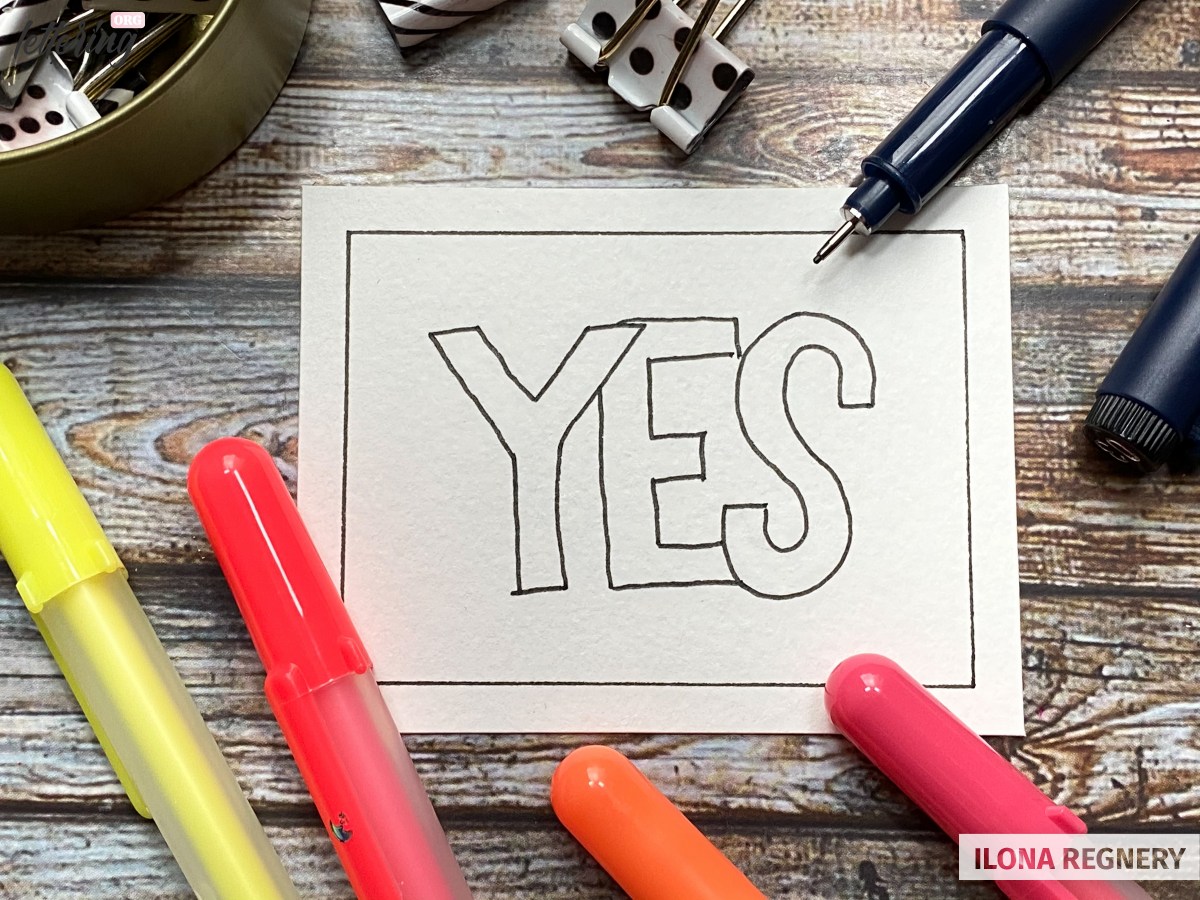
Best thing is, opaque gel pens are very versatile. You can write with them over a light brush pen lettering, but also to fill out block letters or faux calligraphy with them.
Opaque gel pens are rich in pigments, this means we can easily overpaint the next colours by accident while blending.
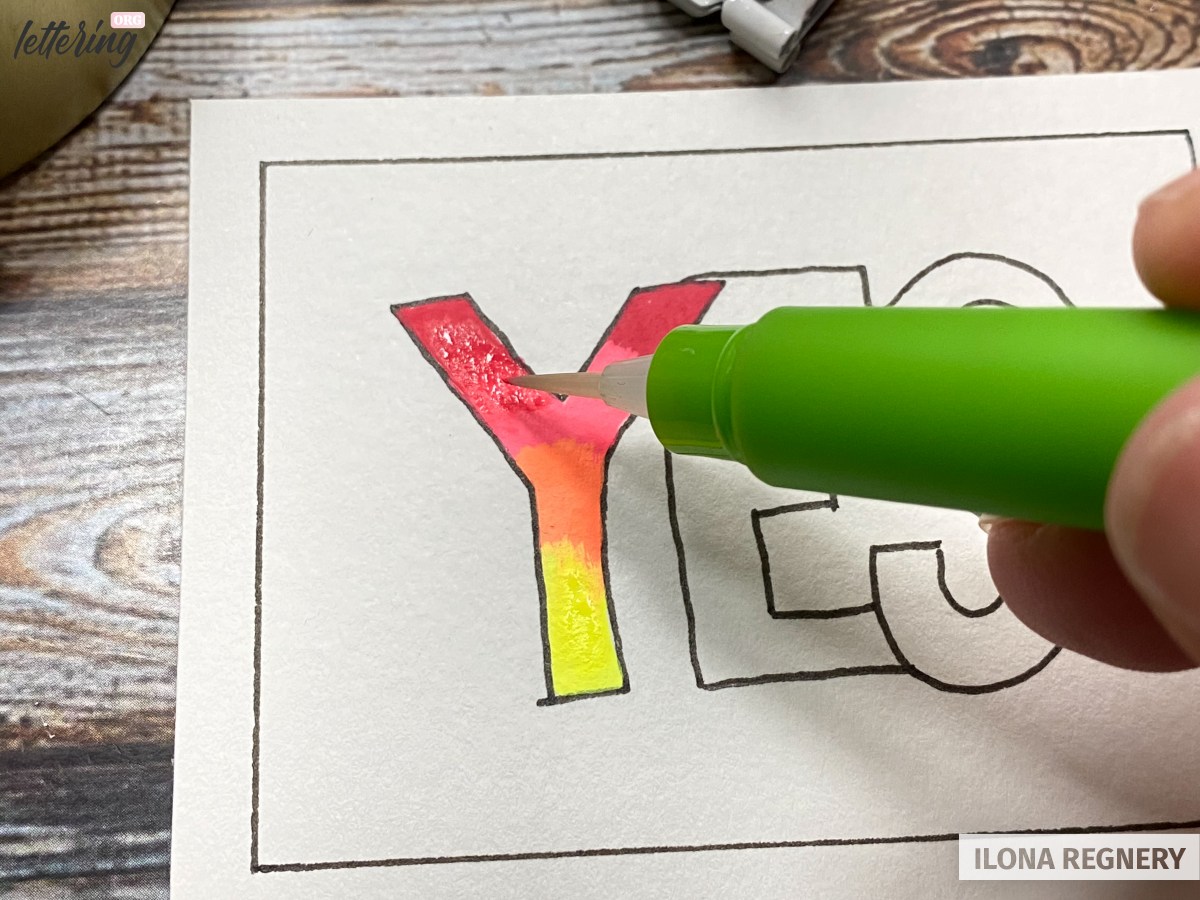
To avoid this, the letters of the lettering shouldn’t be too small. This in mind I choose a big YES with enough room for the blends.
Add the gel pen colours
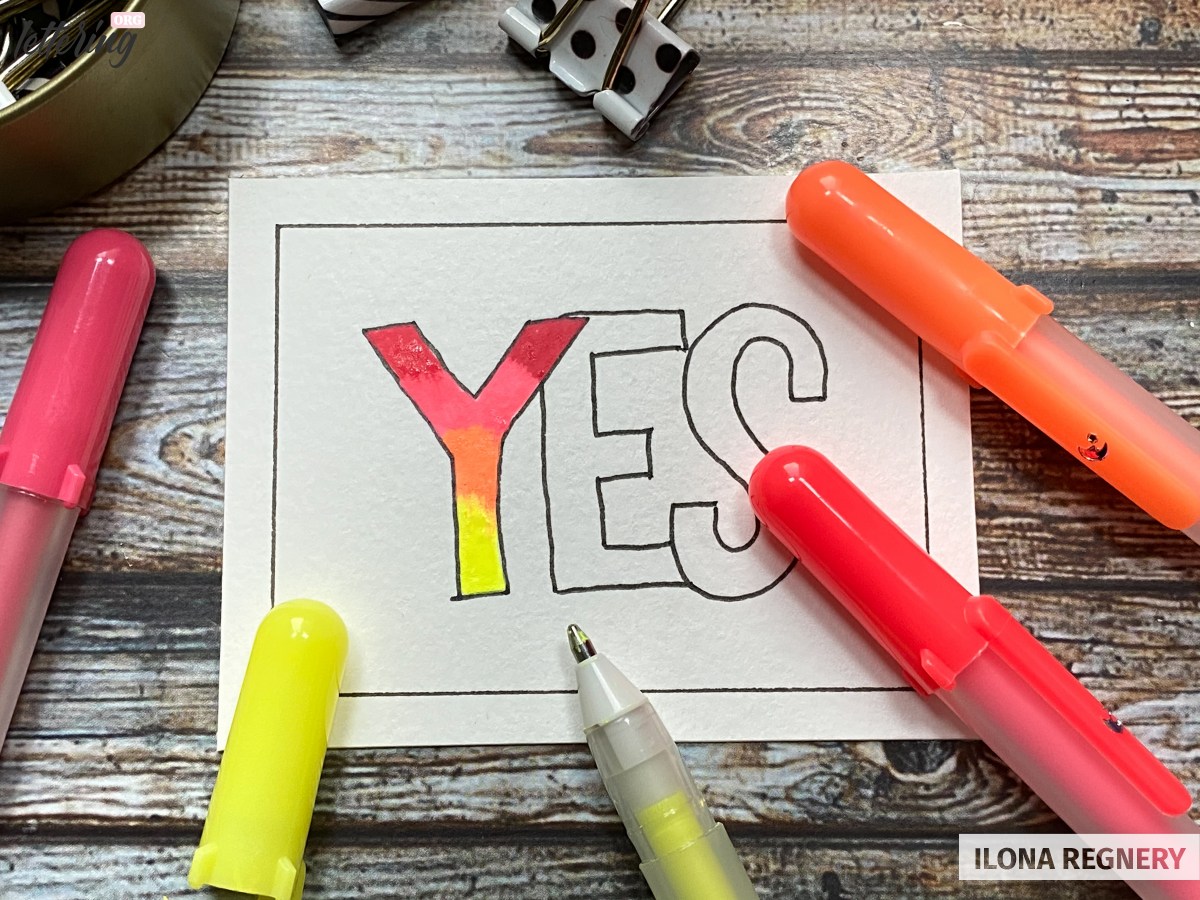
Add at least two different colours to your first letter. I’ve used four colours in my example (dark red, red, neon orange and neon yellow).
When using gel pens it’s totally fine to add the colours a bit overlapping.
The gel pens possibly absorb a bit of the other colors. Clean them to avoid bad surprises next time you’ll use them.
Blend with water
In my experience a more wet brush works well (better) when blending gel pens. Start where the colours meet and mix them at this small area well together. The brush will dilute and absorb the strong pigments very fast, so cleaning the brush in between is a must.
Repeat this procedure everywhere the colours meet until you have a nice and smooth blend. I admit, it can be a bit tricky first. Practicing with big letters and less colours at the beginning, will help you to master this technique very fast.
Work from one letter to another to finish your blending

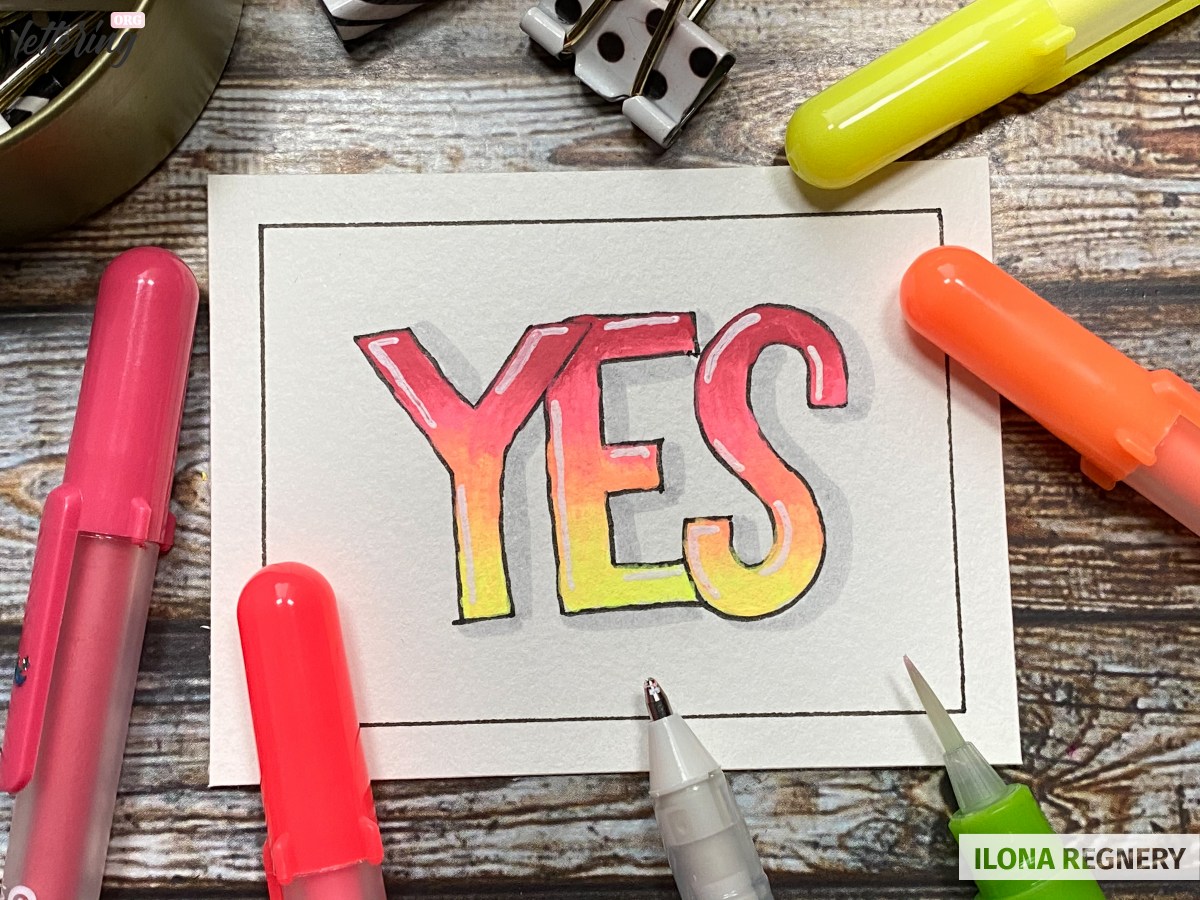
Finish & decorate
Shadows and white gel pen highlights give your gel pen blending a nice finish.
Infusing technique
Wonderful effects, fast and easy. Loved by a lot of artists. And best thing of all, you don’t need any special equipment for this.
Basics
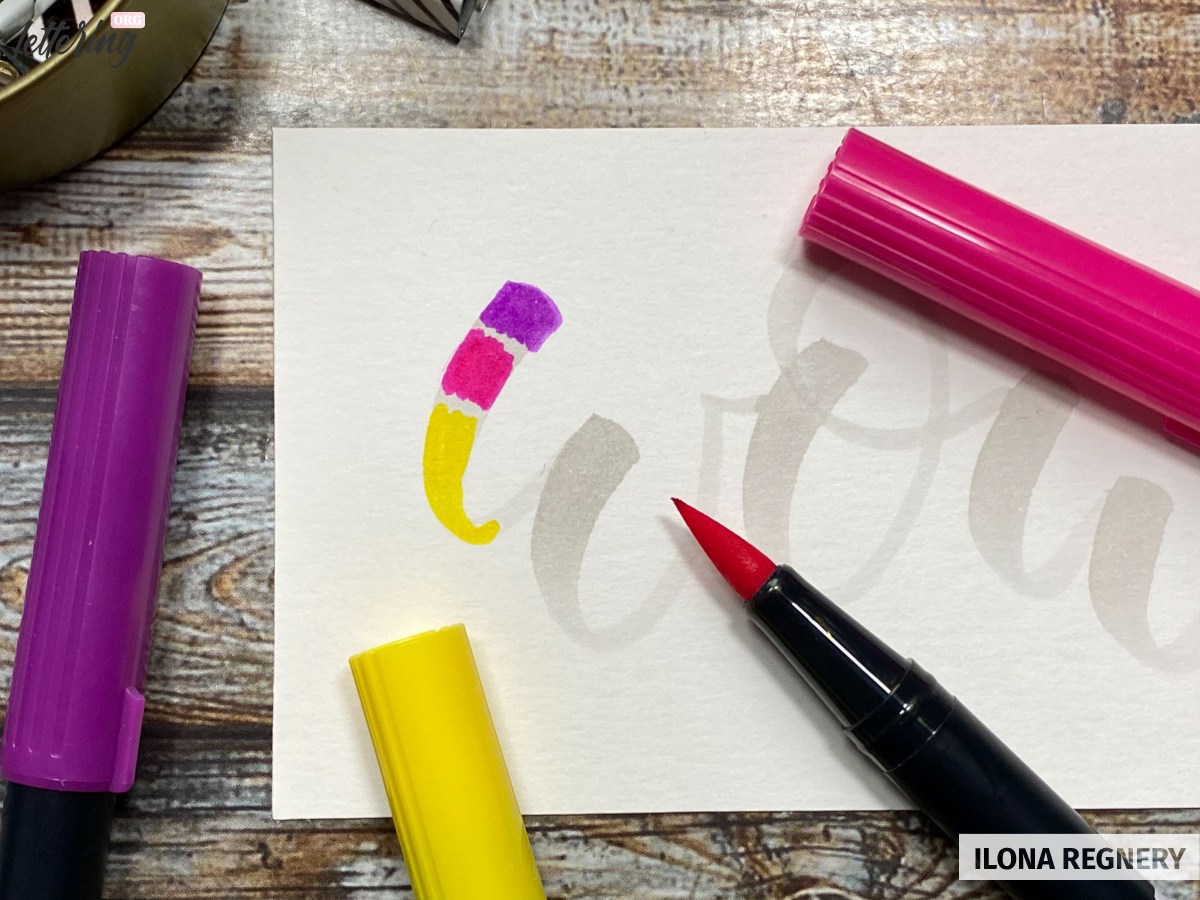
You can do the infusing technique in a lot of different ways. Dip your lighter brush pen nip into a bottle with a darker water colour, or add some colour onto a plate, glass or a piece of plastic first and pick up the colour with a bright pen or hold nib to nib, like I did.
As bigger the difference between the colours as better the effect will be. No worries about your pens. The nib maybe will stay coloured, but the pen will write again in its original colour as soon as the infused colour is completely gone.
Nib to nib
Hold your pens together, nib to nib, until a good amount of the darker colour infused into the lighter pen. If needed spin the darker pen a bit around to infuse enough of the dark colour.
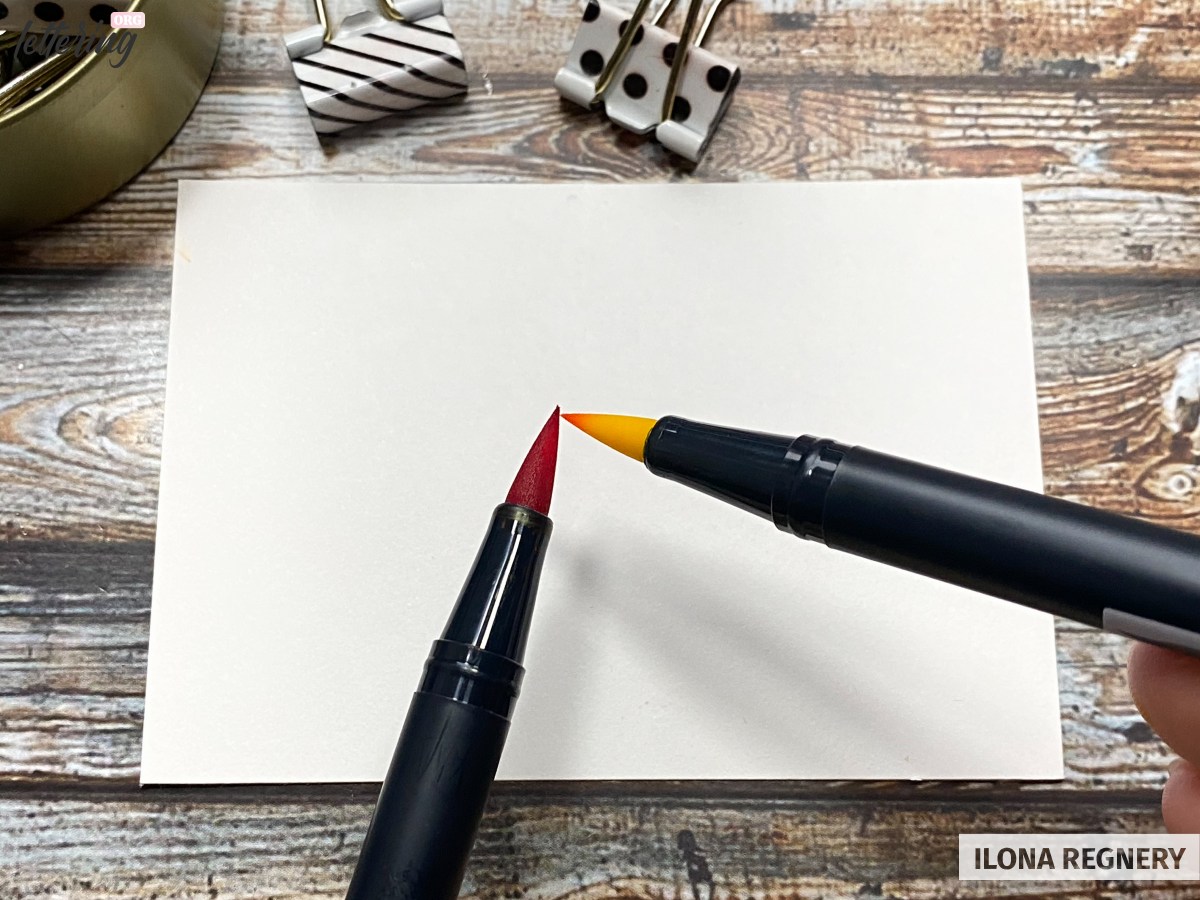
The same way your brighter pen get infused with the dark colour, the dark pen absorb the bright colour. This way you can use both pens for beautiful blends.
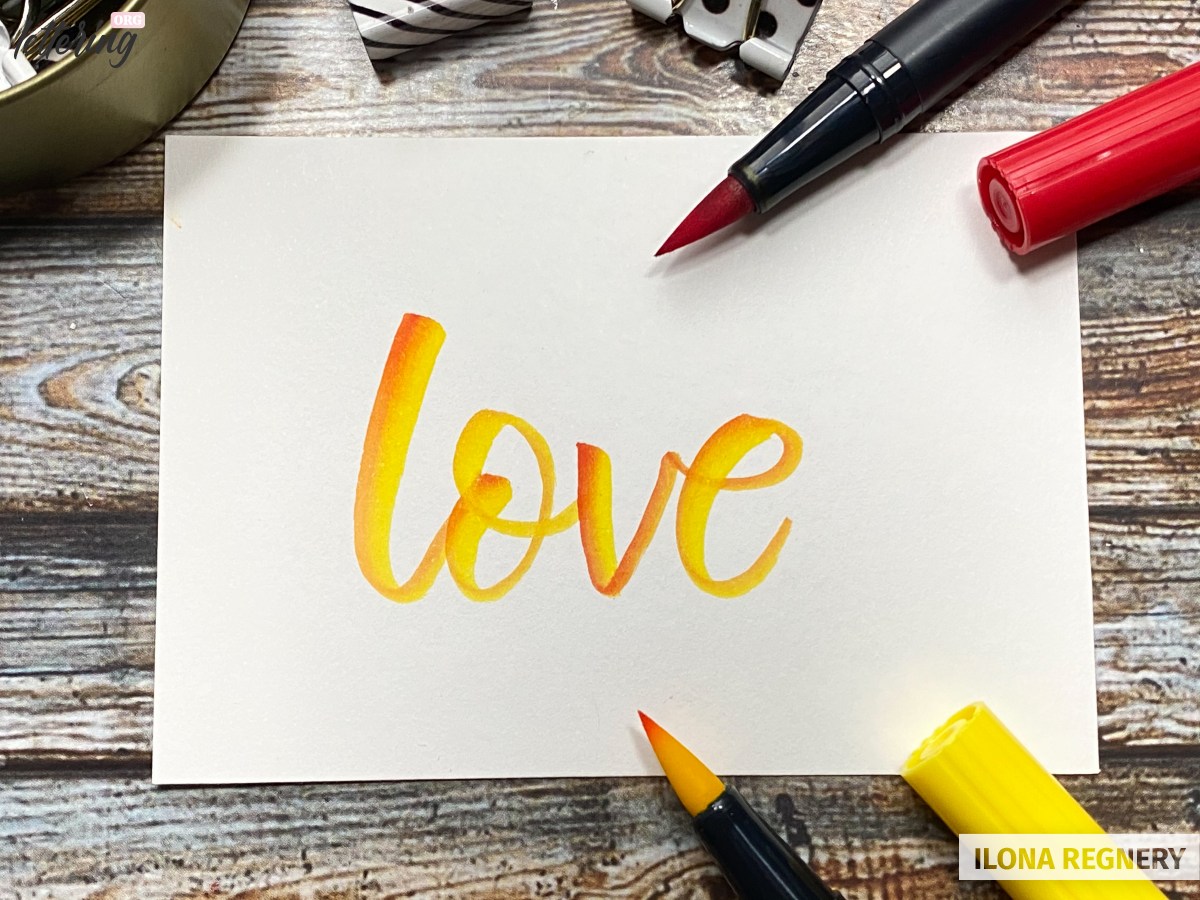
Writing
As soon your brush pen absorbed enough colour, you are ready to start doing a lettering. You will see how the colour will change while writing.
If it’s turns back to its original colour too fast, you can repeat the procedure and continue your writing.
Finish & decorate
A nice dropped shadow with a black fine liner fits very well to this kind of lettering.
Now it’s your turn. Have fun and enjoy the relaxing effect of the blending process.
What’s your favorite ombre lettering technique? Tell me in the comments!
Such a well put together tutorial! You explained with words so well I almost did not need photos(but thanks for those too!)
My favorite one is ‘wow’. I was immediately drawn to it(pun intended, lol) …my version is not as eye catching as yours but I will keep practicing.
Thank you for making this. I would LOVE some more advanced blending and Brush Lettering tutorials. There are not many advanced ones and I a bit stuck.
Take Care!