In this tutorial, I am going to show you a variety of ways of how you can easily jump into the process of creating great compositions of your hand letterings without being overwhelmed by this task.
To improve your skills, decide to hand letter quotes of at least four or five words. Be honest to yourself and do not count filler words, such as: the, and, is, are, etc. They actually do not count as complicated words to fill into your composition.
The longer the message, the more practice you will get in the long run.
Contents
Where to start when it comes to composition
This may sound very trivial but write the respective message you want to hand letter in capital letters first.
It is just a handwritten note, so do not use any specific style. Don’t forget to check the correct spelling. It is your reference as you go along and should always be nearby to your sketches.
A big issue in composition is hierarchy. Which are the most important words you want to focus on? Which words do you want to highlight?
Take a pencil or colored pen and underline words of primary and secondary importance to aquire the first distinctive features for your composition.
This decision helps to structure your layout visually and communication-wise.
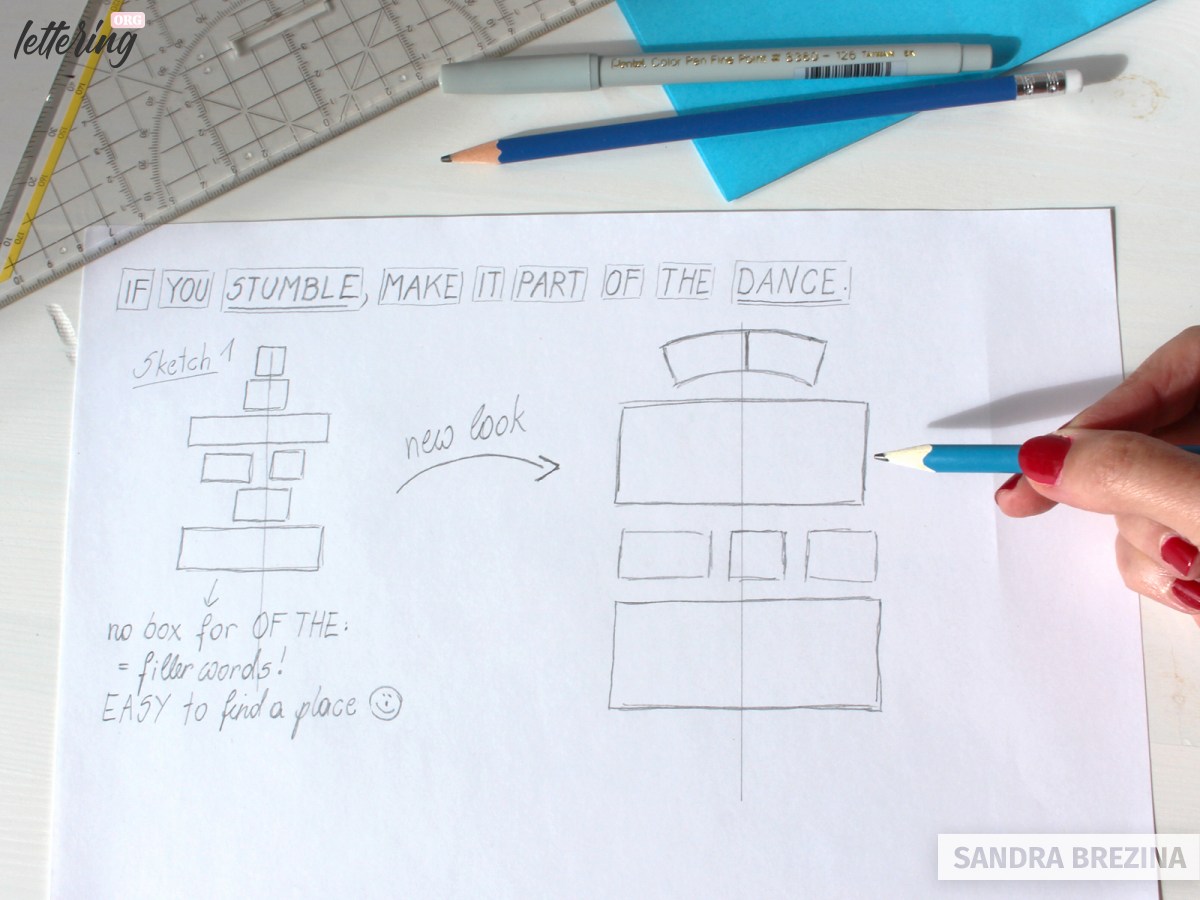
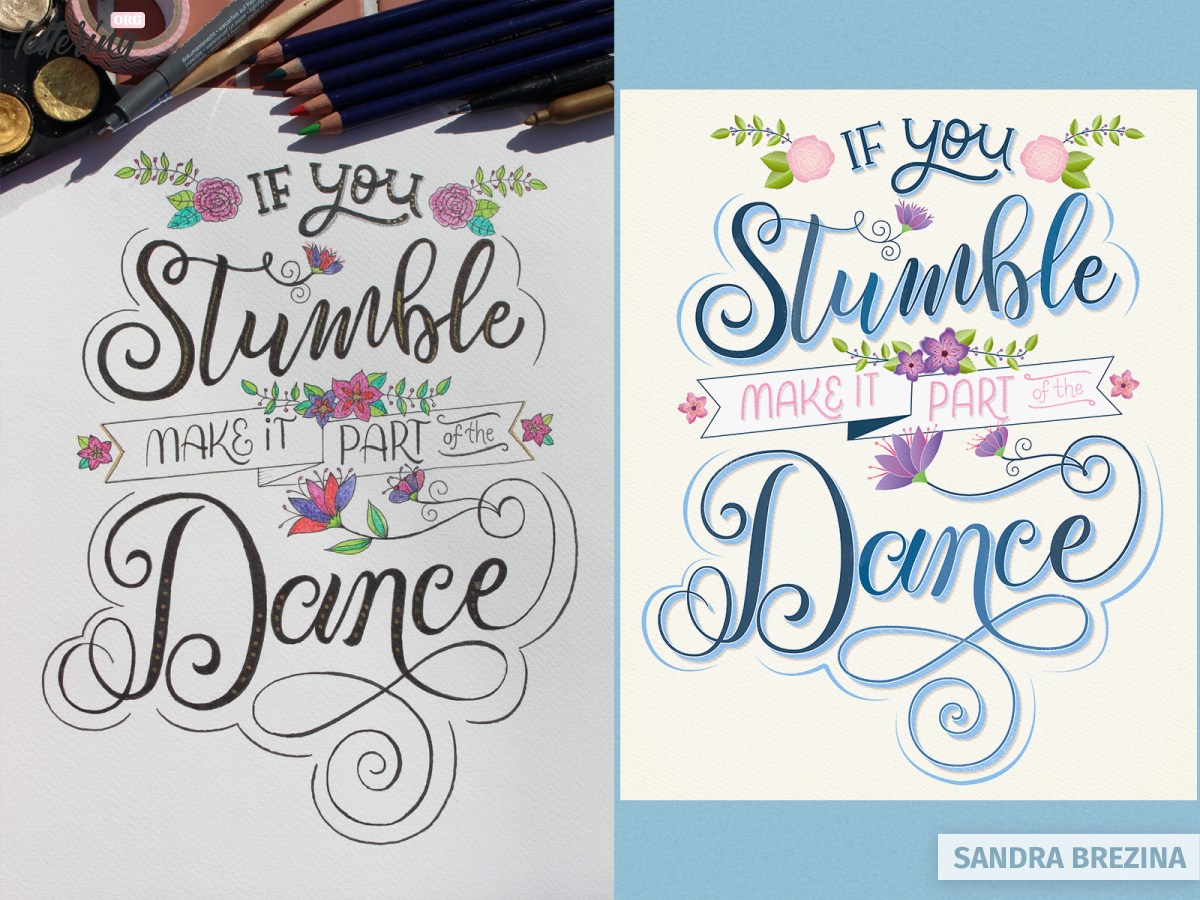
As example, have a look at the quote: If you stumble, make it part of the dance. I had to create this hand lettering composition for a client project in portrait format. For me, the most important words in this quote are stumble and dance. But there is no wrong or right. Maybe you find the word you important as well.
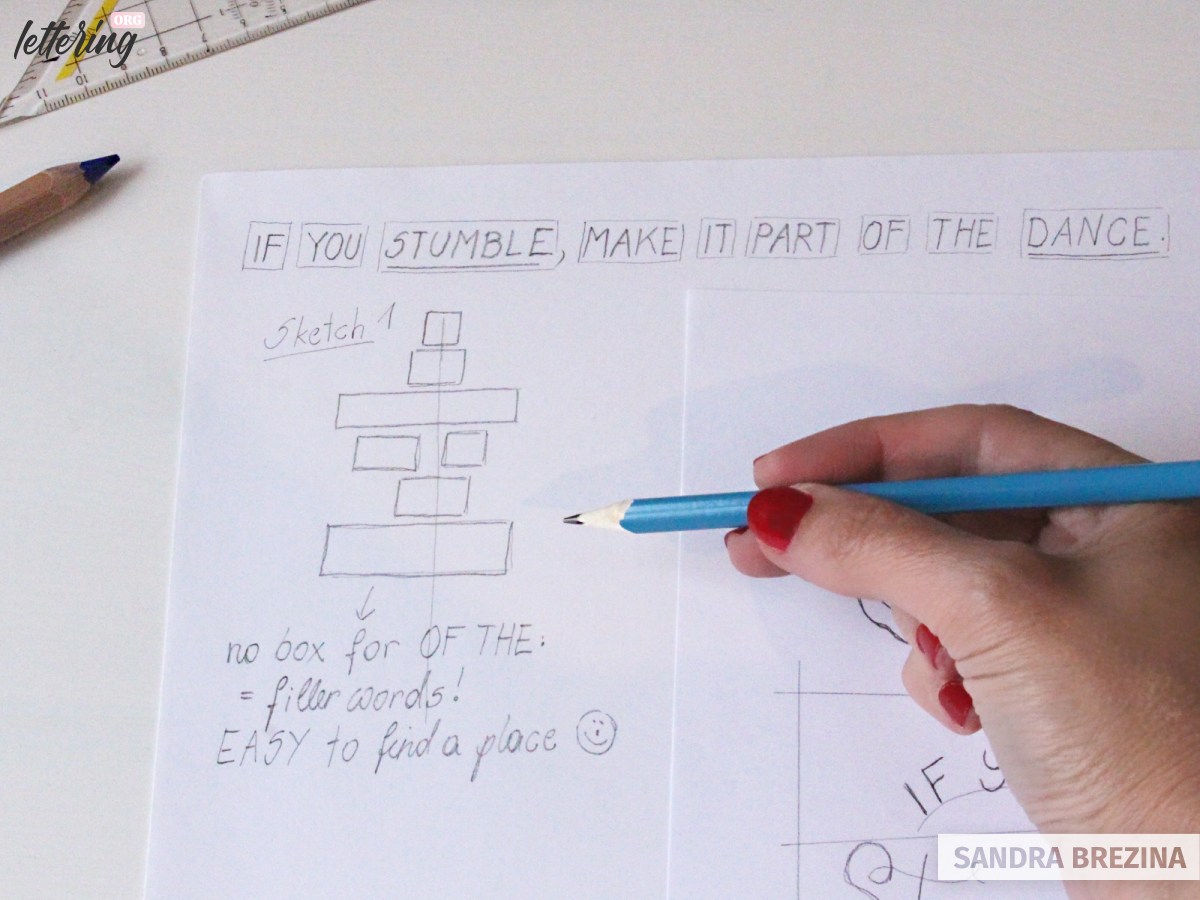
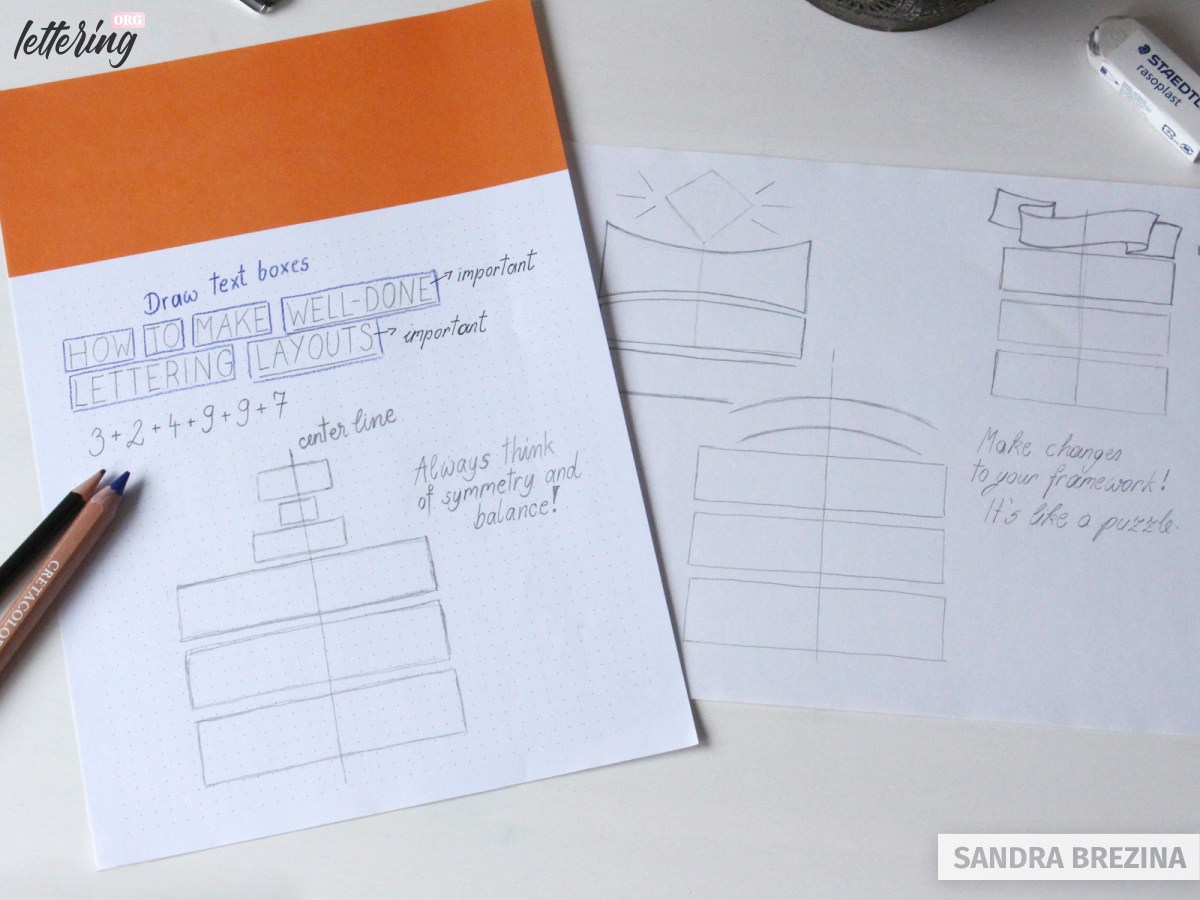
Draw boxes around each word to get an impression of the length of your words. It may even be helpful to count the letters of each word.
Arrange containers as placeholders for your words
Start to create thumbnail sketches by proceeding as follows: Have the format of your composition in mind (for example: square size for an Instagram post, portrait format for a poster artwork, landscape format for a greeting card) and use the desired format as borders of your sketches.
Draw a vertical line which serves as the center line of your very first sketch. Arrange the text boxes symmetrically onto this vertical line. Stack them on top of each other to visualize the amount of words you have to deal with. This arrangement looks totally boring, of course, but this is just the starting point.
Balance is a key component of good composition. Look at nature, at the harmoniously striped fur of a cat, for example, or at the pattern of butterflies. Symmetry is very pleasing to the eyes.
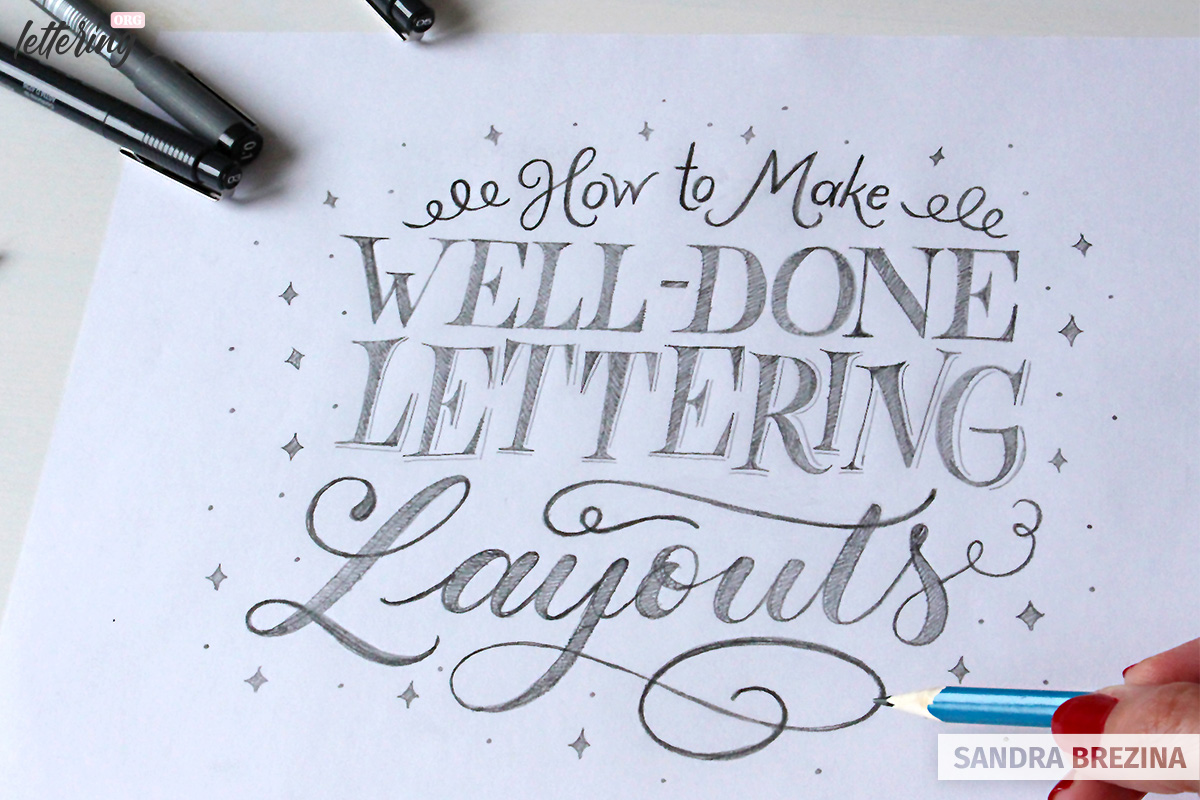
In this context, I would like to give you some insights to the cover picture I made for this tutorial. I created a very basic layout style. I arranged my words in a square format which are well-balanced in length, even though the word layouts is shorter than well-done and lettering.
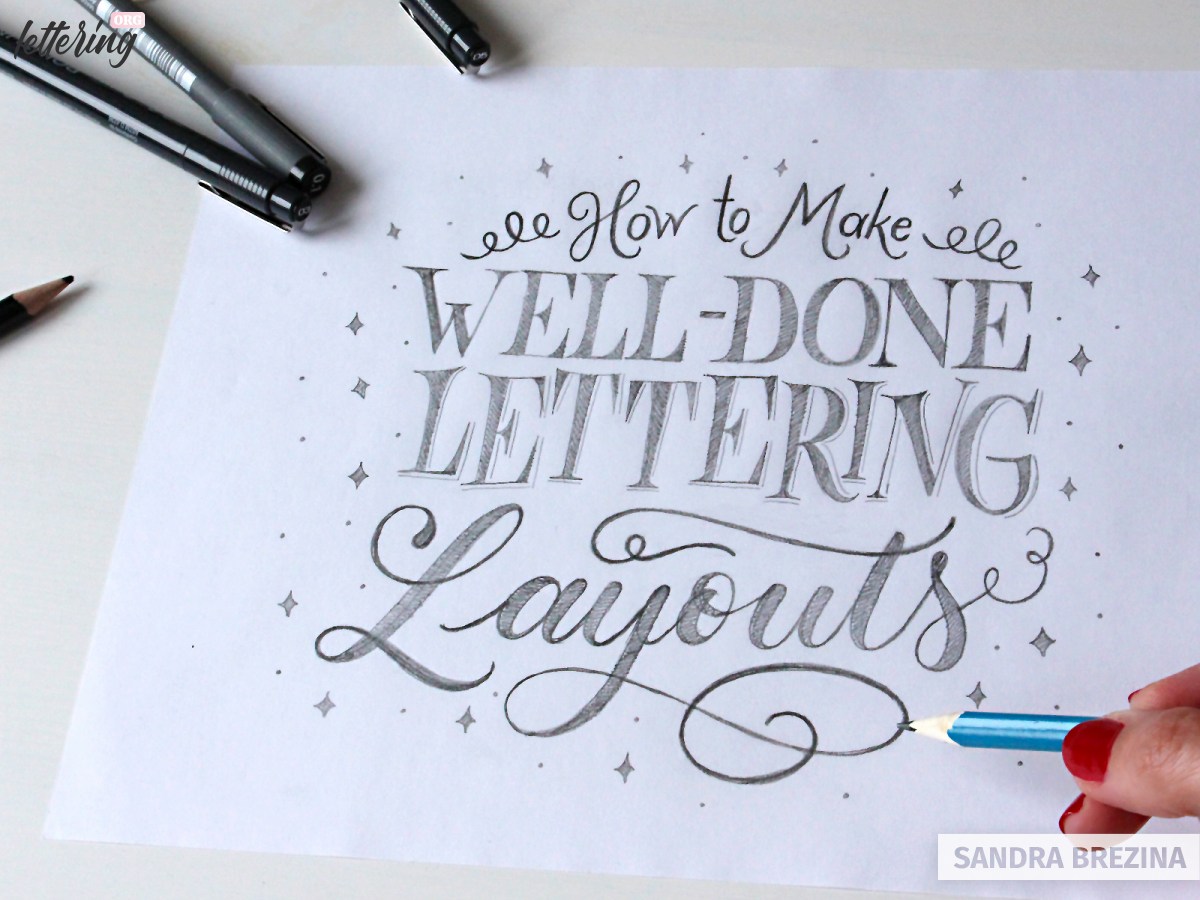
By adding flourishes and a stylized L, I enlarged the word layouts for the sake of my composition’s symmetry. To make my lettering more interesting (it is well-balanced, but also very static), I included different lettering styles: sans serifs, high-contrast serifs, fancy bouncing serifs and a playful script style.
To break up the composition block shape, I decided on an arch shape for my less important words. In general, putting so many different styles within a composition is far too much. But for a cover design, it may be an attractive concept.
Enlarge your boxes for very important words
Make a new sketch where you enlarge those boxes which serve as placeholders for your words of primary and secondary importance.
You will see: these changes usually trigger ideas for arranging your containers in a new way. Try to place smaller boxes side by side. Start changing the uniformity of your boxes step by step.
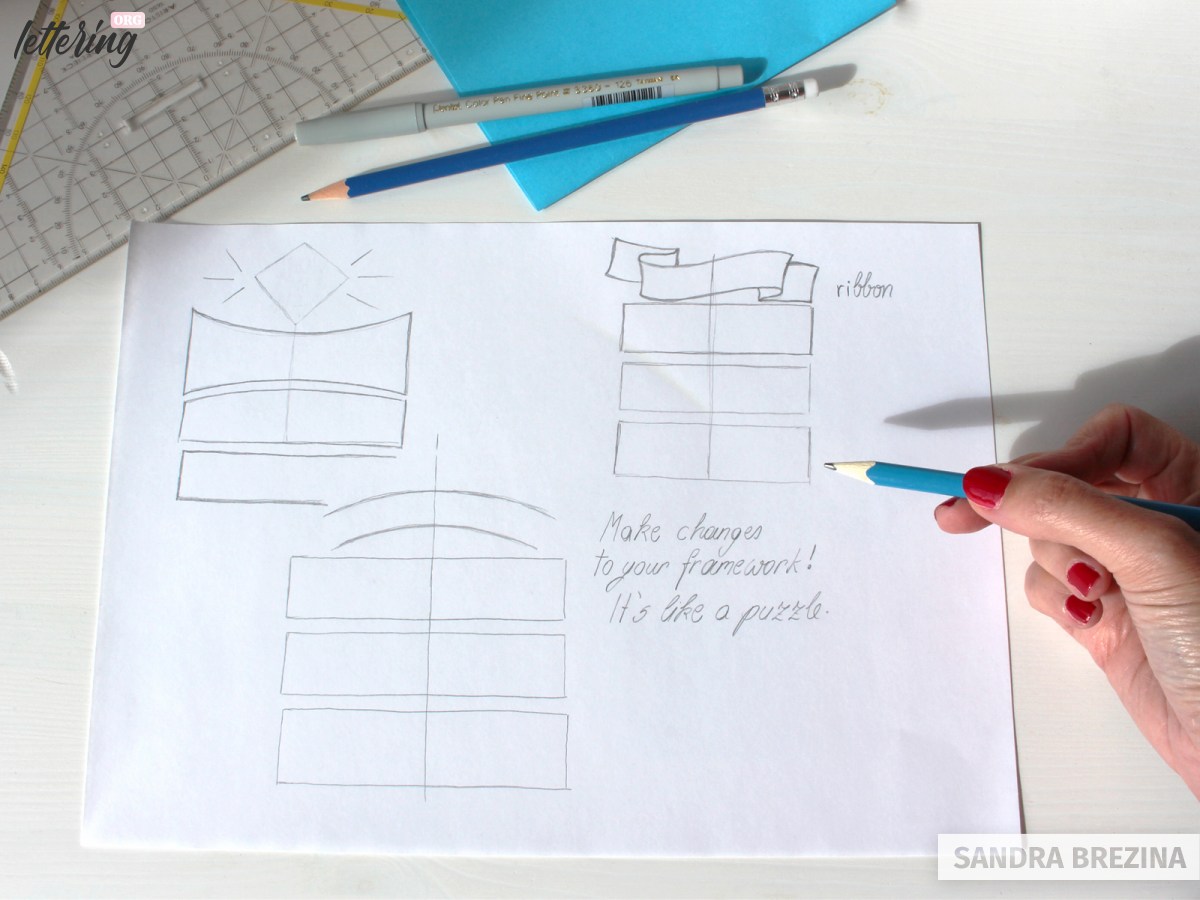
How about a box in the shape of a wave, a diamond, bowtie or triangle for your words?
At present, your text boxes are arranged on horizotal lines. Now, it is time to play around in order to break up the static look and feel of your composition.
However, keep legibility in mind. We use to read from left to right, and from the top to the bottom.
Play puzzle by using various shapes of boxes
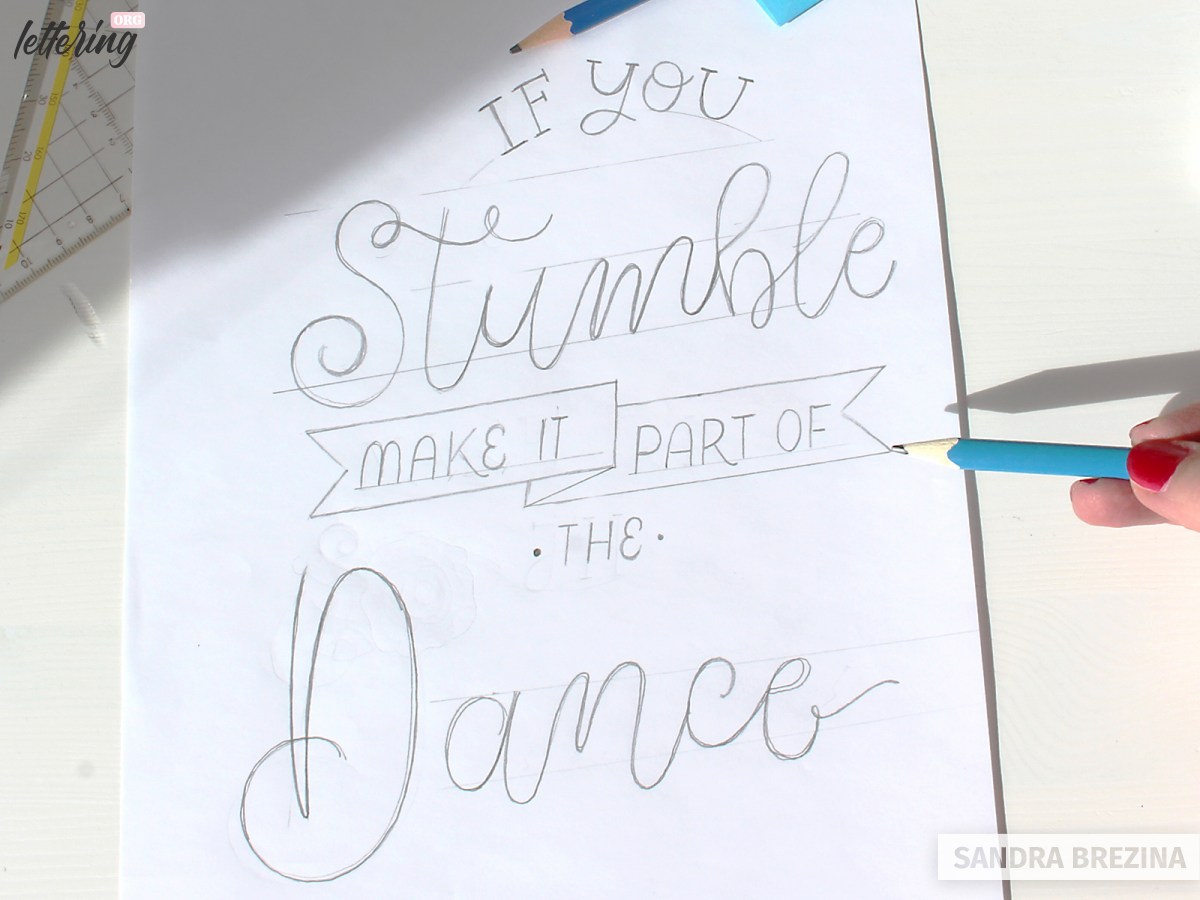
Try to arrange your text boxes on slanted lines in order to give your composition a more dynamic look. Maybe you find a perfect place to include a ribbon or an arch shape.
Filler words such as articles and prepositions can be put in small circles, within lines or between dots to integrate decorative elements into your artwork. This step is like playing puzzle. It’s your turn to find the best solution in creating manifold options with different shapes of boxes and arrangements. The more you work on your concept, the more ideas will hopefully cross your mind.
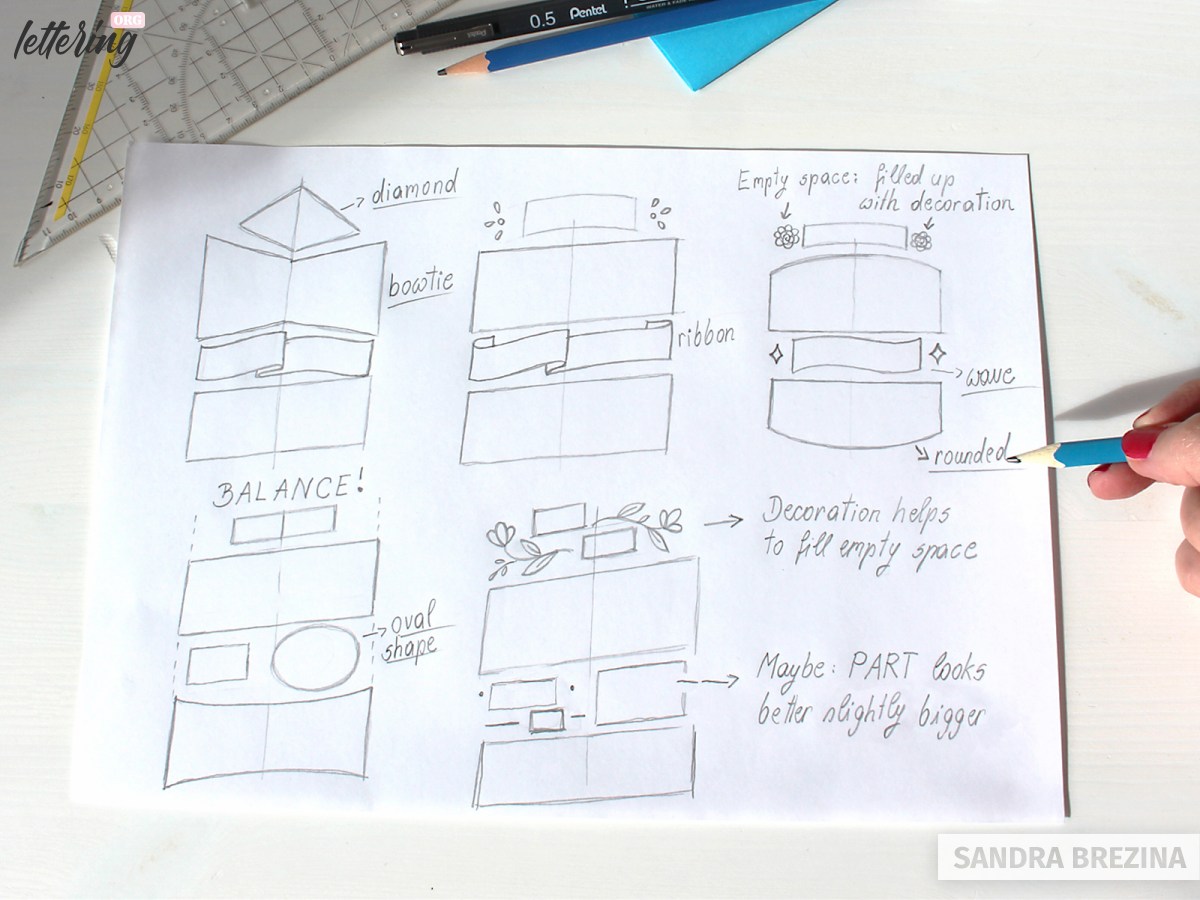
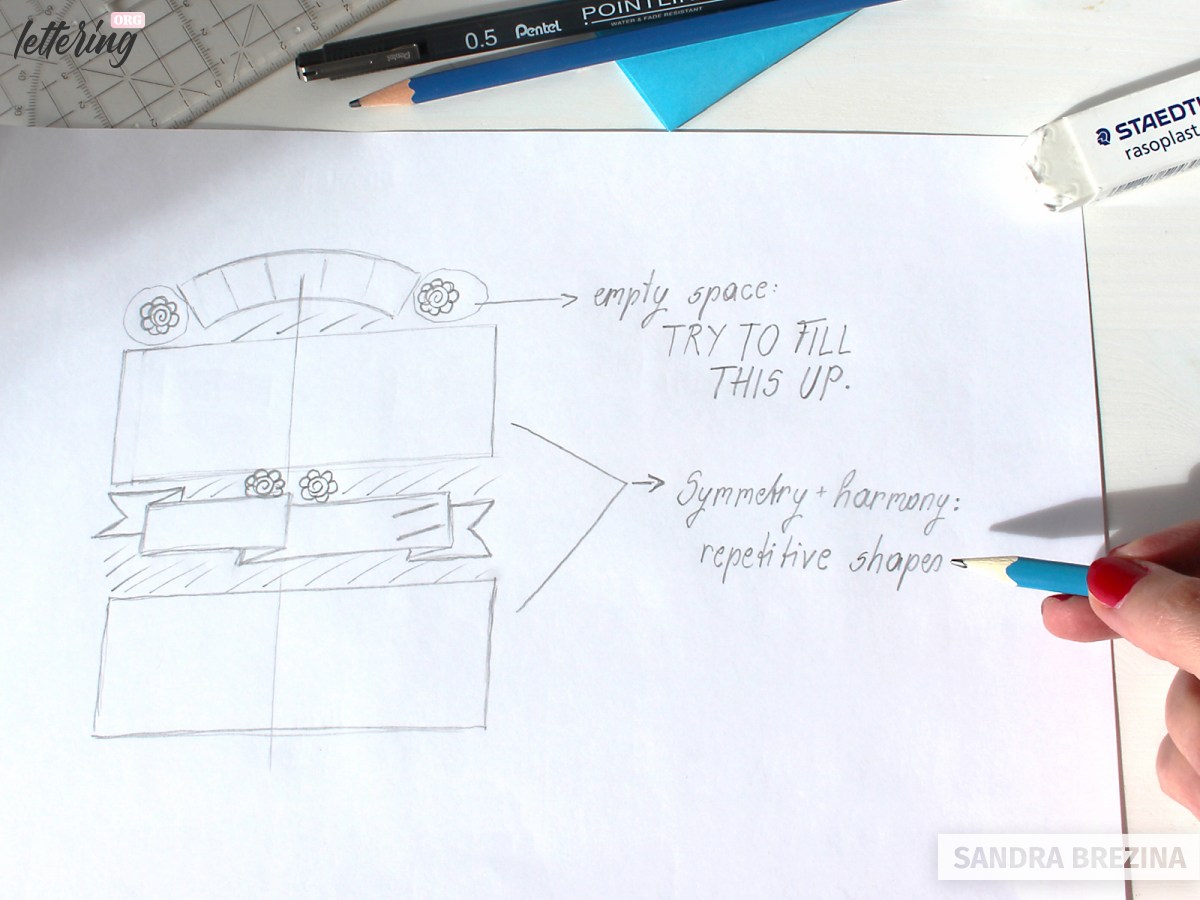
As you go along, try to observe any empty spaces. Try to avoid these and develop ideas for illustrative elements, easily drawn elements or flourishes as extensions of your letters.
Keep in mind: Symmetry is an essential feature of pleasing layouts. It may look nice to have a container shape at the beginning which is repeated at the end of your layout.
As soon as you are satisfied with your framework of boxes and have chosen your favourite option, make a new sketch. Stick to your framework, but this time you write your words instead of drawing boxes.
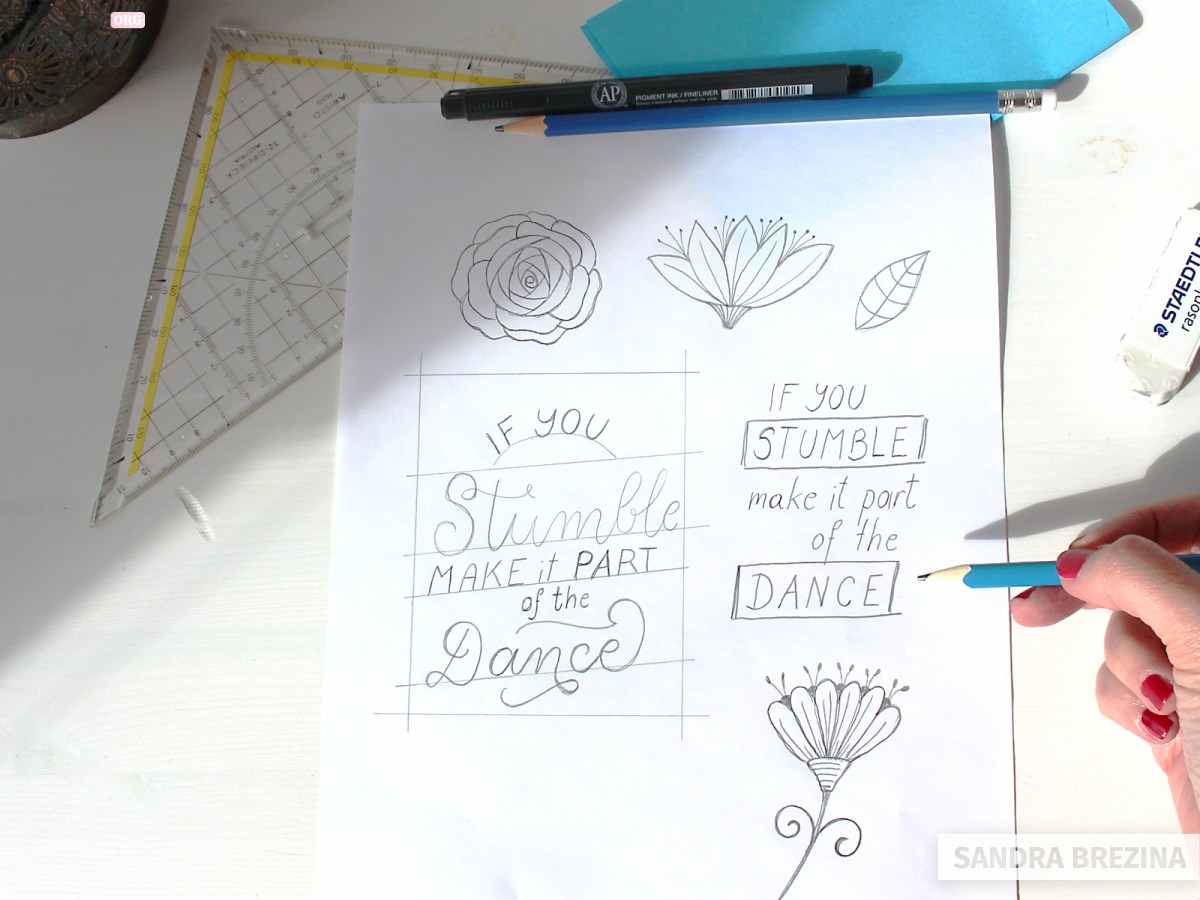
Tip: I recommend to draw the first sketch without using any lettering styles. Roughly letter your words to see if they fit in in a pleasing manner. Optimise your composition until you are happy with your solution. Draw decorative fillers for unpleasant empty spaces. Scribble your rough ideas onto your sketch.
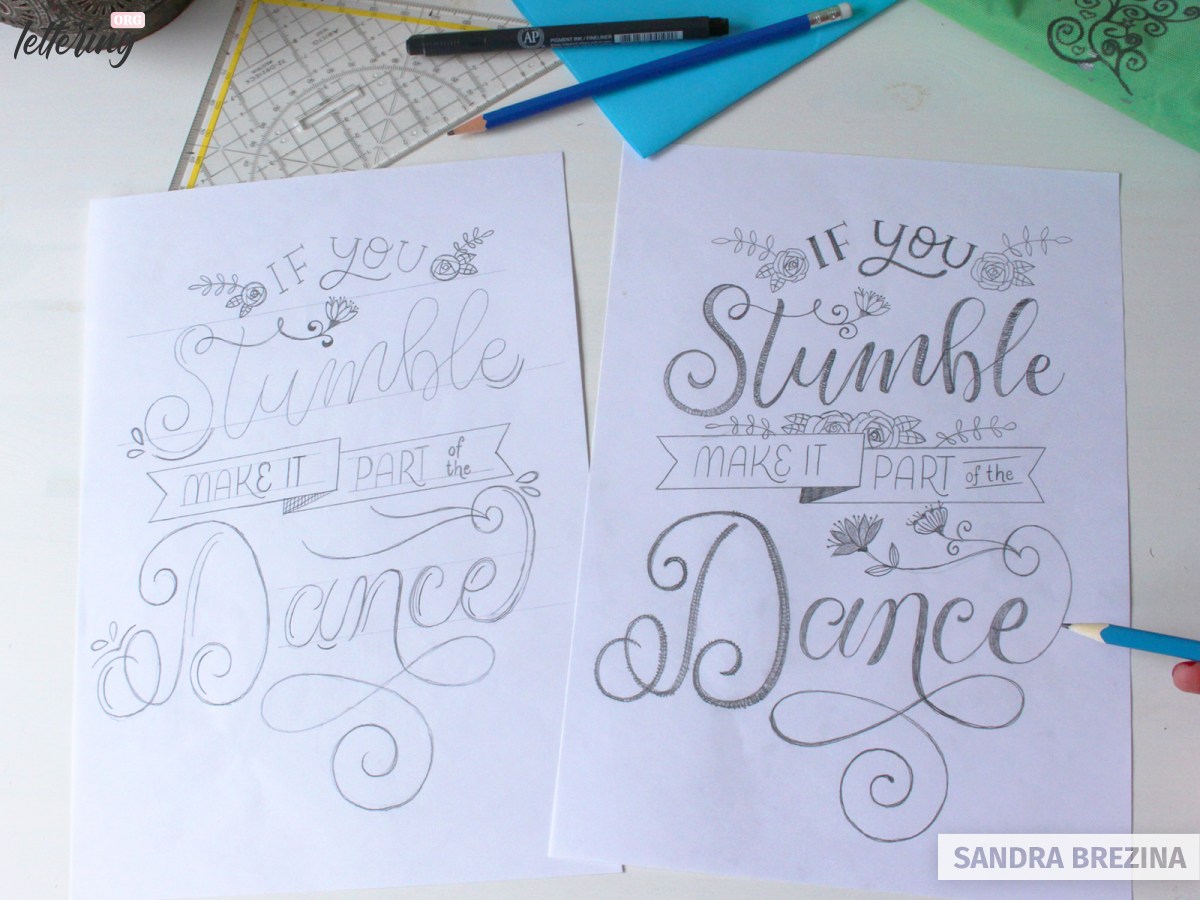
As soon as you have your final layout, place a transparent paper above your drawing and start elaborating the shapes of your letters.
Introduce two or three lettering styles and solve all the problems you come up with within the sketching phase step by step.
Grab your pens or something digital
As soon as you are ready with your well-prepared final sketch, grab your favourite tools or your Ipad or computer, and get your composition ready.
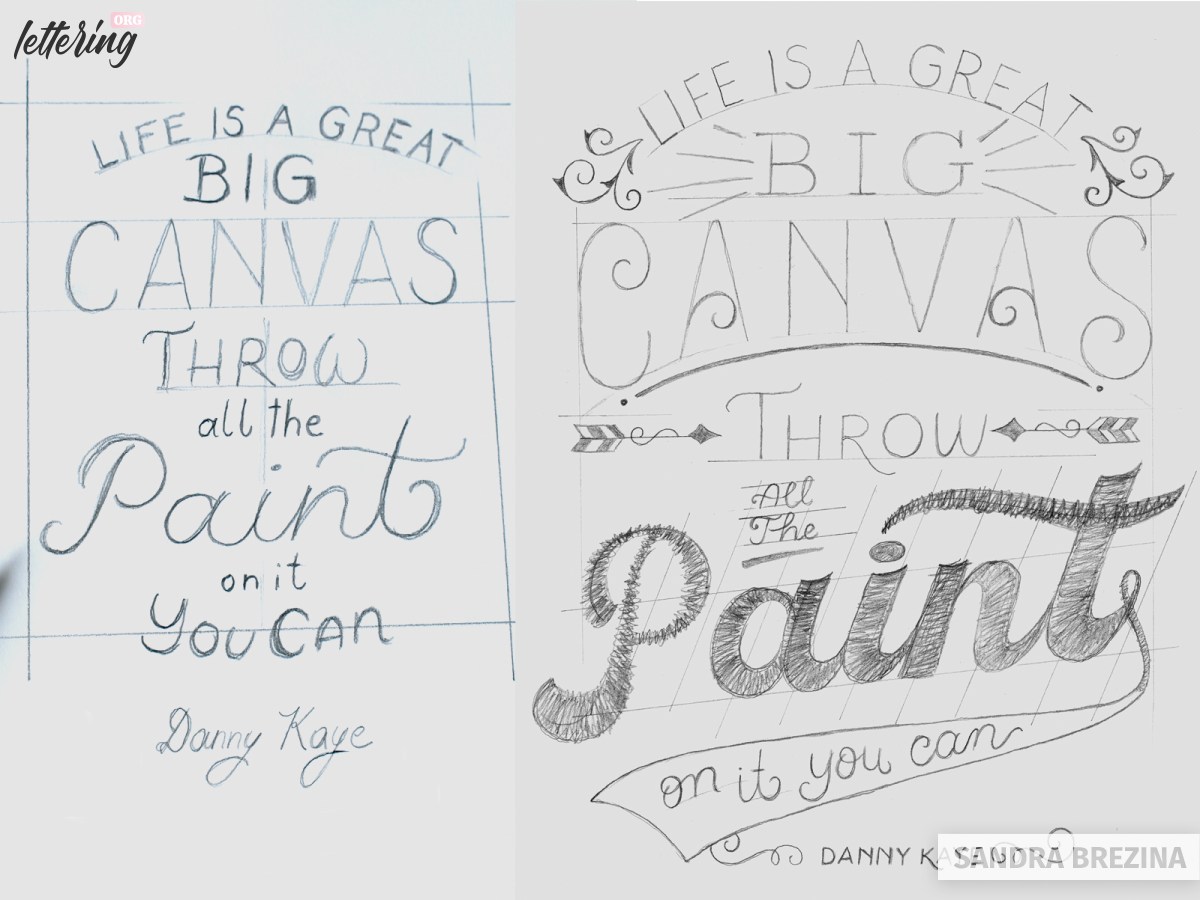
Congrats! After all these steps, you can be proud of what you have accomplished. I elaborated my piece in two ways, by drawing and digitally.
Bonus tip
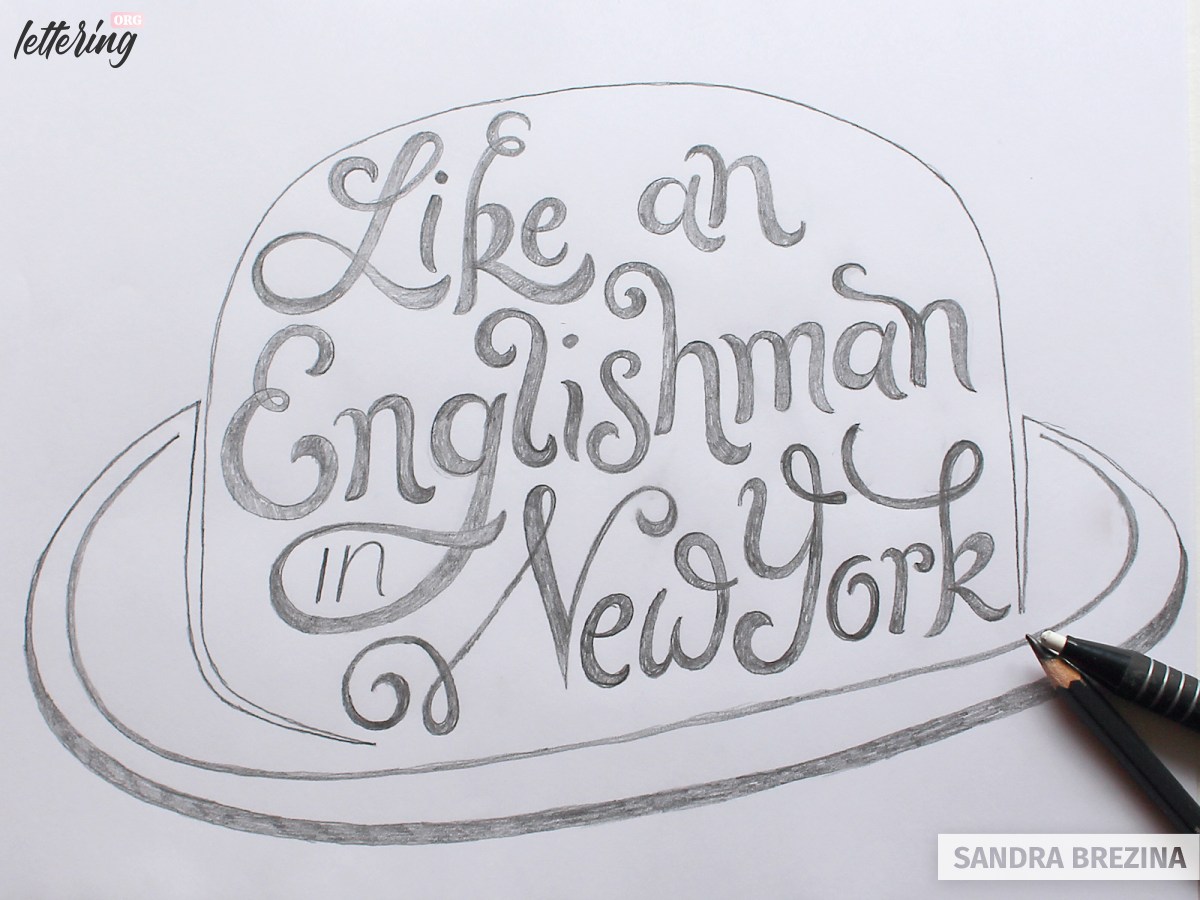
If you are still struggling with composition, I have an alternative for you to start with. Sketch out a shape, such as a circle, for example.
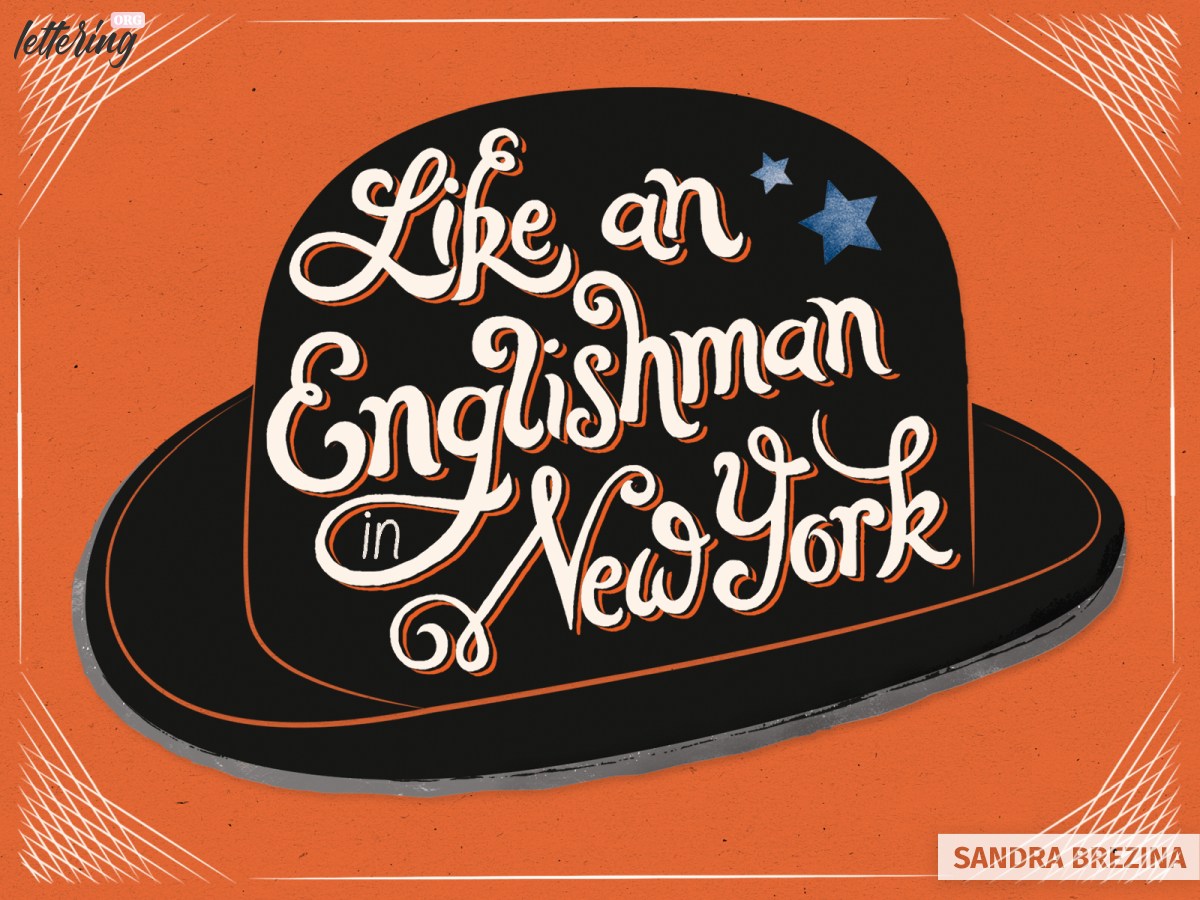
But if you like to create something more fancy, take an illustration. My demonstration example for you is a typically British bowler hat and the song lyrics: Like an Englishman in New York. Draw your illustration, place slanted lines within this shape and play with the shapes of your containers.
Concentrating on the borders of your illustration might help to create your letter shapes and composition with more ease than starting on a blank sheet of paper.
Inhale inspiration in case of a creative block
On social media like Pinterest you can always find amazingly composed lettering artworks and collections of layout grids. Inhale inspiration, but never copy.
In case of a creative block, I recommend the following step: Choose some great designs from the web and redraw them just by using their empty boxes. Try to use the shapes of these boxes for your own words or shift them a little bit around.

Use the lettering generator
If you want to test some compositions simply use the lettering generator. There is no faster way to test different styles, arrangements and decorations. Give it a try!
When you are happy with your composition you can event print it or just use it as a sketch.
Final words
I hope you enjoyed reading this tutorial and learning my tricks and approaches of creating hand lettering compositions. Have fun by lettering quotes and developing interesting or playful compositions. Stay amazing!