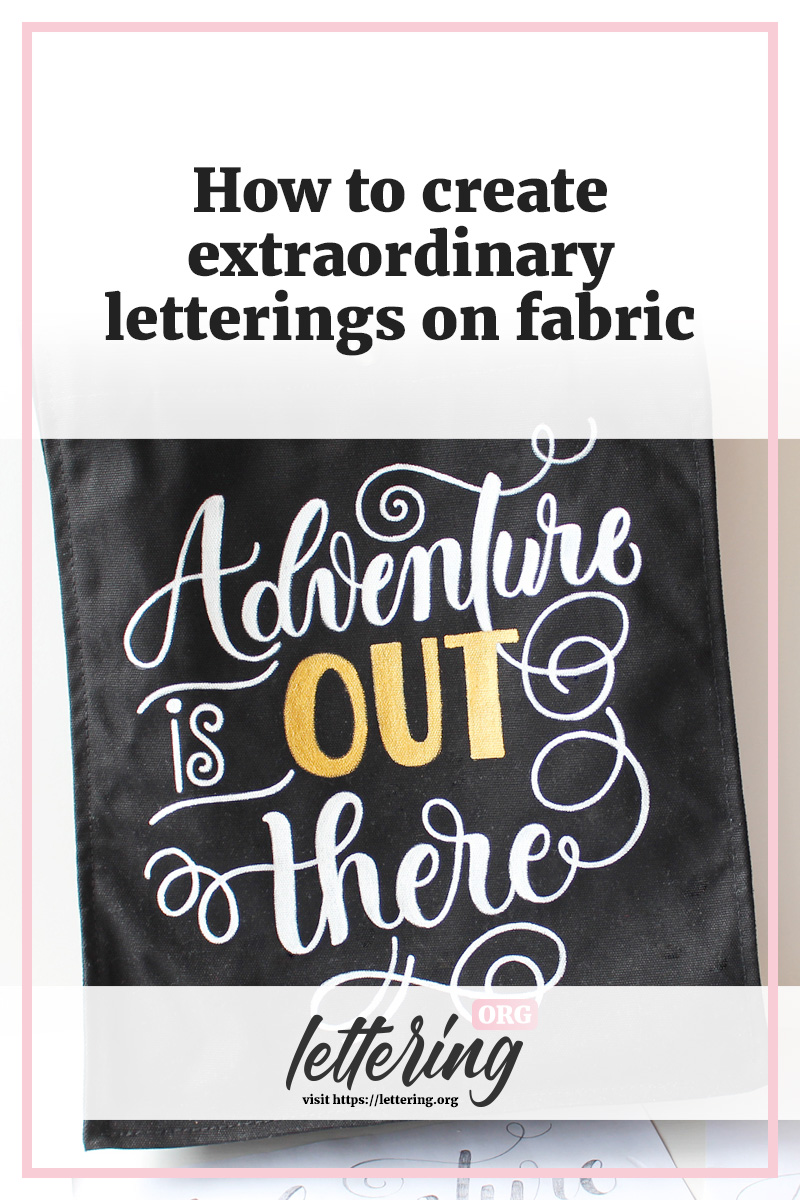
Lettering on cloth bags is a lot of fun! Think of the possibility of lettering cool statements on your shopping bags and turning them into very unique items.
By adding a personal touch, these cloth bags are also perfect gifts for friends and family. Not to forget: they are useful at the same time!
In this tutorial, I’ll be showing you my way to apply hand lettering on fabric, in particular on black cloth bags.
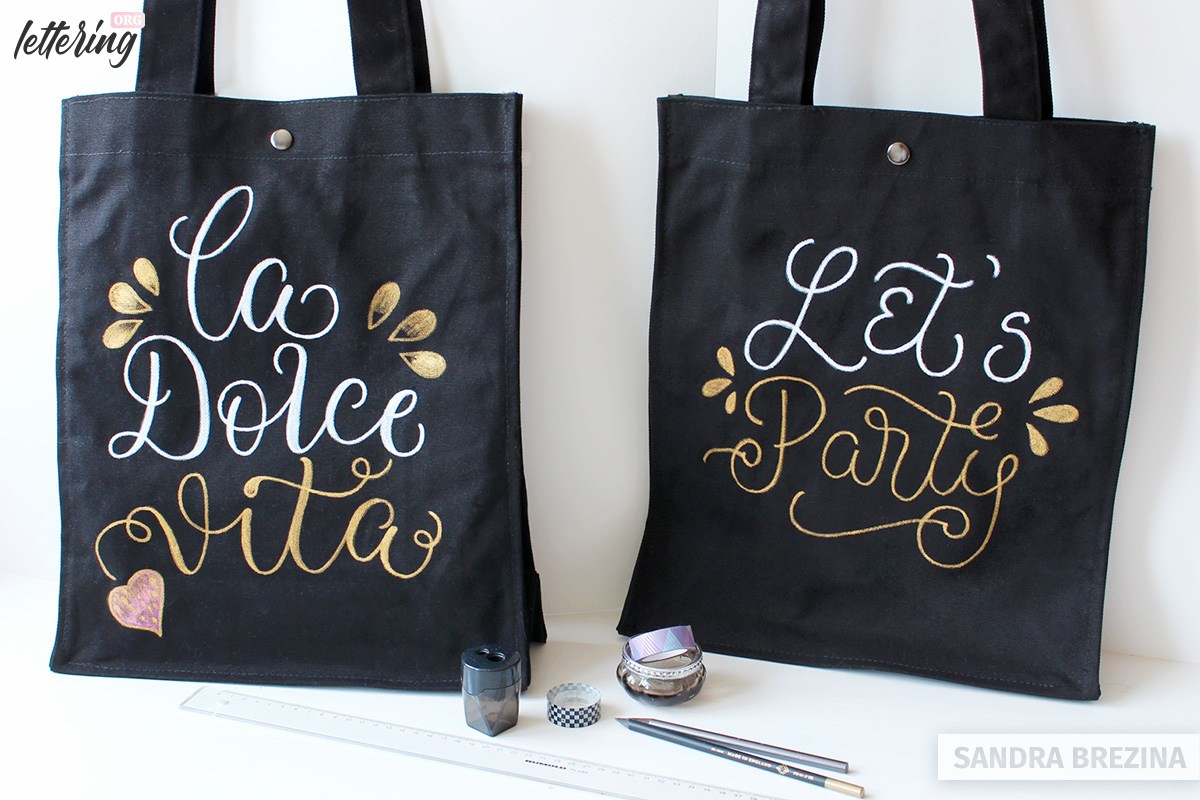
This tutorial is inspired from a live event at a designer store in Vienna, where I created countless personalized cloth bags for customers. The bags I turned into hand lettered statement items were deep black and branded with the logo of the respective company. Since the combination of black fabric, white and gold markers looks very stylish, I will be using the same tools here.
Please feel free to choose whatever is a perfect match to your style.
Contents
What you need
Cloth bag
First of all, get your cloth bag of course. At the live lettering event I was hired for, the company provided me with large cloth bags made of very thick-woven cotton.
Note: the thinner the fabric of your bag, the less layers of paint you need to achieve a beautiful opaque coverage. Furthermore, the process is easier since it is less time-consuming.
However, the thinner the fabric, the more creases you may have while writing. Of course, you can avoid this to happen by stretching the fabric between your thumb and index finger.
Art supplies
- Marabu fabric paint marker* (bullet point: 3 mm), white, gold and glitter gold
- Chalk pencil white* (I love to use the brand Cretacolor)
- Washi tape (optional)
- Transparent foil
- Scrap paper for your pencil sketches
- Tracing paper
- Piece of cardboard that fits into your bag
- Flat iron to fix your lettering
- Some kind of cloth or paper towel
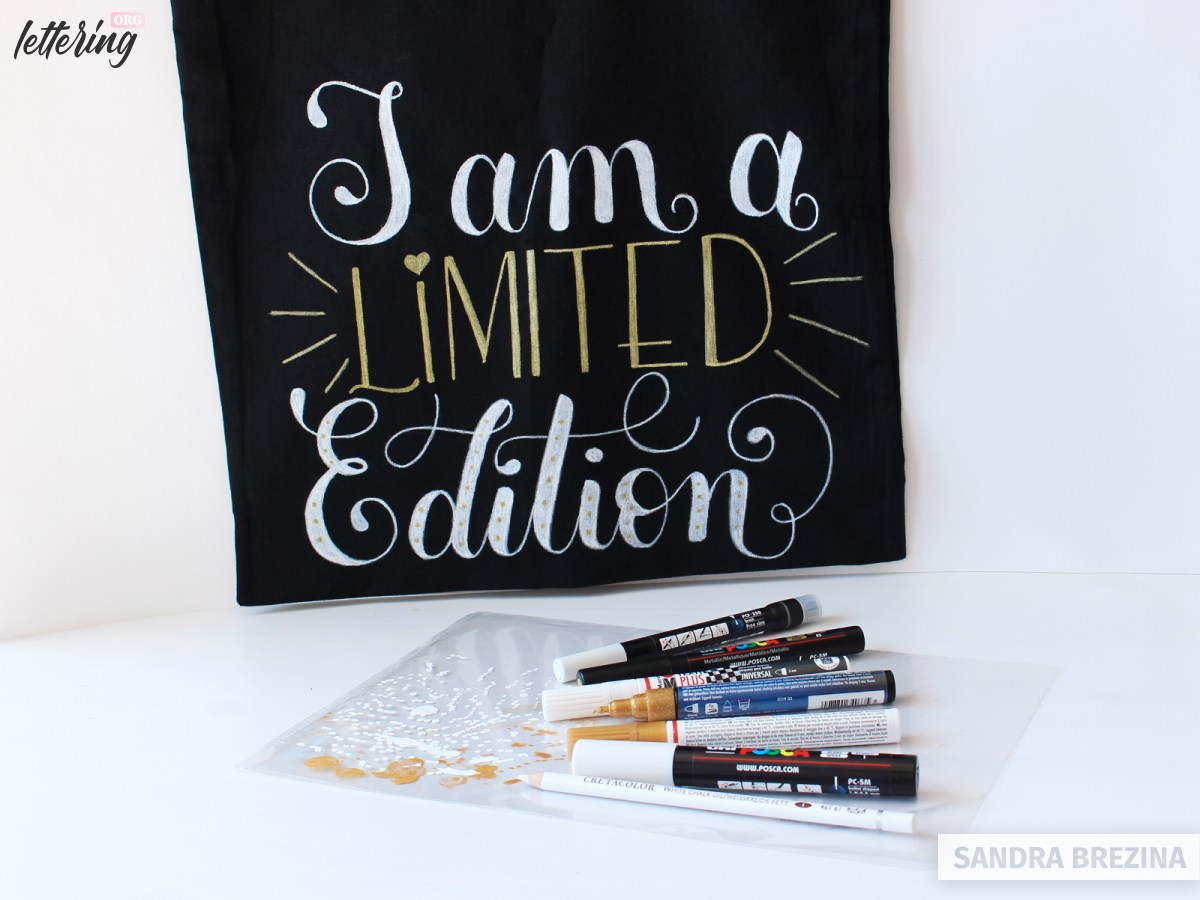
I experimented with several fabric paint markers, but the ones of Marabu are my favourite ones.
Before you start to develop any ideas, iron your bag to ensure that it lays flat without any creases.
Let’s dive in!
Create your design sketches
Measure the appropriate space
As soon as you know the required space for your hand lettering, you can start preparing your pencil sketches.
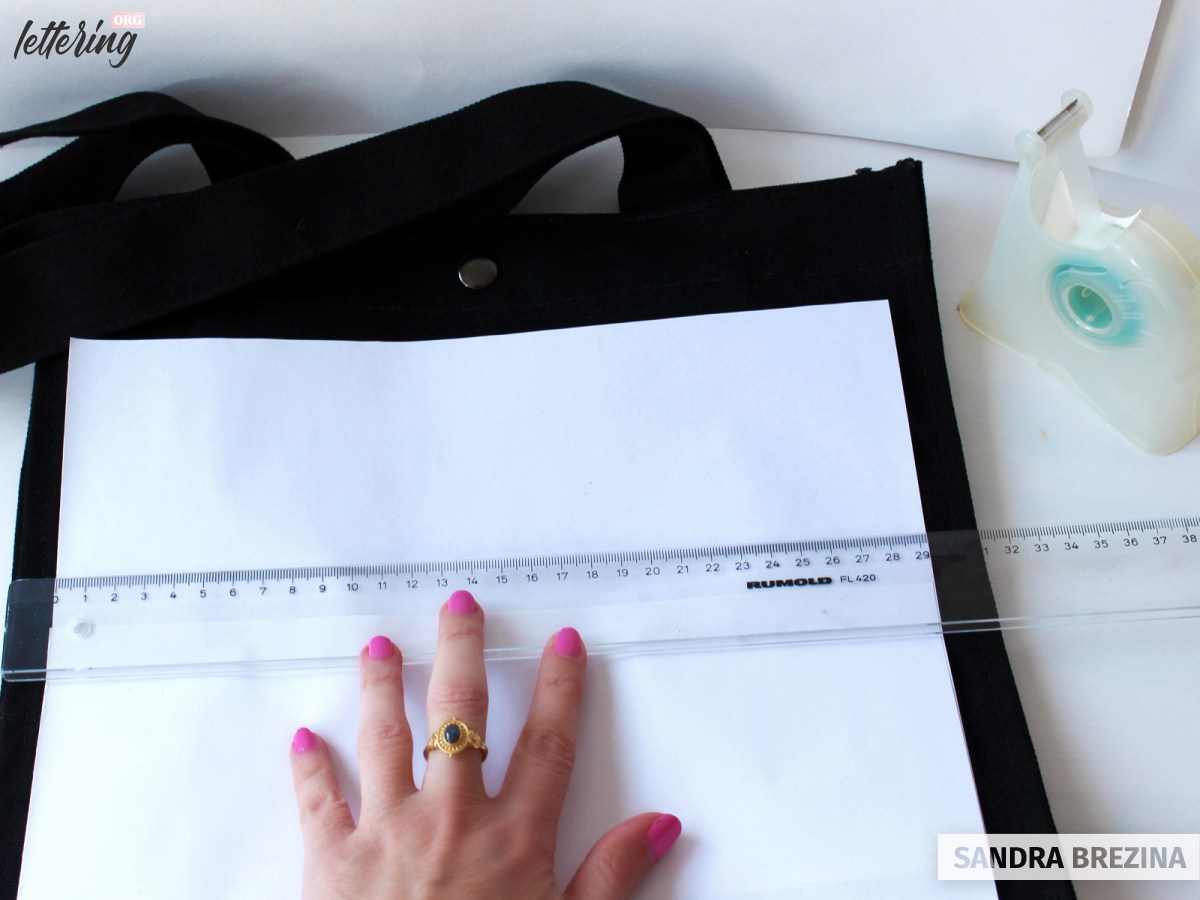
For this project, I take two sheets of scrap paper (DIN-A4) and stick them together in accordance to the area of my design. This amounts to 29 x 31,5 centimeters.
Pencil sketches
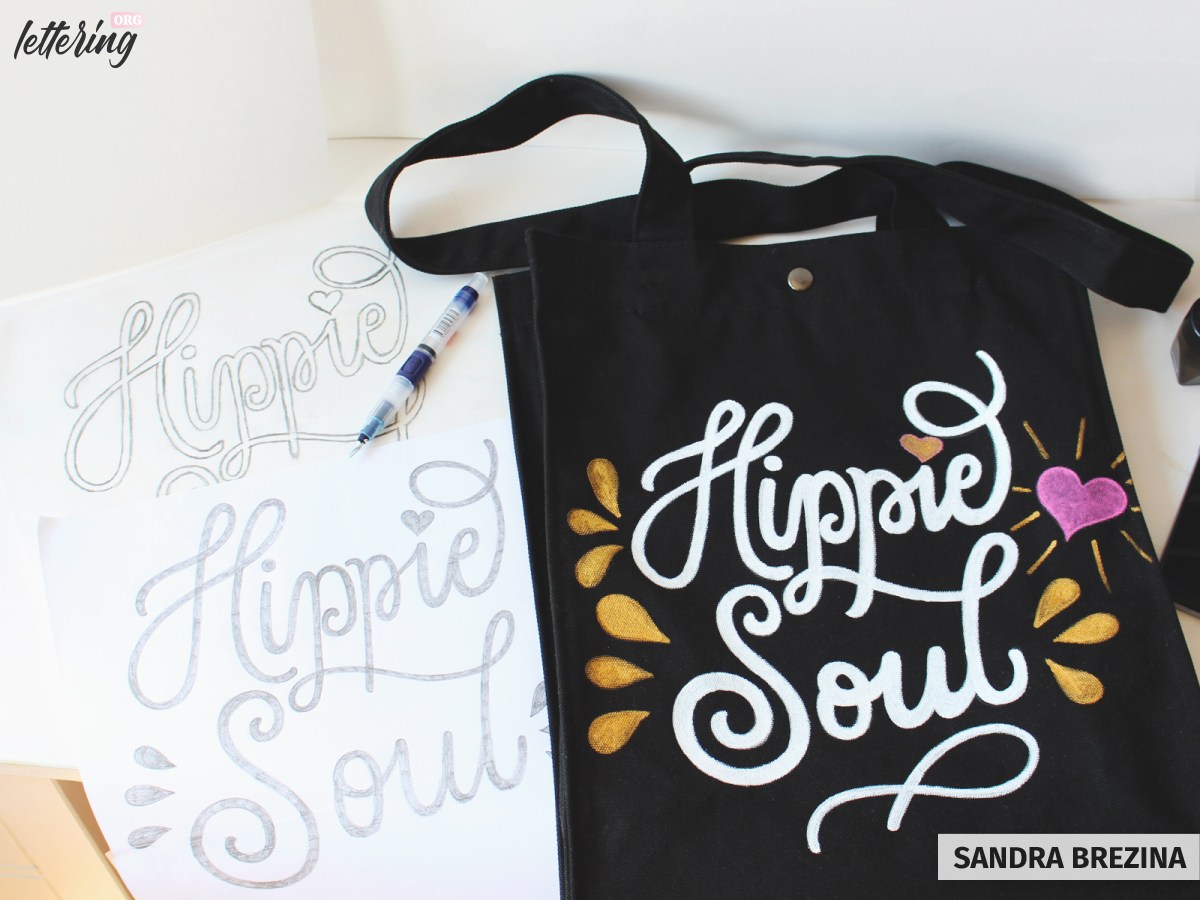
In my opinion, elaborating two or three sketches and optimising each version until you are totally satisfied is a good way to sharpen your muscle memory.
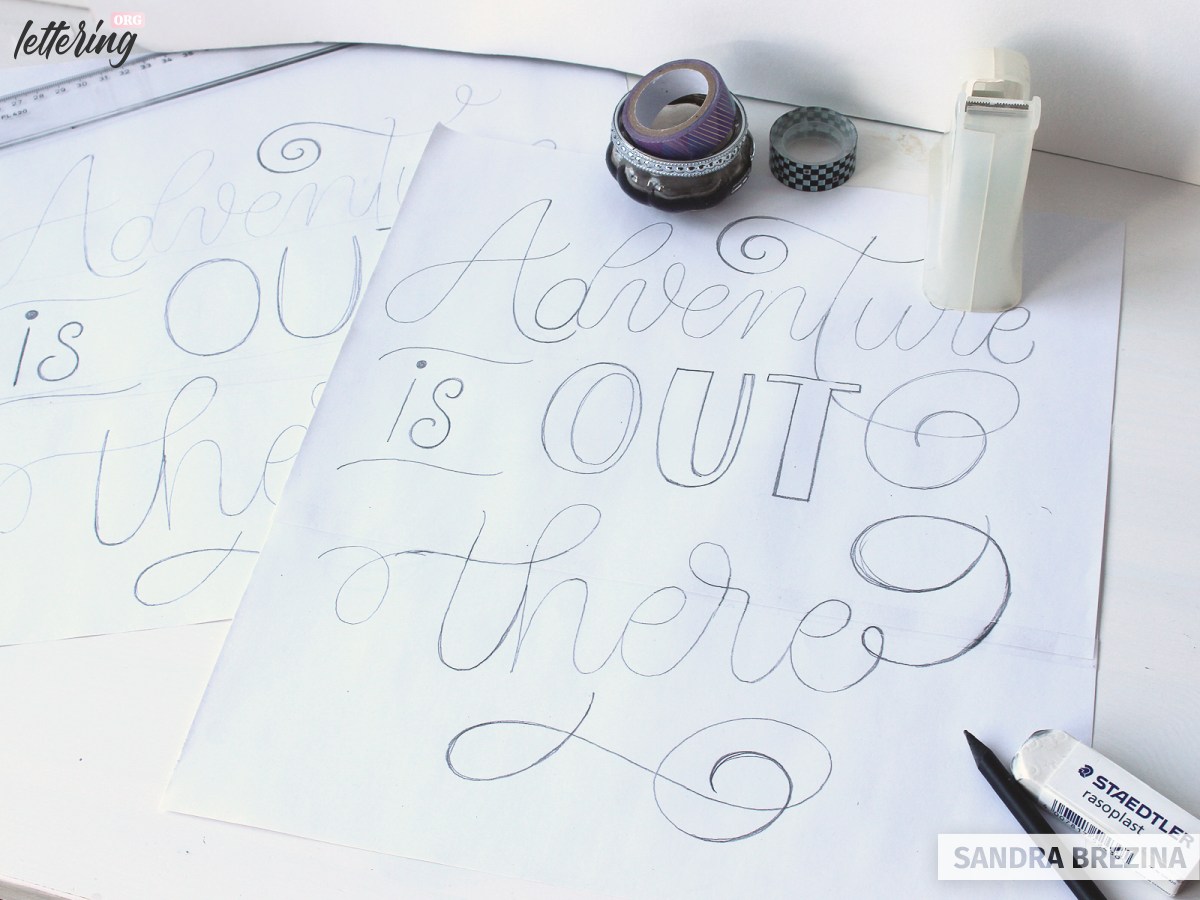
I complete my hand lettering by starting with a monolinear drawing which I convert into faux calligraphy afterwards.
To make my design more interesting, I decide to combine two types of letters: script and sans serif ones. My style is very playful and mostly full of flourishes. Flourishes are also efficient options to fill in any negative space.
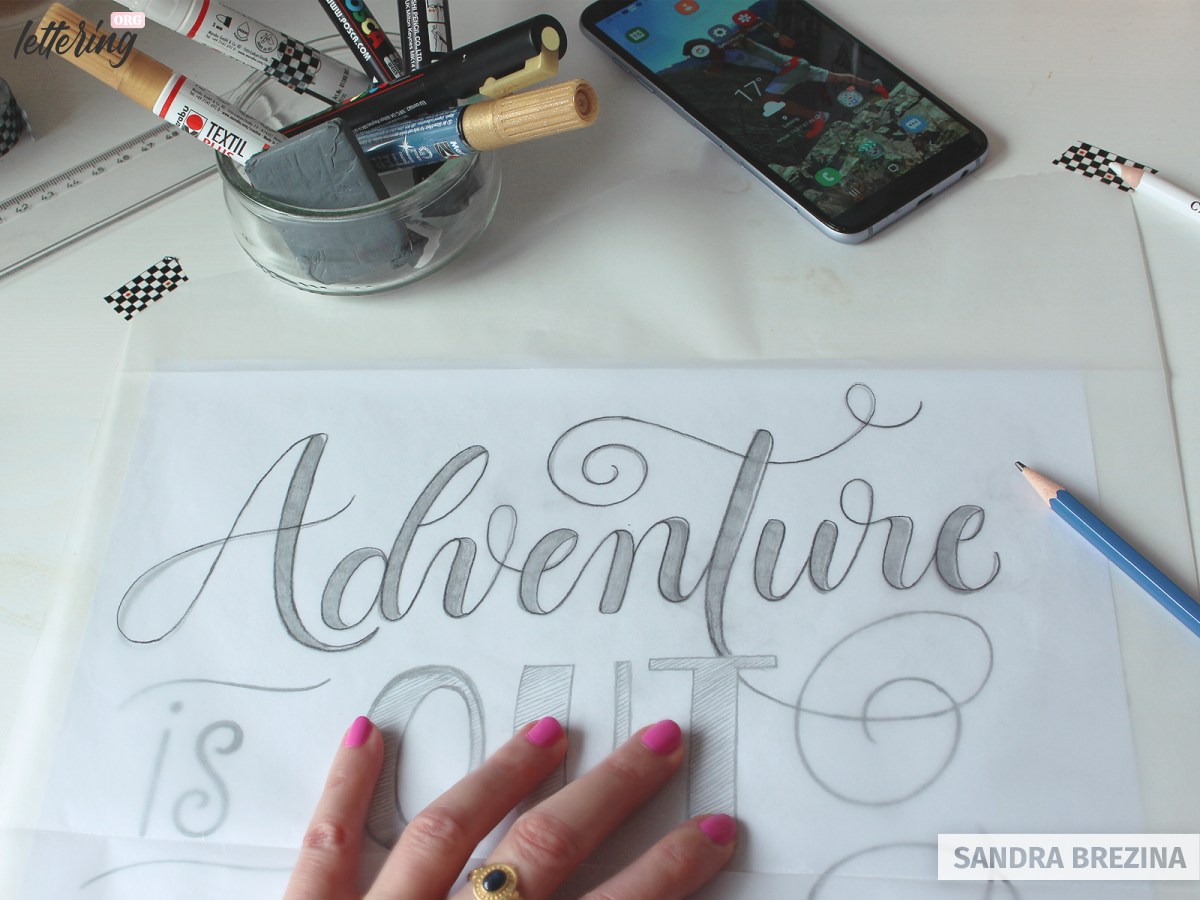
Develop your template
Refine your sketch to generate your final template.

Keep in mind that fabric paint markers – even with a fine broad tip of 3 millimeters – cannot imitate thin pencil strokes. Your letters will require more space in width when you switch to your fabric paint tools.
You can use your final drawing as a guidline for reference and transfer it with a white chalk pencil onto your fabric just by eyeballing the design. If you prefer to proceed like this, just skip the next step.
Transfer your design onto the fabric
Prepare your template
If you hesitate to copy your design directly onto your cloth bag just by eyeballing it, this trick is for you! Place a tracing paper over your template. Take a pencil and draw a line as precisely as possible over the contours of your lettering. I use a washi tape to fix the tracing paper onto my desk.
Turn the page, so you have the design back-to-front and put some scrap paper below to avoid to copy your drawing onto your desk 😉
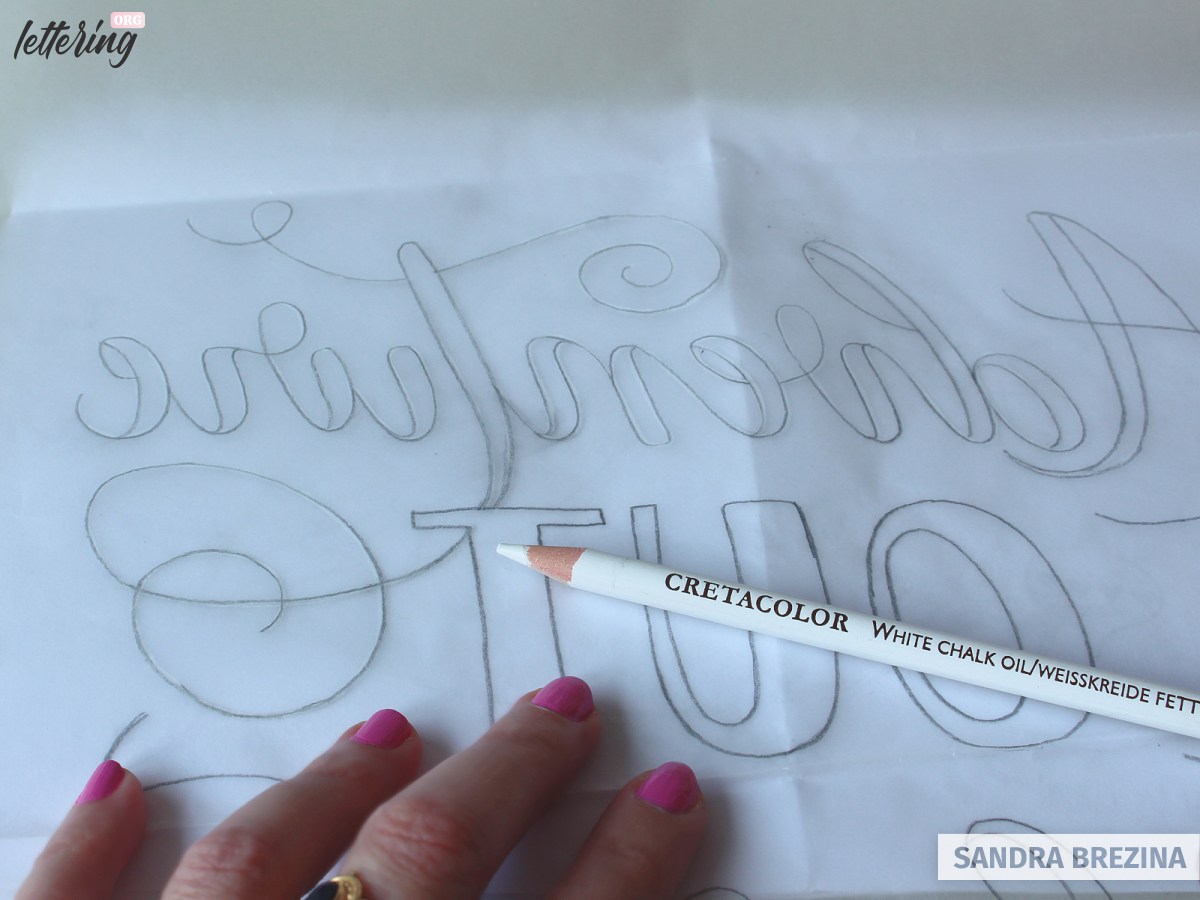
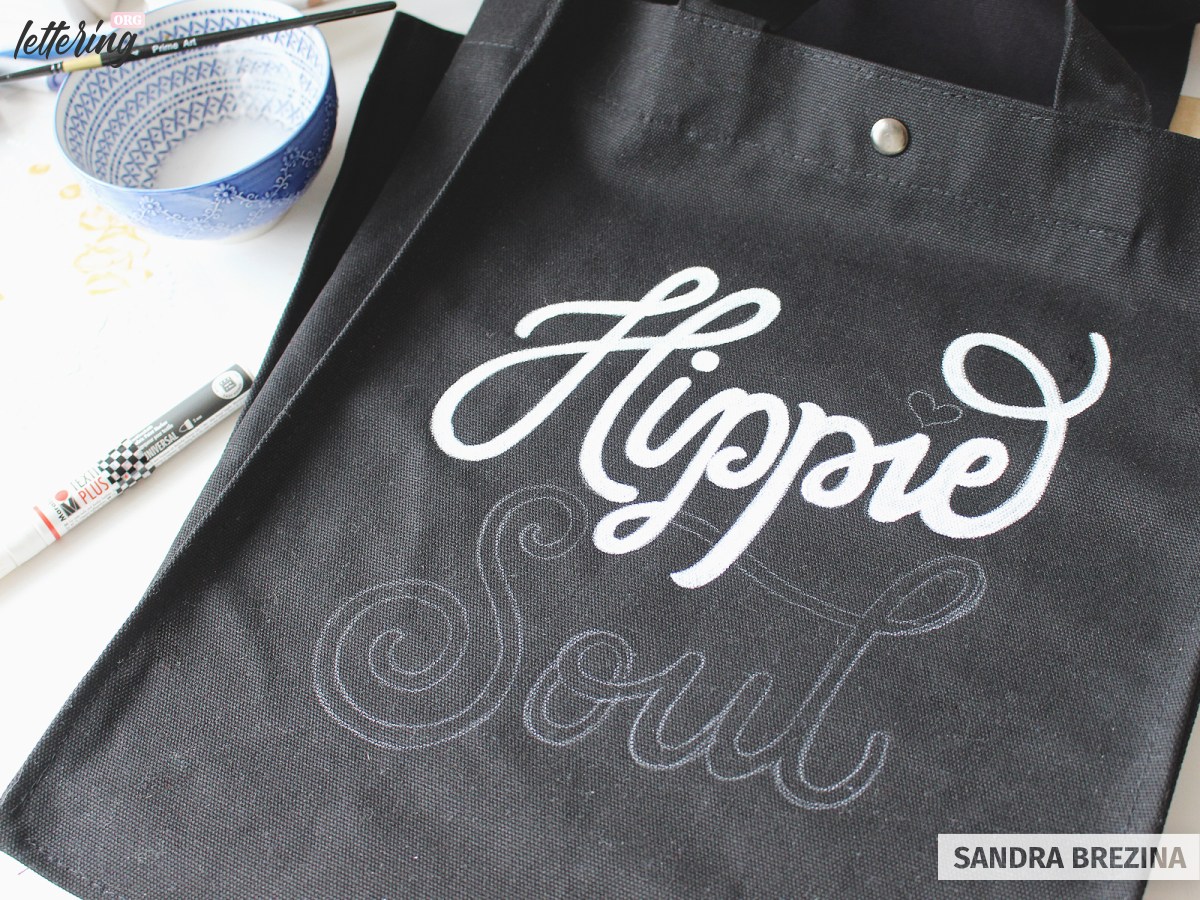
Take a white chalk pencil and follow as precisely as possible over your pencil lines. You will not see much, but your grey pencil drawing should become lighter because of the white chalk residues.
Copy your hand lettering to the fabric
Now it’s time to take your cloth bag. Put a piece of cardboard inside to have an optimal base and prevent paint from seeping through the reverse side.
Arrange the tracing paper on your cloth bag as preferred.
When you place the tracing paper on your bag, be careful. Avoid moving it around. Your chalk drawing leaves unpleasant smudges.
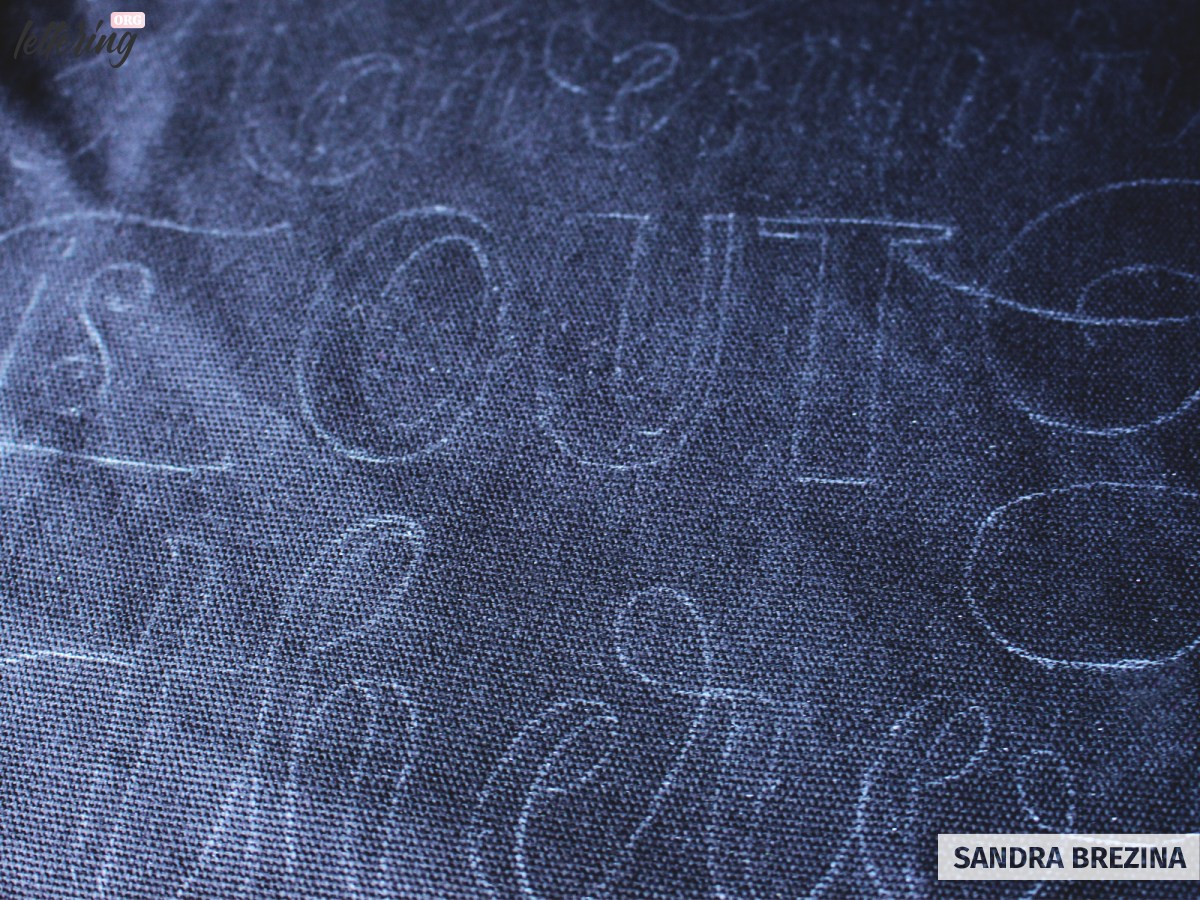
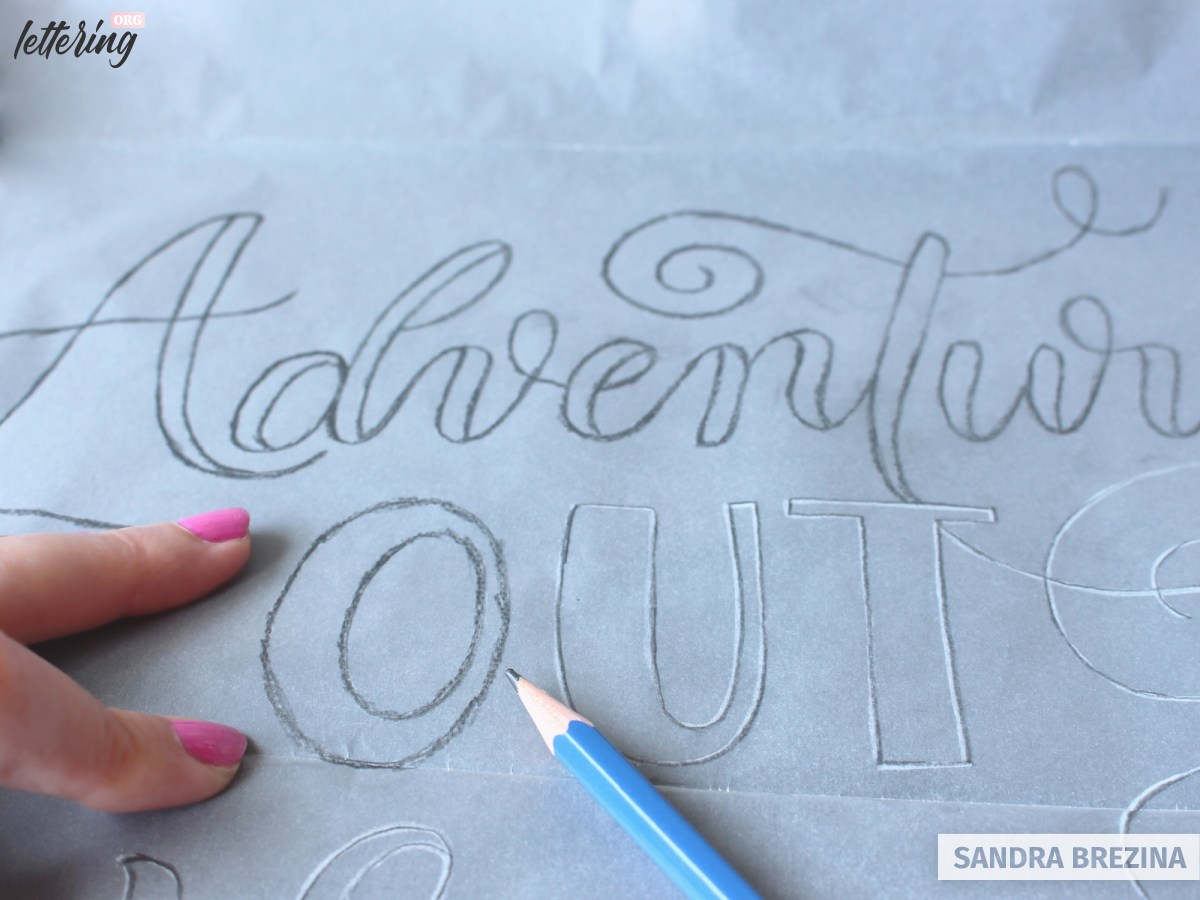
Take a pencil and follow the exact lines of your original drawing on the tracing paper. The chalk dust you left on the reverse side will be copied to your fabric. You will receive a very faint result, but the tracing is sufficient enough to proceed.
It’s time for the fun part
Before you start with your paint markers, be well prepared with a transparent foil to test the flow behaviour of your tools.
Fabric paint markers do not behave like acrylic markers. You have to be patient and pump a lot of paint onto the foil to activate them and make them work.
This has to be repeated throughout the whole process of creating your hand lettering. For fine lines, you can use a thin brush as well. Dip it into the paint you leave with your markers on the foil.
Place a cloth or paper towel on top of your hand lettering (or chalk lines) in order to protect your letters from getting smudged.
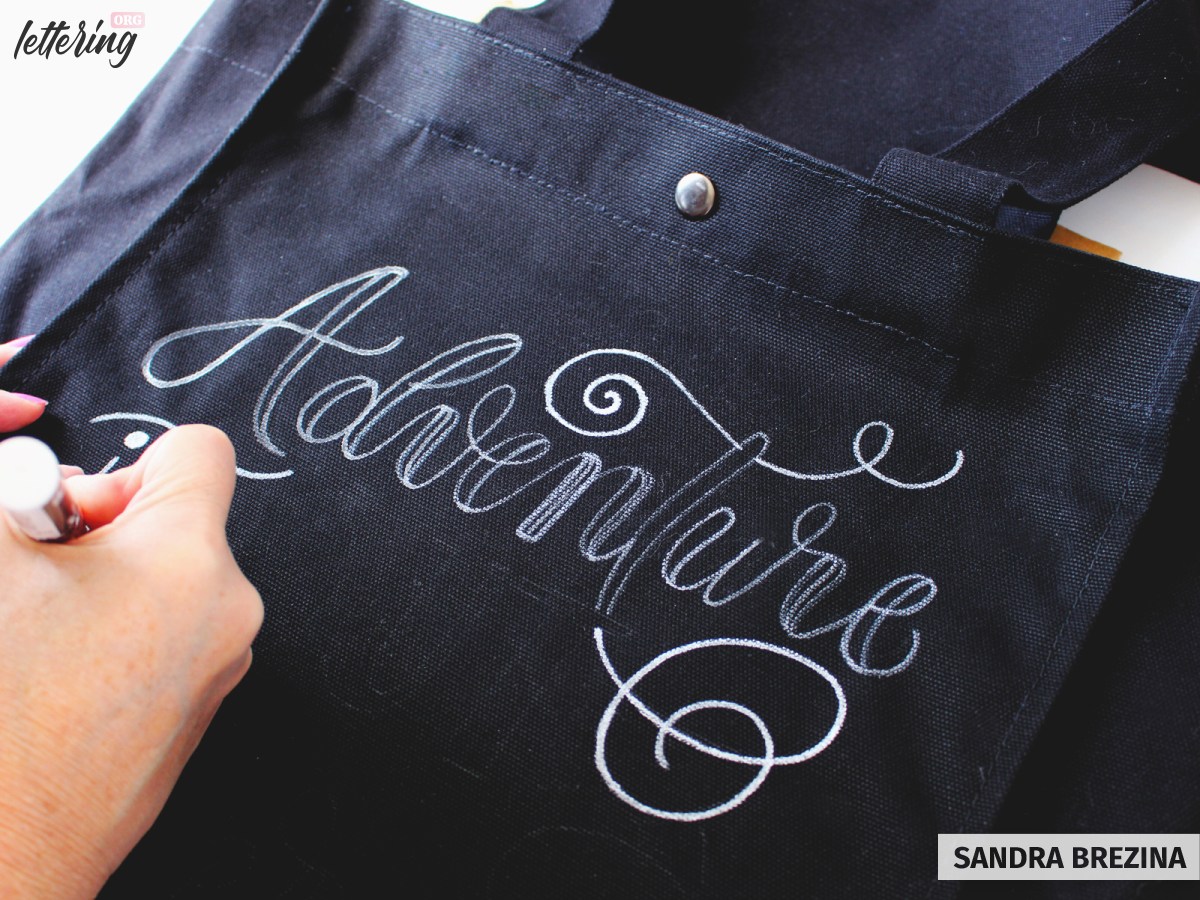
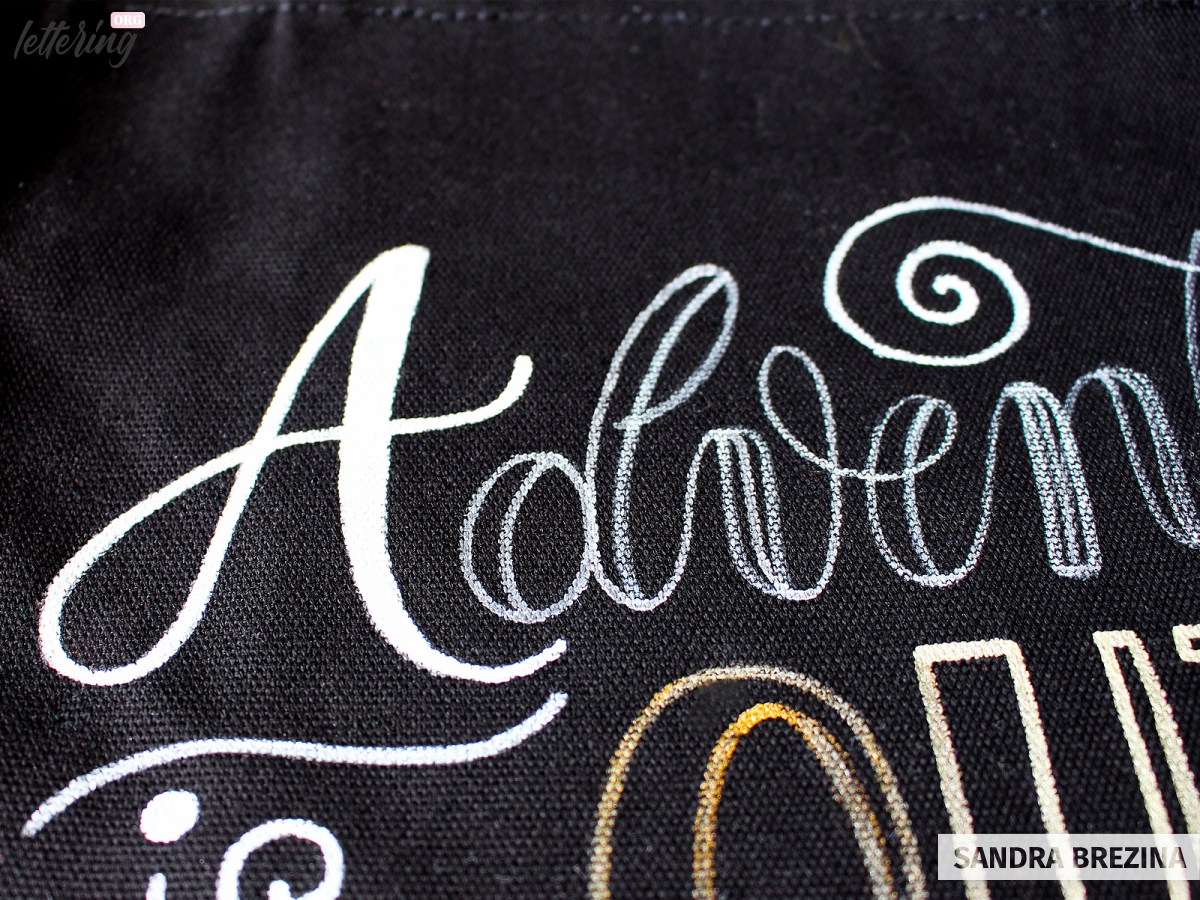
Redraw your hand lettering and proceed as you like. I like to draw my contours first and then fill in my letters with paint. The thicker the fabric, the more layers of paint you need to get a beautiful opaque coverage.
So turn on some good music, relax and enjoy the process of layering.
Fix your hand lettering
Most of the fabric paint markers I know work on the same basis. You have to put a clean cloth above your dried lettering and iron your design for about 3 minutes without steam to fix it.
Note: without using a cloth above your design, ironing will smudge and ruin your lettering.
Once you ironed your cloth bag, you can even put it into the machine and wash it at 40° Celsius. And rain cannot do any harm to your hand lettered bag anymore.
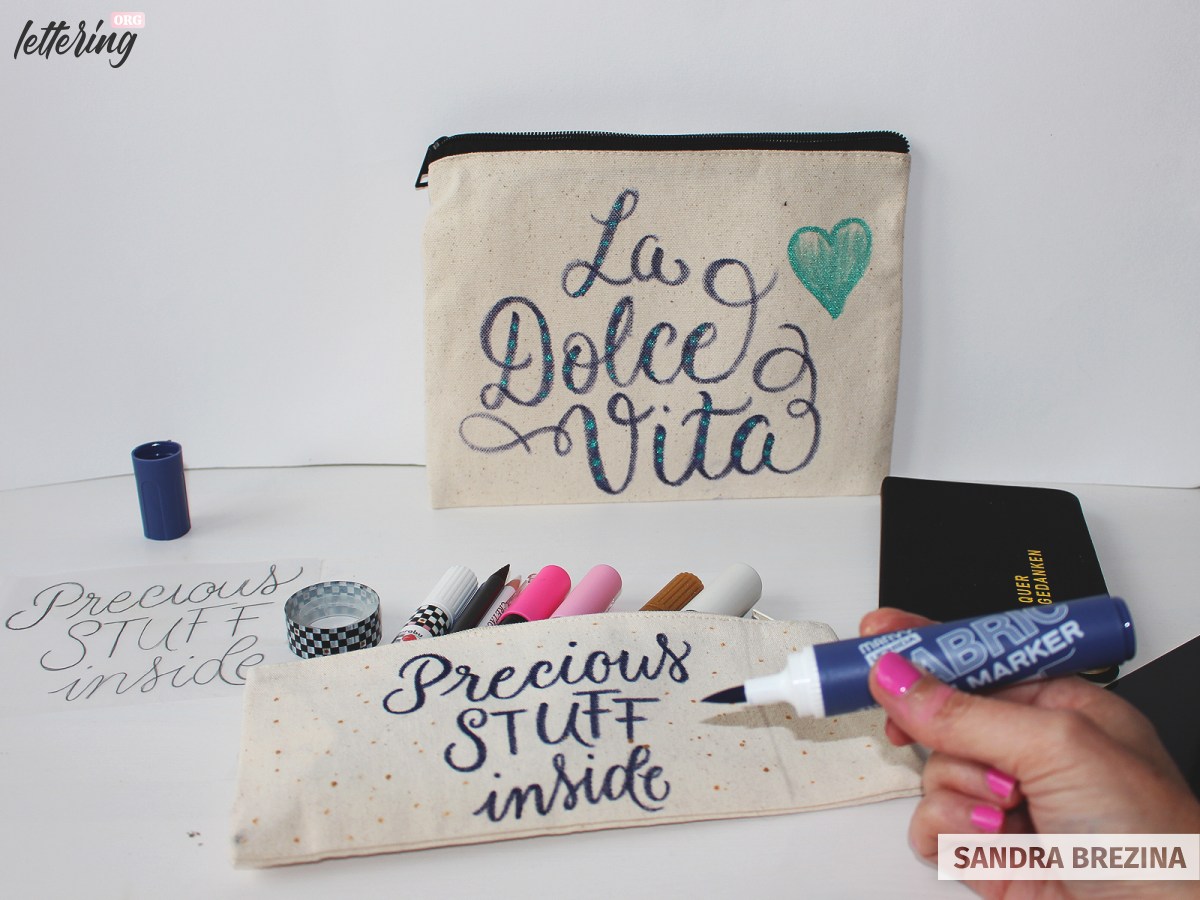
Further inspiration
Add more colors
For my „Happy Soul“ design I tried to apply fabric paint with a brush. However, after drawing only half of a letter, I switched to my fabric paint markers which are more comfortable for me to use.
Fabric paint is a very paste-like media and in my opinion very hard work to distribute onto the fabric surface. That’s why I tried to dilute it with adding water, but then the white color was too transparent to cover my deep black fabric.
As you see, I added pink as third color to give my hand lettering an additional highlight.
Fabric brush pens
If you prefer to have a real brush lettering feeling on fabric, I recommend a very special tool: the fabric brush pens of Marvyuchida.
Furthermore, you do not have to iron your hand lettering after writing.
Last but not least: these tools are available as sparkling fabric brush pens as well! 🙂
The only thing you have to keep in mind: they cannot be used on dark fabrics since their coverage is not comparable to the fabric paint markers I showed you in all the previous steps.
If you ask yourself how I can follow all these steps at live lettering events without having any time management problems. Well, you are right. At live events, I omit the step of developing sketches, tracing them and copying them onto my fabric.
Final words
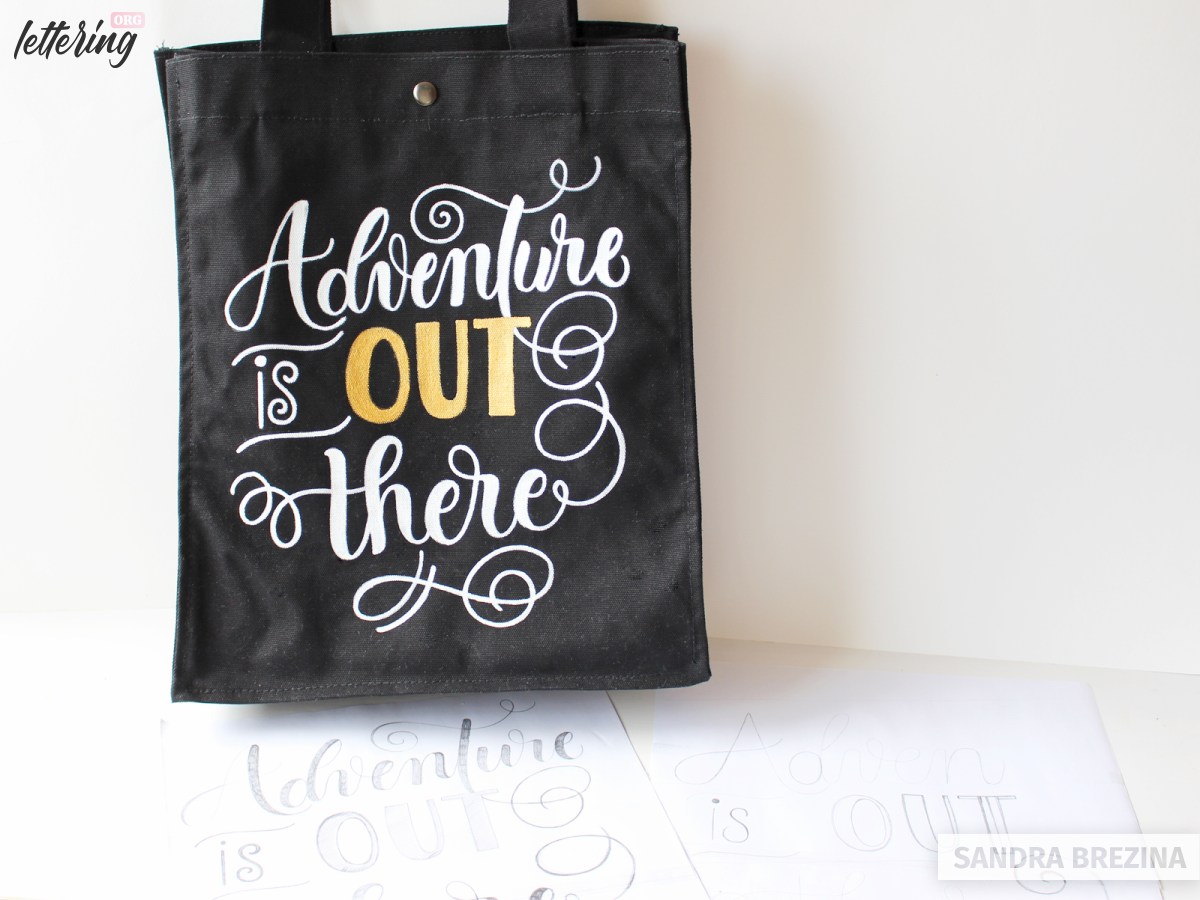
There you have it, your beautiful handmade cloth bag, embroidered with your unique hand lettering.

I really hope that you had fun in reading this tutorial and creating your own hand lettered cloth bag.
As you may have noticed from my photos, different fabric textures give the design additional charm and slightly change the color and appearance of the painted letters.
Keep creating memorable bags for yourself and for your beloved ones or for various occations. Stay amazing!