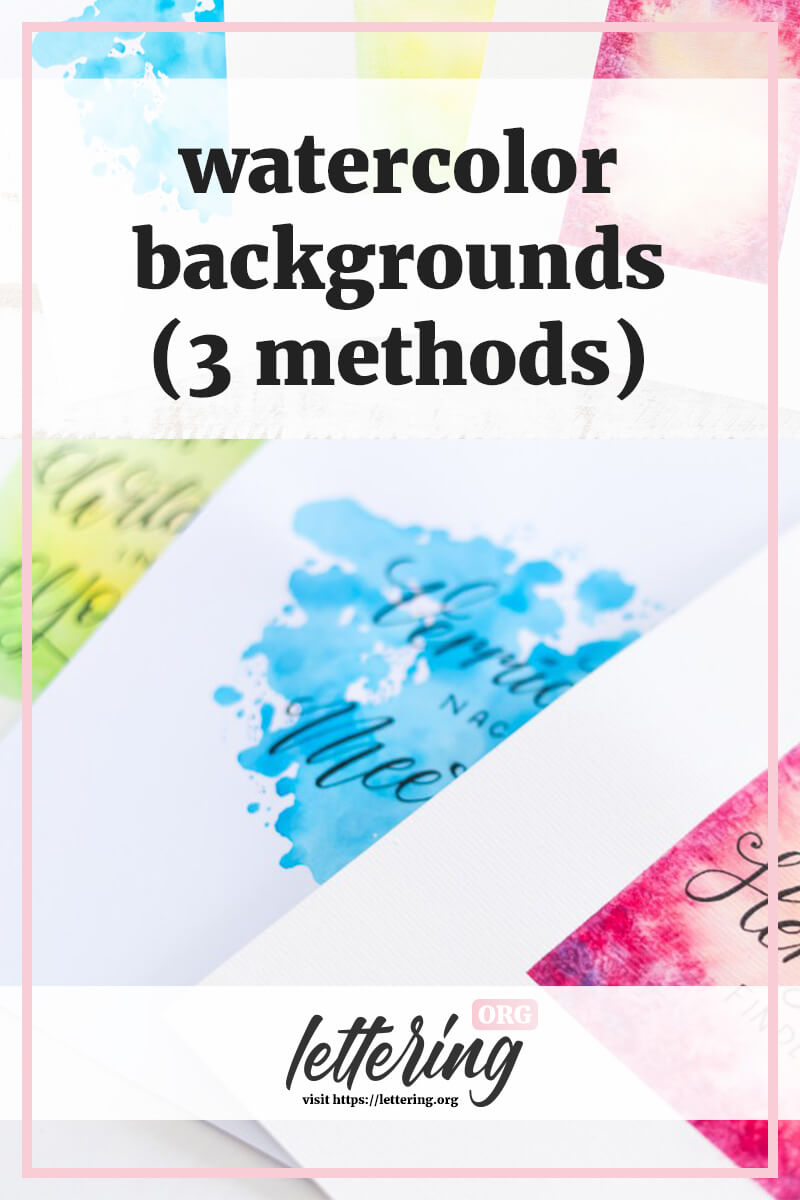
Watercolors are perfect as background for your hand and brush letterings. What sounds simple, however, requires one or two tricks.
In this tutorial I show you how to create great watercolor backgrounds. With brush pens, brushes or watercolor crayons.
For watercolor techniques you should also use appropriate (watercolor) paper. Only the first method also works with thick printer paper.
Contents
What you need
Depending on the method you need different tools.
- Mix Media Paper*
- Smooth lettering paper*
- Crepe tape* (high quality)
- Watercolor pencils*
- Ink box / paint box*
- Brush pens* with the thickest possible paint application
- Large brushes*
- Smooth surface (e.g. foil or plastic folder)
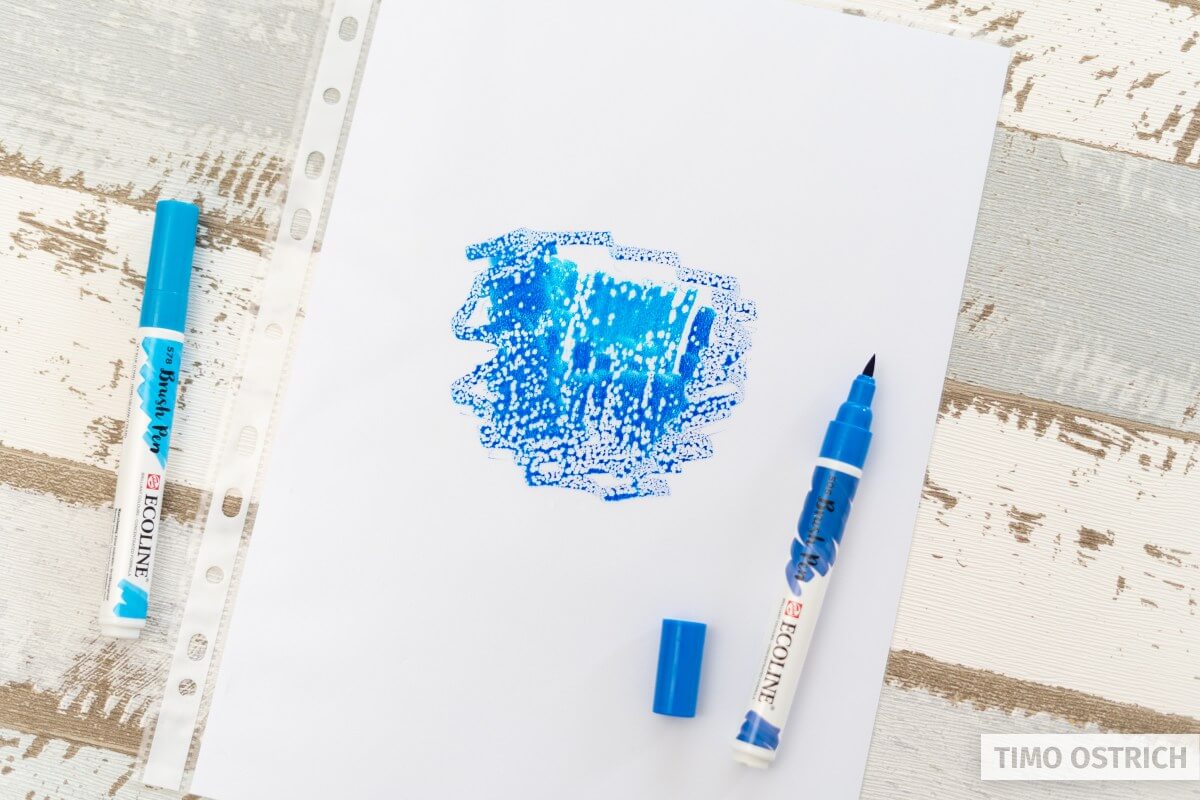
With brush pens and foil
If you only have brush pens (or felt-tip pens) at your disposal, you cannot paint typical watercolors. The pens usually do not release enough paint to cover large areas.
This makes sense, because brush pens are designed to only give off as much paint as you need for one stroke.
However, we can trick this behavior to create colorful watercolors with brush pens as well.
All you need is a foil and some extra water.

Here’s what you do:
First, with your brush pens or felt-tip pens, draw on the foil. Apply as much color as possible. You can also use different colors here.
In the second step you mix your paint with some water so that the colors can flow into each other.
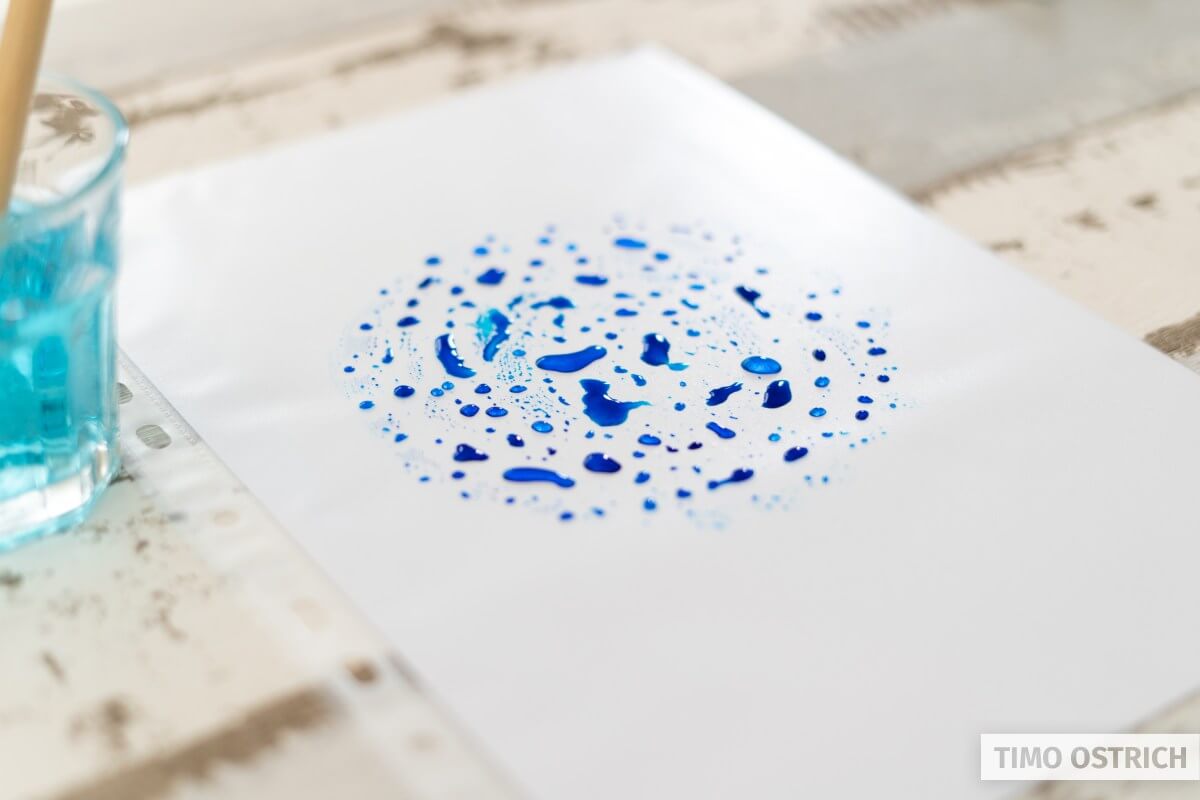
Now you press the front of your paper directly onto the foil. This will spread the ink over a large area and randomly on the surface.
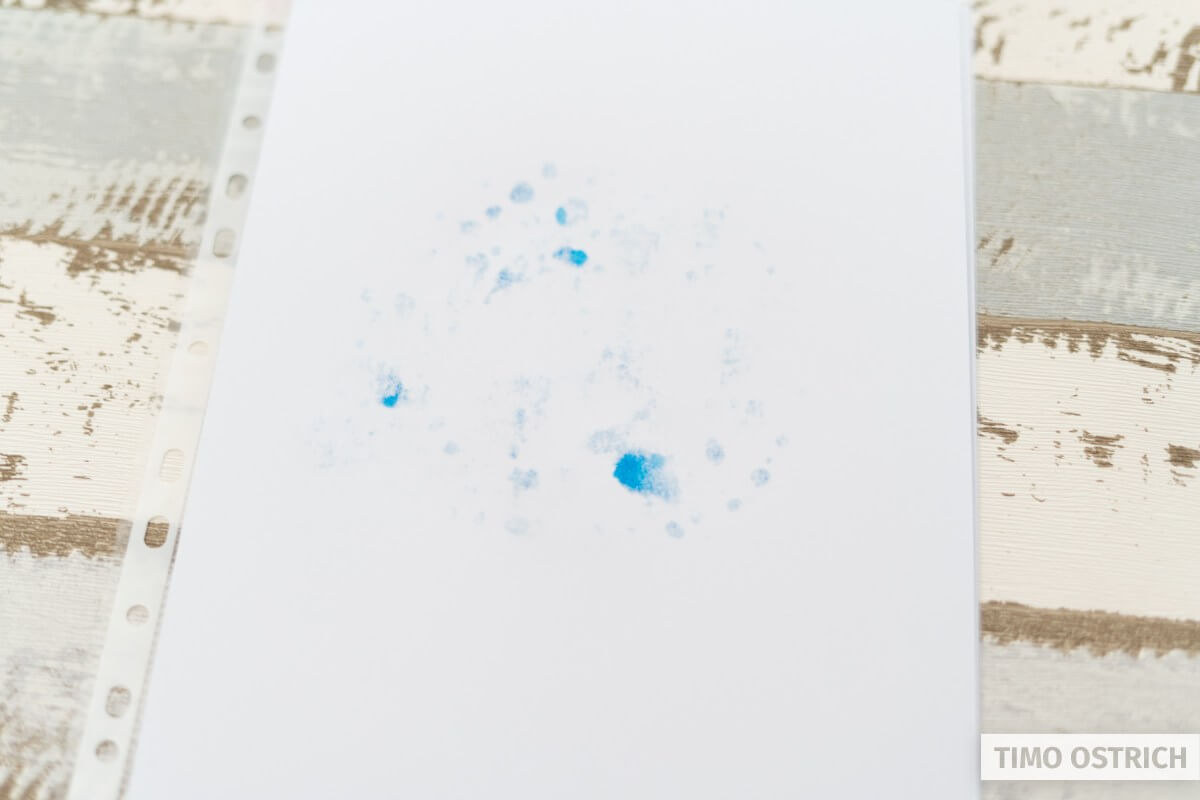
Take the paper back up and let it dry a little before you write on it. Well – how do you like your watercolor background?
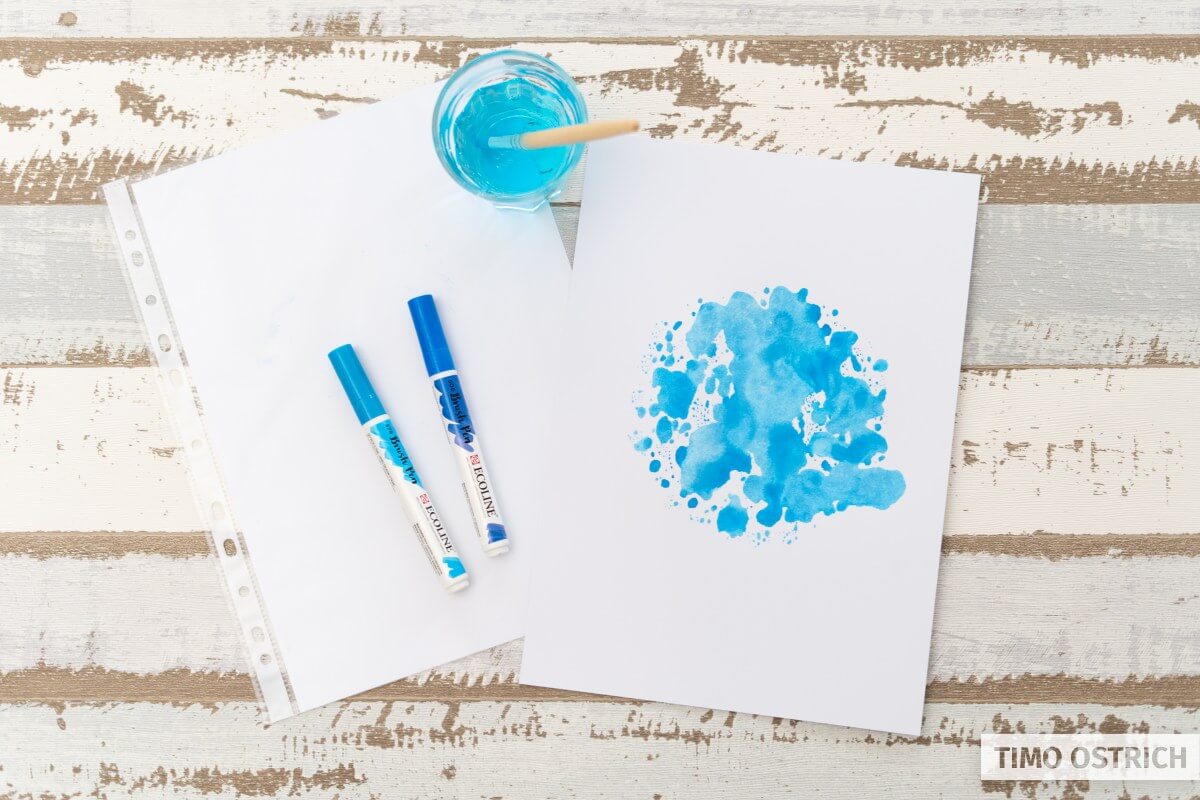
The beauty of this technique is that you can use smooth lettering paper. It just needs to be thick enough. In this case, I used 300g of paper. This way you can perfectly sit on it without endangering your brush pens.
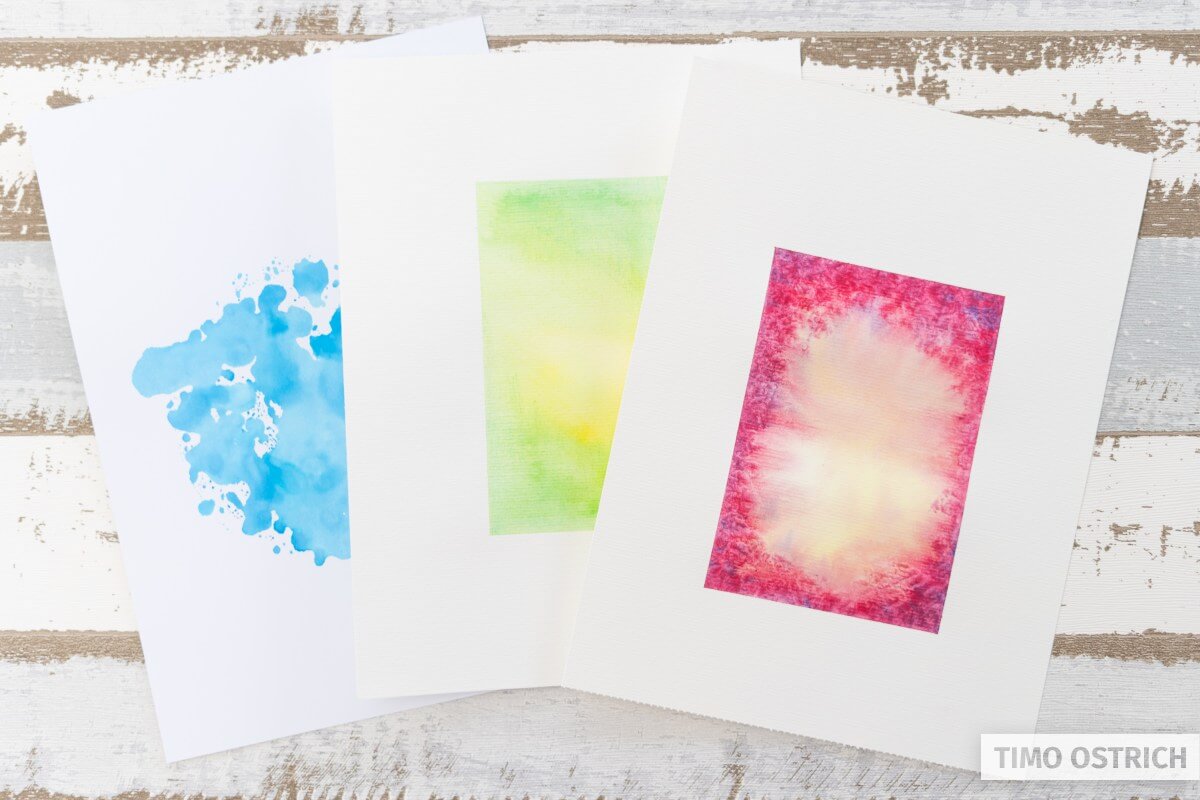
With liquid ink
The classic method to create beautiful watercolor backgrounds is the use of brushes and liquid paint. Also an ink box (paint box) is suitable, if you dilute the colours sufficiently.
I like to tape the edges here to get a nice, clean edge later. Test in any case how well you can get the masking tape off again. There is the danger of tearing off the paper!
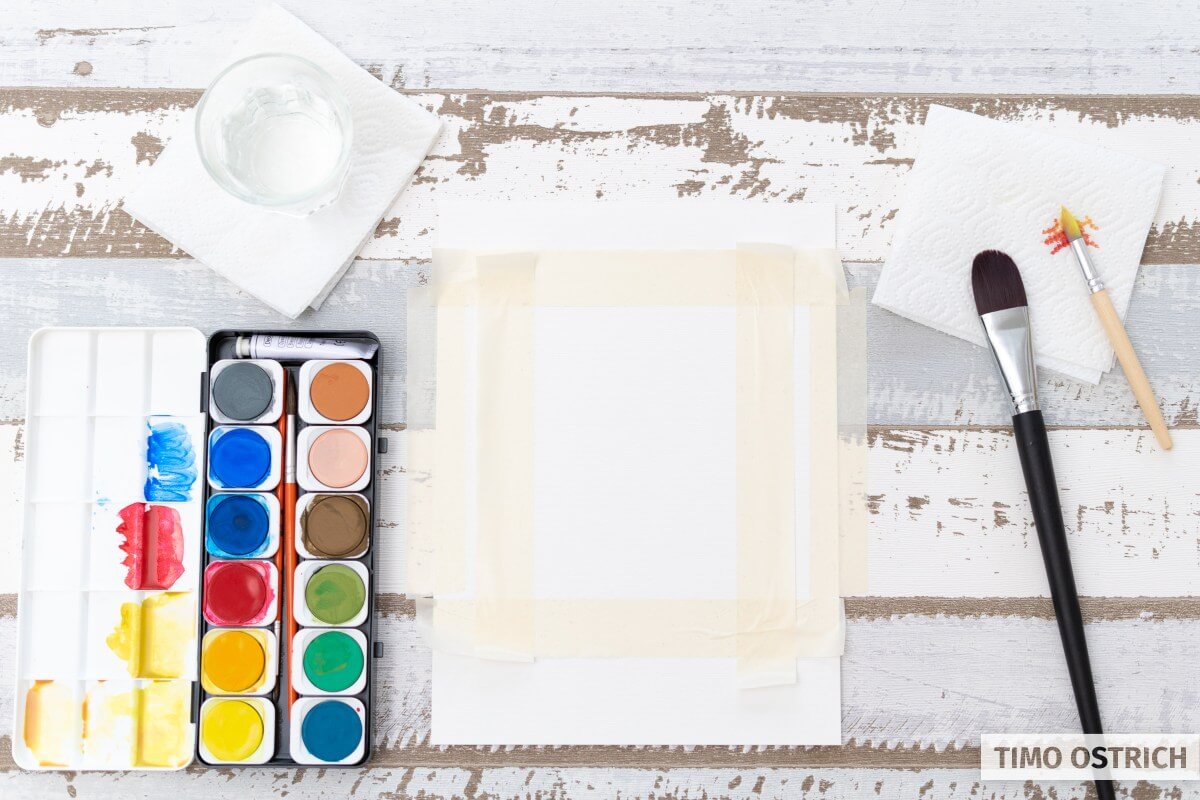
With this variation you put a lot of water on your paper before the first ink application. Therefore, you should definitely use mix media or watercolor paper.
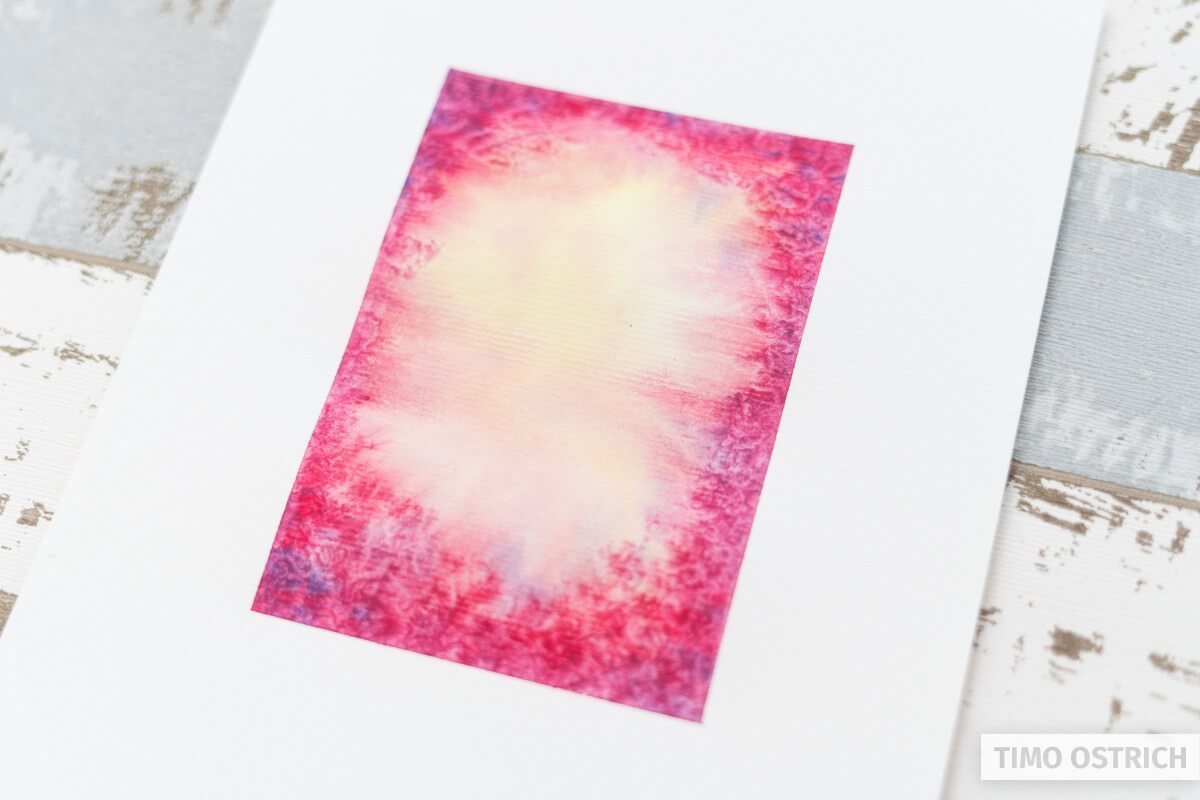
If the sheet is wet enough, you will stick your diluted paint on the paper. You can really watch how the color runs randomly and how beautiful patterns are created by themselves (almost like pour painting and similar painting techniques).

Depending on your taste, you can now add more colors or use your brush to mix the colors further. You may need to add more water to the mix.
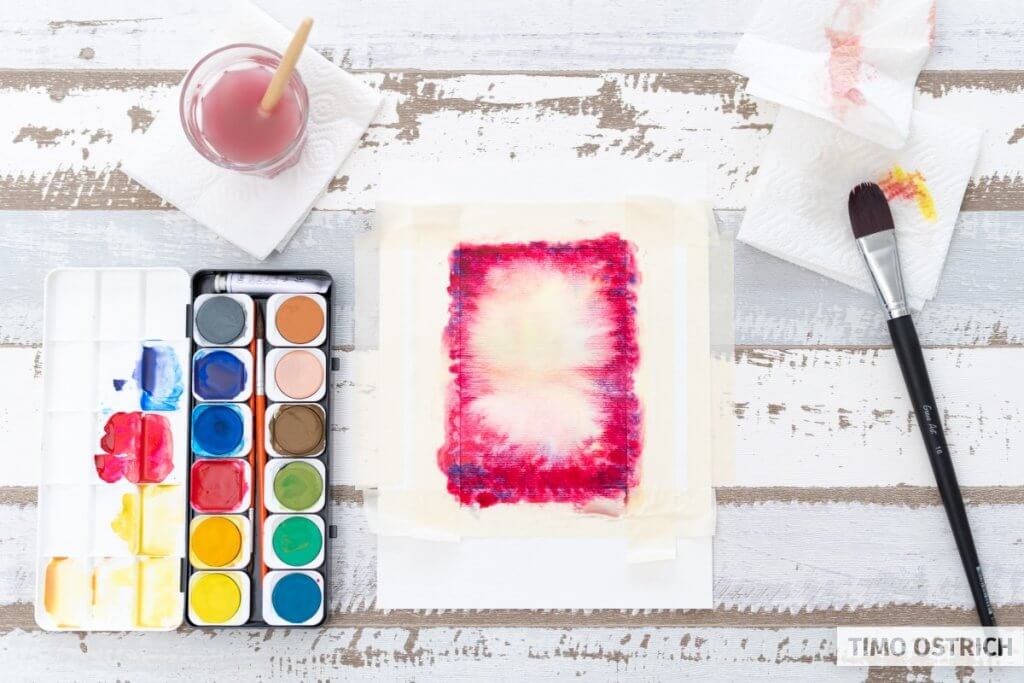
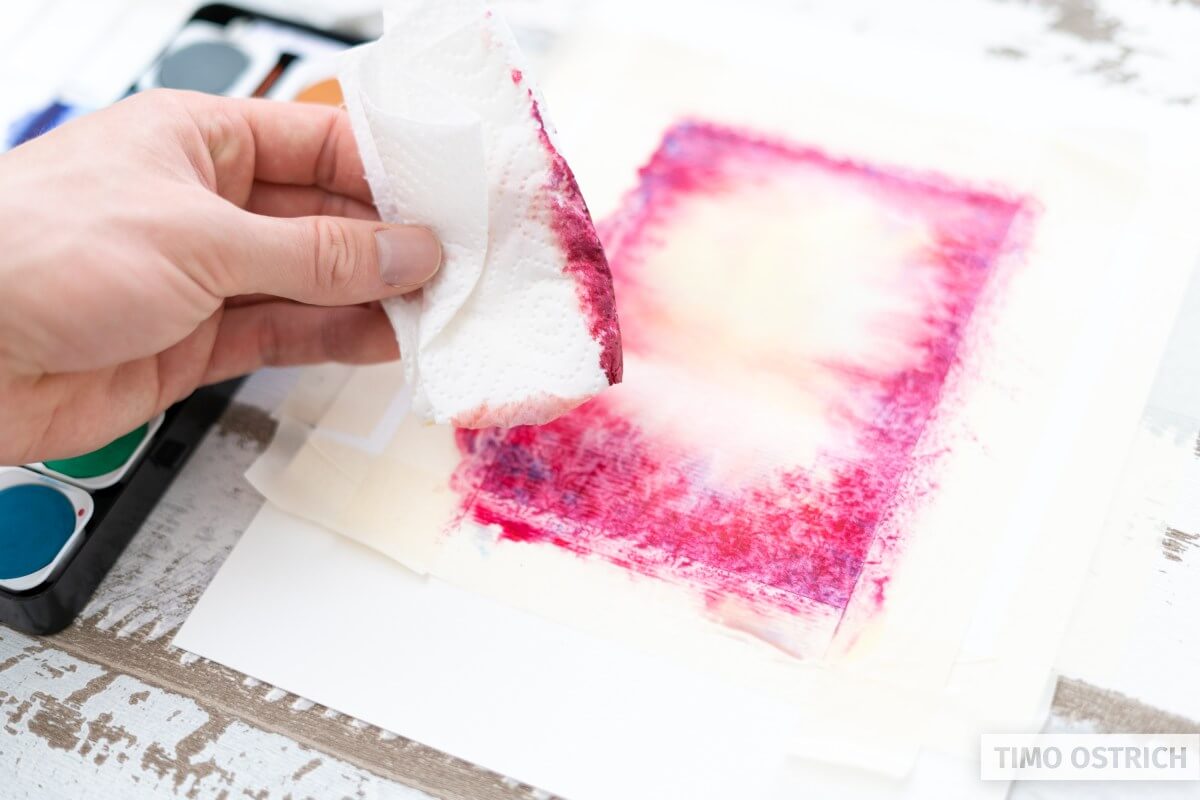
Excess water can be dabbed off if necessary. However, this creates a correct texture. If you don’t want this, the water must dry completely. In this case, however, I have taken advantage of the effect and dabbed a frame.
Due to the high water content it now takes a while until the paper is really dry again.
As soon as there is no more liquid left, pull off the crepe tape carefully and slowly.
I always pull the tape off very flat, so the danger of tearing paper is the least. If you pressed the crepe tape well at the beginning, a perfect edge will appear now.
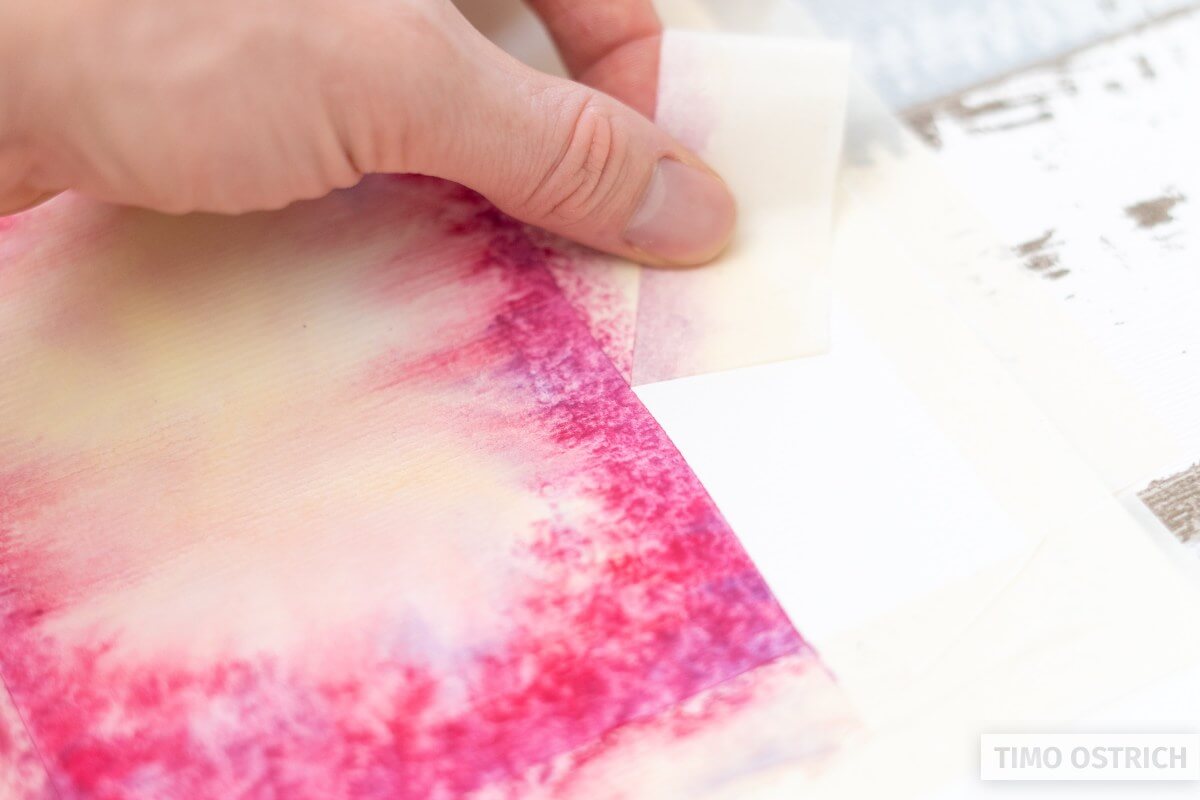
What remains is a beautiful, unique watercolor background with clean edges.
Once everything is really dry, you can put your lettering on the background.
With watercolor pencils
It also works completely without liquid paint application. At least in the first instance. We’re talking about watercolor pencils. Here the color can be applied as with a normal colored pencil.
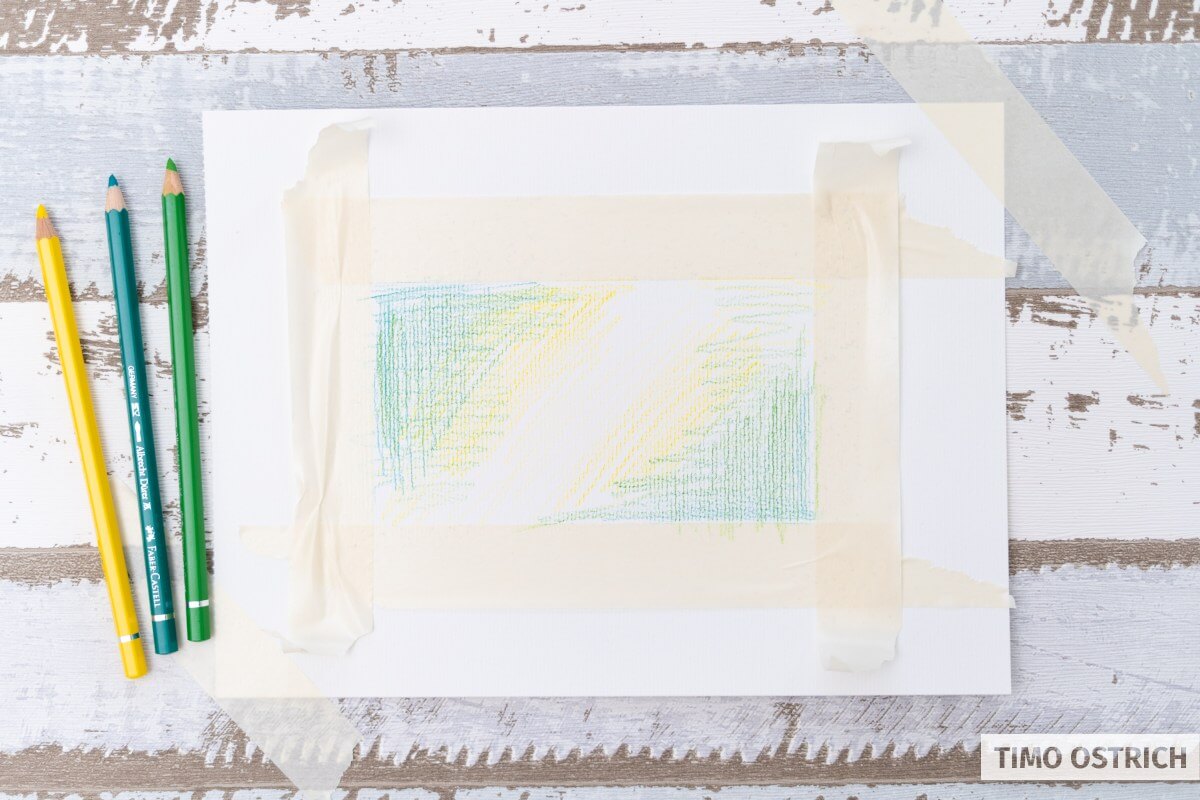
Only in the second step does the magic happen: with the help of water you dissolve the colour from the paper and can paint it wonderfully in watercolors.
You can even mix the colors and achieve great effects. Here too, sufficient water is important.

With the pencils you have quite a lot of control over the look of your backgrounds. Depending on your needs, you can draw your colored lines more in the center, more outside, more or less strongly.
Try not to exert too much pressure – otherwise the colored lines won’t dissolve completely.
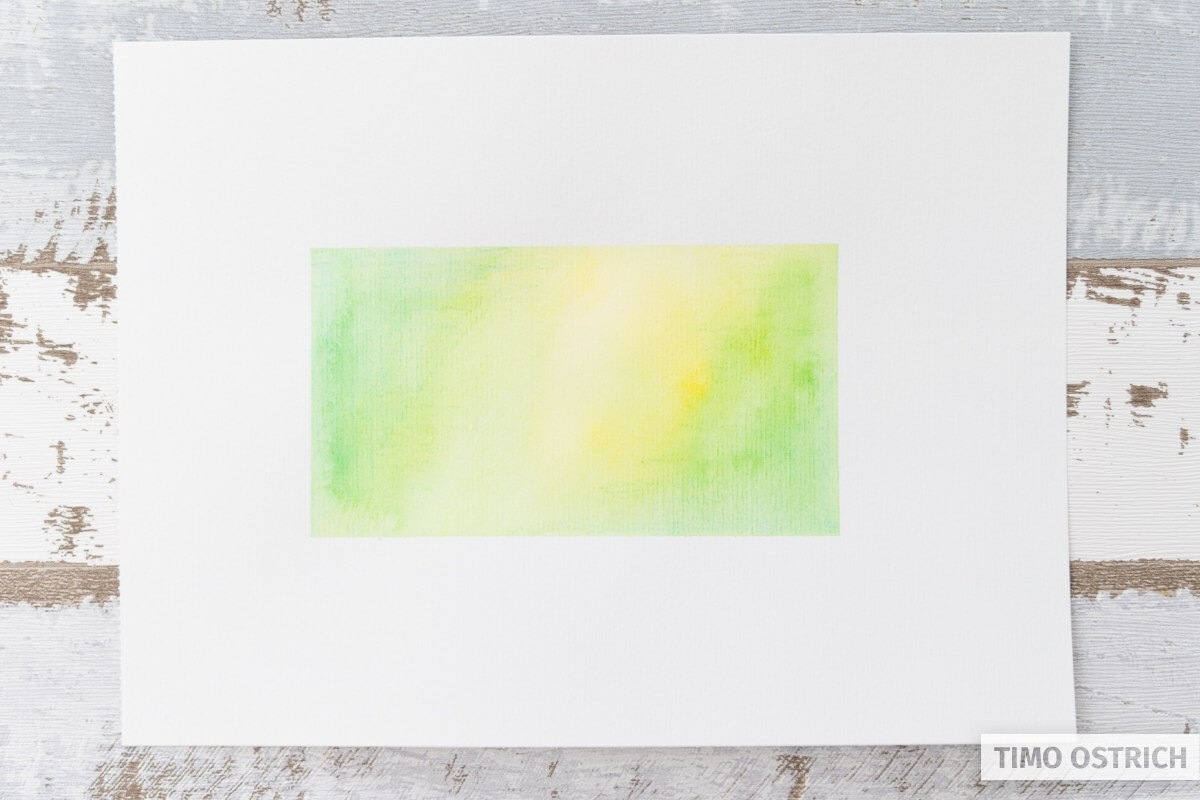
Of course, the same applies here as well: let it dry well!
Additional details
Your finished watercolor backgrounds can be decorated even more wonderfully. You can position the details consciously and neatly or distribute them randomly.
For example, you can randomly create patterns, splashes or textures:
- A toothbrush to spray the paint with the bristles on the paper
- Crumpled paper, cloth or a handkerchief to dab on special textures
- Brush bristles to create splashes
- Additional paint drops with the help of a pipette or a straw
All these techniques inevitably lead to your background becoming absolutely unique.
The more often you use them, the more you can consciously control the seemingly chaotic application of paint.
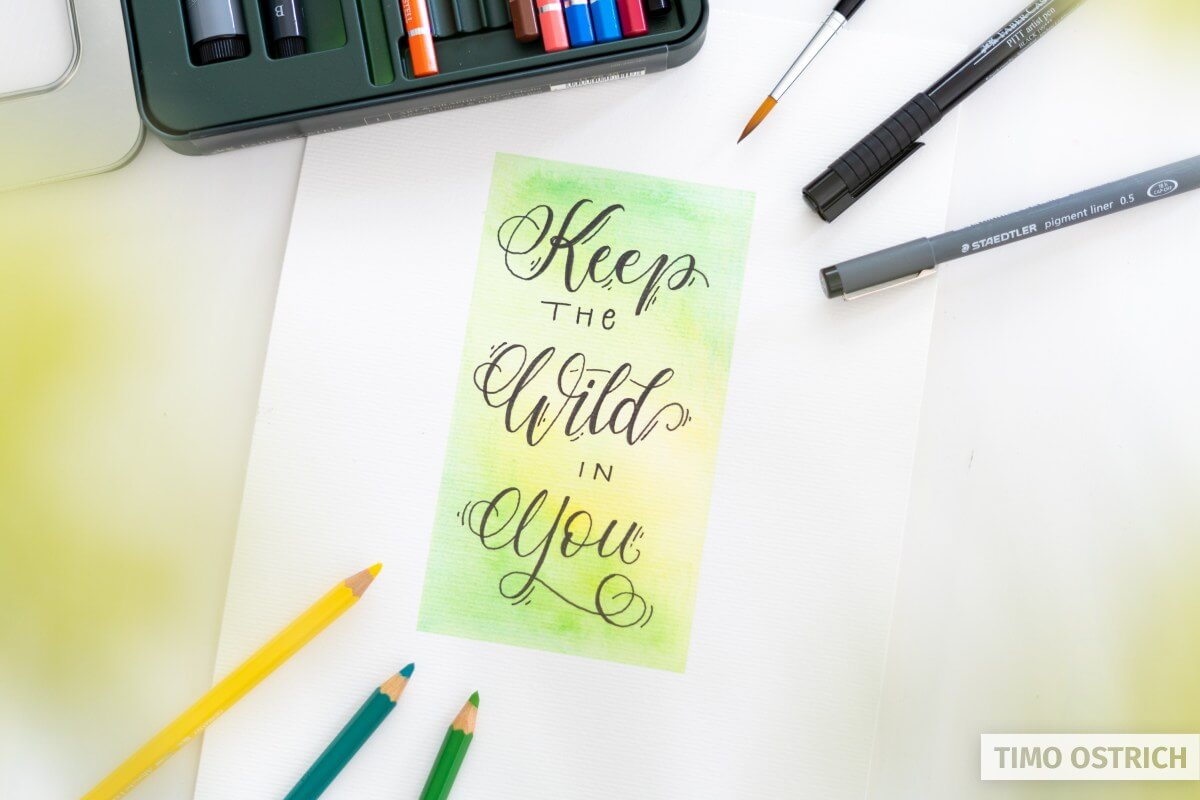
The lettering at the end
You should not apply your lettering until the backgrounds have dried properly. Otherwise your color will blur and you will be annoyed!
To speed up the process, a hot-air blow-dryer is suitable, for example (as in embossing). But you should also proceed carefully here. If in doubt, wait one night and enjoy the anticipation of the lettering.
And this is how the finished lettering can look on your background:
Have fun with watercolors!